
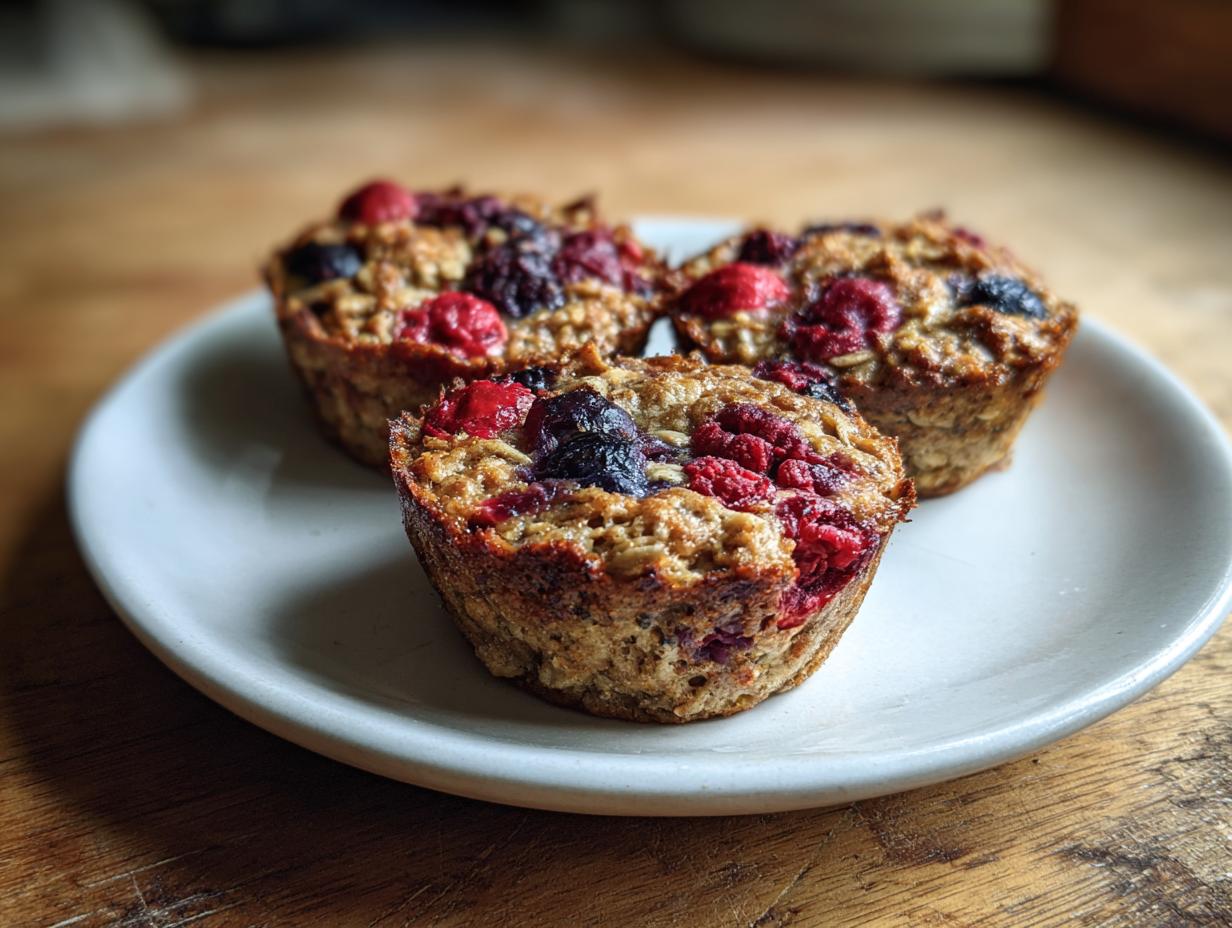
Mornings, right? Sometimes it feels like a frantic race just to get everyone fed before the door slams! If you’re tired of the same old soggy cereal or resorting to sugary coffee shop stops, I totally get it. That’s why I rely on my **baked oatmeal cups**. Seriously, these little gems are my secret weapon for stress-free weekdays. They manage to be unbelievably moist—not cakey, not dry, but perfectly tender—while still being totally portable. Back when I was juggling my degree and working in the test kitchen, I perfected this exact **Easy baked oatmeal cups recipe** so I could grab two or three on my way out the door feeling like I’d actually eaten something nourishing. This recipe is the simple, reliable breakfast bake you’ve been looking for!
- Why This Easy Baked Oatmeal Cups Recipe Works for You
- Gathering Ingredients for Perfect Baked Oatmeal Cups
- Step-by-Step Instructions for Your Baked Oatmeal Cups
- Customizing Your Baked Oatmeal Cups for Dietary Needs
- Tips for Perfect Baked Oatmeal Cups Every Time
- Make Ahead Breakfast Cups and Storage for Baked Oatmeal Cups
- Serving Suggestions for Your Baked Oatmeal Cups
- Frequently Asked Questions About Baked Oatmeal Cups
- Nutritional Snapshot of These Baked Oatmeal Cups
Why This Easy Baked Oatmeal Cups Recipe Works for You
Listen, I know the promise of a healthy breakfast often falls apart by Wednesday. But this **Easy baked oatmeal cups recipe** is different because it’s designed for real life. These aren’t fussy little things; they are built to be reliable grab-and-go fuel. They shine because they deliver exactly what busy home cooks need.
- They are fantastic **Portion control breakfast ideas**. No guessing how much you ate!
- The total time commitment is super low, making it a wonderful **Quick breakfast bake**.
- They have the absolute **best texture baked oatmeal cups**—moist inside but they hold their shape!
- This recipe is the definition of the perfect **Oatmeal cups for meal prep**; they only get better sitting in the fridge.
When you need a dependable breakfast that tastes homemade, trusting this simple 12-cup batch is the way to go. If you are looking for other fuss-free ways to start your day, I’ve got loads of other great ideas over in my main breakfast collection here!
Gathering Ingredients for Perfect Baked Oatmeal Cups
Okay, let’s get our ingredients lined up! You’ll be amazed how simple this is. When I test recipes, I always insist on clear measurements because baking is chemistry, even when it’s a casual recipe like these **muffin tin oatmeal recipes**. Trust me, having everything measured out before you start mixing makes the process flow so smoothly.
For the core structure, we need 2 cups of rolled oats—and this is important—use *rolled oats*, not instant. Rolled oats have the structure needed to bake up firm enough to hold their shape, which is key for a good grab-and-go cup. If you need **gluten free baked oatmeal cups**, just make sure your oats are certified GF!
Ingredient Clarity and Preparation Notes
Getting these amounts right ensures you get those 12 perfect servings mentioned in the details above. Accuracy matters, especially with the leavening agent. If your baking powder measurement is off, your cups might not rise properly!
- Dry Base: 2 cups rolled oats, 1 teaspoon baking powder, 1 teaspoon ground cinnamon, and just 1/4 teaspoon salt to wake up the flavors.
- Wet Bindings: We need 1/2 cup milk (any kind works!), 1/4 cup maple syrup or honey for sweetness, 1 large egg for binding, and 1 teaspoon vanilla extract.
- The Star: Finally, 1 cup of mixed berries. I use whatever is in season, but frozen berries work like a charm here since we aren’t draining them!
Step-by-Step Instructions for Your Baked Oatmeal Cups
This is where the magic happens! Since the total time for these **baked oatmeal cups** is only about 35 minutes (10 prep, 25 bake), you can whip these up before work, I promise. First things first: crank that oven up to 375 degrees Fahrenheit. Don’t skip the prep on your 12-cup muffin tin—a good grease job or paper liners are non-negotiable unless you want a fight getting your treasures out later!
Next, we mix. Throw all the dry stuff (oats, baking powder, cinnamon, salt) into your big bowl and give it a quick whisk. In your smaller bowl, whisk the milk, maple syrup, egg, and vanilla until they look happy together. Now, pour the wet into the dry. You want to stir this only until there are no more flour streaks visible. Seriously, stop stirring! Overmixing develops the oats too much, and we want that tender crumb, remember?
Gently fold in your berries. Don’t mash them! Pop the mixture into your tins—filling them about three-quarters full works perfectly for a nice, domed top. Bake them until they look golden, usually 20 to 25 minutes. Always let them settle in the tin for five minutes before moving them to a wire rack to cool down.
Achieving the Best Texture in Your Baked Oatmeal Cups
If you want the absolute best texture baked oatmeal cups—moist, but they don’t fall apart when you grab them—technique is everything here. When you fold the berries in, use a rubber spatula and cut down through the middle and scoop up. We aren’t *beating* air into the batter at this stage; we are *preserving* the air we beat into the wet ingredients earlier!
My biggest tip for that “moist but firm” result is what I mentioned above: do not pack the mixture down into the muffin liners. Spoon it in lightly. If you press it down hard, you are squeezing out the space where the moisture and steam need to expand during baking. Gentle hands lead to perfectly structured **single serving baked oatmeal** cups!
Customizing Your Baked Oatmeal Cups for Dietary Needs
One of the things I love most about this base recipe is how easy it is to flex it for whatever your family needs that week. We’re not locked into one specific set of parameters here; we’re making food that works for us! If you’re looking for **vegan oatmeal cups**, that switch is super simple. Just ditch the regular egg and use a flax egg instead. Mix 1 tablespoon of ground flaxseed with 3 tablespoons of water and let it sit for five minutes until it thickens up—that binds everything just as nicely!
We can also totally tweak the sugar content if you are trying to keep things **low sugar oatmeal cups**. The recipe calls for 1/4 cup of maple syrup, but you can easily drop that down to just 1/4 cup of syrup and add 1/4 cup of unsweetened applesauce. The applesauce replaces the volume and moisture from the sugar, so you don’t end up with anything dry. See? These are such flexible **make ahead breakfast cups**; you can adjust them weekly!

And don’t forget about milk! If you need **gluten free baked oatmeal cups**, you should already be using certified GF oats, but you can swap the dairy milk for almond, soy, or oat milk without affecting the texture one bit. It’s all about making home cooking accessible, right?
Tips for Perfect Baked Oatmeal Cups Every Time
We’ve covered the basics, but achieving that top-tier, consistently perfect texture for your **baked oatmeal cups** comes down to a few crucial details. When I first started testing these **muffin tin oatmeal recipes**, I learned the hard way that even a small mistake can lead to sticking or uneven baking. So, here are my non-negotiable tips for success!
First, let’s talk about sticking. While liners are easy, I actually prefer using a good quality cooking spray that contains flour, or what I call ‘cake goop’ if I’m feeling fancy, just because I love that slightly crisped edge you get when the batter touches the metal. If you use liners, make sure you are using quality ones; cheap paper liners can sometimes stick too!
When it comes to placement, always position your middle rack in the center of the oven. These cups bake fairly quickly, and centering them ensures that the heat circulates evenly around the whole tin. If you have a hot spot, rotate the tin halfway through baking!
And I’m bringing this up again because it’s so important: Do not, under any circumstances, smash that batter down into the cups with your spoon. Keep it light! You are aiming for fluffy, airy oats that expand, not dense pucks that refuse to cook through. If you want more ideas on how to bake oats deliciously, check out my banana oatmeal muffins—same gentle mixing principle applies!
Make Ahead Breakfast Cups and Storage for Baked Oatmeal Cups
The real payoff for making a batch of **baked oatmeal cups** is having breakfast ready for days! These are absolutely fantastic **Oatmeal cups for meal prep**. You do all the work once, and you’re set for quick mornings. But you have to store them correctly, otherwise, that perfect texture we worked so hard for disappears!
First, they must cool completely. I mean stone cold on a wire rack. If you try to pack them warm, you’re just trapping steam, and nobody wants soggy bottoms.
Once they are room temperature, pop them into an airtight container. I usually layer them separated by parchment paper, just in case things get squished together in the fridge. They keep beautifully in the refrigerator for about five days, which is great for a single week.
But the real secret weapon? The freezer! These are incredibly **freezer friendly breakfast** items. You can store them in a good quality freezer bag or container for up to three months. When you need one, you don’t even have to fully thaw them. Just toss one straight into the microwave for about 60 to 90 seconds, and bam—hot, homemade breakfast!
If you want to get ahead on your whole week’s lunch prep too, I have a few great recipes for make-ahead salads that are just as foolproof as these right here!
Serving Suggestions for Your Baked Oatmeal Cups
Okay, your **baked oatmeal cups** are ready! Now, how do you eat them? Honestly, they are fantastic straight out of the wrapper while you’re rushing out the door, maybe still slightly warm. That’s the beauty of **portion control breakfast ideas**!
But if you have an extra minute, they are wonderful warmed up briefly in the microwave. Don’t just eat them plain, though! Try topping one with a dollop of thick Greek yogurt—it adds a nice tanginess that contrasts the cinnamon beautifully. A little drizzle of peanut butter or a sprinkle of chopped pecans is heavenly.
I find room temperature is the best way to enjoy them later in the day, perhaps as an afternoon snack. If you’re feeling adventurous and want to try something completely different after breakfast, I have some incredibly easy ways to make your own easy homemade salad dressing recipes!
Frequently Asked Questions About Baked Oatmeal Cups
Can I skip the egg in this recipe?
You totally can, especially if you’re aiming for **vegan oatmeal cups**! As I mentioned in the customization section, the egg acts as a binder so we need a substitute. The best thing to use is a flax egg—just mix 1 tablespoon of ground flaxseed with 3 tablespoons of water and let it sit for about five minutes until it gets kind of gelatinous. That mixture replaces one egg perfectly in these **baked oatmeal cups** and keeps them from getting too crumbly!
Can I use different fruit instead of mixed berries?
Absolutely! This recipe is so forgiving. You can use chopped apples, diced peaches, or even dried cranberries if that’s what you have on hand. If you use frozen fruit, don’t thaw it first; just toss it in frozen. The only thing I’d caution against is very wet fruit like canned pineapple, which might make the cups too soggy. Stick to about 1 cup total of whatever fresh or frozen fruit you love!
How can I make these lower in sugar?
It’s really straightforward to make **low sugar oatmeal cups**! As long as you use rolled oats without added sugar, you’re halfway there. To reduce the impact of the added sweetener, I recommend reducing the maple syrup or honey from 1/4 cup down to just 1/4 cup total, and throwing in 1/4 cup of unsweetened applesauce. The applesauce replaces the moisture lost from reducing the sugar, and you’ll barely notice the difference in flavor!
How long do I need to bake them if I use mini muffin tins?
That’s a great question if you’re making these for little ones or just want smaller snacks! Since the mini tins are much shallower, the total baking time drops significantly. For **single serving baked oatmeal** in mini tins, start checking them around 12 to 15 minutes. They will set up much faster than the standard size, so watch them closely so they don’t start to brown too much!
Nutritional Snapshot of These Baked Oatmeal Cups
I always feel better knowing what’s powering my morning, even when I’m rushing out the door! Since we are using whole ingredients like oats and fruit, these **baked oatmeal cups** offer a really solid start to the day, hitting good fiber and protein marks. Remember, since this recipe uses standard rolled oats and natural sweeteners, these numbers represent a very good baseline for a **quick breakfast bake**.
Now, please keep in mind that these are just estimates based on the base recipe, using regular cow’s milk and pure maple syrup. If you swap to almond milk or use a super-sweet topping, the totals will shift a bit! But for one standard cup, here’s what you’re generally looking at:
- Serving Size: 1 cup
- Calories: 180
- Sugar: 9g
- Sodium: 95mg
- Fat: 4g
- Saturated Fat: 1g
- Unsaturated Fat: 3g
- Trans Fat: 0g
- Carbohydrates: 32g
- Fiber: 4g
- Protein: 6g
- Cholesterol: 25mg
That 4 grams of fiber per cup is fantastic when you’re trying to stay full until lunch. These are designed to be nourishing fuel, not just a sugar bomb!
PrintEasy Baked Oatmeal Cups Recipe for Meal Prep
Make these simple, portion-control breakfast cups using your muffin tin. This recipe yields moist, healthy baked oatmeal cups perfect for grab-and-go mornings.
- Prep Time: 10 min
- Cook Time: 25 min
- Total Time: 35 min
- Yield: 12 cups 1x
- Category: Breakfast
- Method: Baking
- Cuisine: American
- Diet: Vegetarian
Ingredients
- 2 cups rolled oats (use gluten free if needed)
- 1 teaspoon baking powder
- 1 teaspoon ground cinnamon
- 1/4 teaspoon salt
- 1/2 cup milk (dairy or non-dairy substitute)
- 1/4 cup maple syrup or honey
- 1 large egg
- 1 teaspoon vanilla extract
- 1 cup mixed berries (fresh or frozen)
Instructions
- Preheat your oven to 375 degrees Fahrenheit. Lightly grease a 12-cup standard muffin tin or use paper liners.
- In a large bowl, combine the rolled oats, baking powder, cinnamon, and salt. Mix these dry ingredients well.
- In a separate medium bowl, whisk together the milk, maple syrup, egg, and vanilla extract until smooth.
- Pour the wet ingredients into the dry ingredients. Stir until just combined. Do not overmix.
- Gently fold in the mixed berries.
- Spoon the mixture evenly into the prepared muffin cups, filling each about three-quarters full.
- Bake for 20 to 25 minutes, or until the tops are lightly golden and set.
- Let the baked oatmeal cups cool in the tin for 5 minutes before transferring them to a wire rack to cool completely.
Notes
- For a vegan oatmeal cups version, substitute the egg with a flax egg (1 tablespoon ground flaxseed mixed with 3 tablespoons water, let sit for 5 minutes) and use non-dairy milk.
- To achieve the best texture—moist but firm—do not pack the mixture into the muffin cups; spoon it lightly.
- These are freezer friendly breakfast items. Cool completely, then store in an airtight container in the freezer for up to 3 months. Thaw overnight or reheat from frozen for 60-90 seconds in the microwave.
- For low sugar oatmeal cups, reduce the maple syrup to 1/4 cup and add 1/4 cup unsweetened applesauce.
Nutrition
- Serving Size: 1 cup
- Calories: 180
- Sugar: 9g
- Sodium: 95mg
- Fat: 4g
- Saturated Fat: 1g
- Unsaturated Fat: 3g
- Trans Fat: 0g
- Carbohydrates: 32g
- Fiber: 4g
- Protein: 6g
- Cholesterol: 25mg