
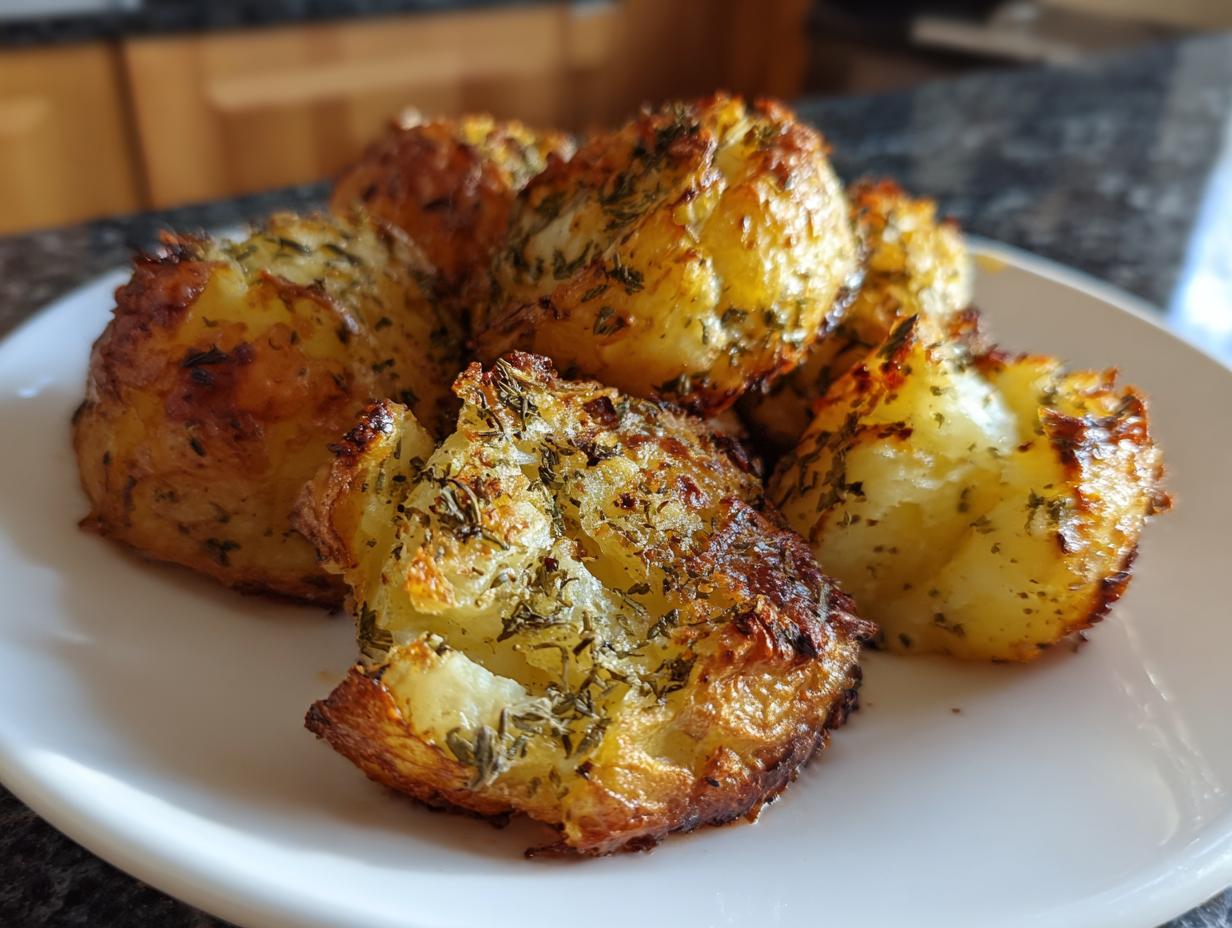
Honestly, there’s nothing more disappointing than digging into a tray of roasted potatoes only to find they’re doughy in the middle or completely soggy on the outside. Over the years, I’ve wrestled with this staple side dish—trying everything from shaking them wildly to blasting the heat—until I finally landed on the technique that never fails. This method guarantees you get that highly sought-after textural contrast: a perfectly fluffy inside hugging a wonderfully crusty, golden exterior. Getting truly great oven roasted potatoes is less about magic and more about following a few crucial steps developed from trial and error. Trust me, once you master these simple moves, you’ll never settle for less than perfect Crispy Roast Potatoes again, making this your go-to for everything from quick weeknight meals to holiday spreads. You can find more of my reliable go-to recipes perfect for busy evenings over at weeknight dinner recipes.
- Why This is the Best Roasted Potatoes Recipe for Your Table
- Essential Ingredients for Perfect Oven Roasted Potatoes
- Simple Potato Roasting Method: Step-by-Step Instructions
- Tips for Success with Oven Roasted Potatoes
- Variations on Your Oven Roasted Potatoes
- Serving Suggestions for Your Perfect Potato Side Dish for Dinner
- Storage and Reheating Instructions for Leftover Oven Roasted Potatoes
- Frequently Asked Questions About Oven Roasted Potatoes
- Take Command of Your Next Side Dish
- Take Command of Your Next Side Dish
Why This is the Best Roasted Potatoes Recipe for Your Table
I’ve tested countless methods, and I truly believe this combination of steps separates the okay potatoes from the absolutely sensational ones. This isn’t just my personal favorite; this is genuinely the Best Roasted Potatoes Recipe because it incorporates the science of steam and surface area. We aren’t just tossing them in oil and hoping for the best here. We’re setting the stage for success!
The secret sauce is twofold: the initial boil and the aggressive shaking afterward. Boiling the potatoes slightly cooks the starch deep inside, guaranteeing that soft, pillowy center—the ‘fluffy inside’ everyone craves! Then, letting them steam off and shaking them vigorously in the colander is where the magic happens. That process creates the necessary nooks and crannies on the edges. Those rough edges are what turn into crunchy, delicious bits when they hit the hot oil and oven, delivering those amazing Fluffy Inside Crispy Outside Potatoes.
When you follow this method, you’re guaranteed reliability, which is why I love serving these for company, or even just for a Tuesday night meal. You can find some other reliable favorites that streamline your snacking game over at easy appetizers and snacks.
Achieving Golden Brown Roasted Potatoes Every Time
Crispiness needs high, dry heat, plain and simple. If your oven isn’t hot enough, those spuds end up steaming in their own moisture instead of roasting happily. You absolutely must preheat your oven to 425°F before anything touches that pan!
Once they’re coated in oil and seasoning, they need personal space. If you pile them up, they steam and turn soft—we don’t want that! Make sure every single potato piece is touching the hot metal of the baking sheet in a single layer. If you have to use two pans to achieve a single layer, please, use two pans. That space guarantees those beautiful, crunchy edges that lead to truly Golden Brown Roasted Potatoes!
Essential Ingredients for Perfect Oven Roasted Potatoes
When it comes to roasting, the quality of your starting ingredients, especially the potatoes themselves, dictates fifty percent of your success. This recipe relies on simple, pantry-stable items elevated by specific prep, which you can see outlined below. If you’re looking for some other simple flavor boosters for your sides, check out my thoughts on garlic butter rice while you grab your supplies!
- 3 lbs Yukon Gold or Russet potatoes, scrubbed and cut into 1.5-inch pieces
- 1/4 cup olive oil (don’t skimp here!)
- 1 tablespoon coarse kosher salt (this helps draw out moisture)
- 1 teaspoon black pepper
- 1 teaspoon garlic powder
- 1 teaspoon dried rosemary (the real star of the savory flavor!)
- 1/2 teaspoon dried thyme
Potato Selection and Preparation Notes
Choosing the right potato is crucial if you want that fluffy reward after all that hard work. I strongly prefer Yukon Gold eggs for roasting; they have slightly less starch than a Russet, which gives you a gorgeous, creamy interior that still crisps up beautifully on the outside. Russets are great too if you want that absolute fluffiest texture imaginable, but they can sometimes get a bit crumbly if you over-shake them in the next step.
You must cut them into roughly 1.5-inch chunks. Why that size? If they are too small, they burn before the inside gets tender. If they are too large, they just steam forever and never get that great crust. Keep your pieces uniform so they all cook at the exact same speed!
And one small thing I learned the hard way when I was first starting out: scrub them well! You can leave the skin on—in fact, I prefer it because it helps hold that tender inside together—but you need to clean off all that leftover dirt before they even think about touching boiling water.
Simple Potato Roasting Method: Step-by-Step Instructions
Okay, this is it—the part where all the preparation pays off! We are going to walk through this process together. Remember, we’re cooking for texture here. Follow these steps exactly, and you’ll have the most incredible oven roasted potatoes you’ve ever made, perfect for serving alongside your next meal found over at my favorite weeknight dinner recipes collection.
The Pre-Roast Prep: Boiling and Roughing Up Edges
First things first: heat management! Get a big pot of water boiling over high heat. Once it’s roaring, drop in those cut potatoes and add one tablespoon of salt to the water. We need to boil them for exactly 7 minutes. Don’t look away! Seven minutes is the sweet spot for softening the starch deep inside, guaranteeing that soft, pillowy center—the ‘fluffy inside’ everyone craves! Then, letting them steam off and shaking them vigorously in the colander is where the magic happens. That process creates the necessary nooks and crannies on the edges. Those rough edges are what turn into crunchy, delicious bits when they hit the hot oil and oven, delivering those amazing Fluffy Inside Crispy Outside Potatoes.
Once the timer goes off, drain them immediately in a colander. Now, here’s the part you absolutely cannot skip if you want those crispy edges. Let them sit there, just draining, for about 5 minutes. Seriously, give them time to steam off. After that rest, grab the colander and shake it—gently at first, then a little more vigorously! You aren’t trying to mash them; you just want the edges to get slightly fuzzy or roughed up. That rough, starchy surface is what fries up beautifully when it hits the hot oil.
Seasoning for Incredible Garlic Herb Roasted Potatoes Flavor
Now we move these slightly fuzzy beauties into a big mixing bowl. Drizzle in that olive oil. It needs to be enough to coat everything well—don’t be shy! Then toss in your salt, pepper, garlic powder, rosemary, and thyme. This combination is what gives us those deep, savory notes we associate with amazing Garlic Herb Roasted Potatoes.
Toss everything until every potato chunk looks thoroughly oiled and seasoned. You want an even coating on every surface. No dry spots allowed! This coating not only flavors them but also helps them brown beautifully in the oven.
Roasting Technique for Maximum Crispiness
Time for the oven! Grab your prepared baking sheet—remember, no crowding! Spread those seasoned potatoes out in a single layer. If they overlap or pile up, they will steam, and we are done with soggy potatoes, right? Use two pans if you need to keep that single layer intact. This is the trick to knowing exactly How to Make Crispy Potatoes in Oven.
Slide the pan into that 425°F oven and let them roast untouched for 20 minutes. Then, carefully pull the tray out. Use a good, sturdy spatula to flip every potato piece over. This ensures even contact with the pan surface. Pop them back in for another 20 to 25 minutes. You’re looking for deep, rich golden brown color all over. When they look crackly and sound crunchy when you poke them, they’re done!
Tips for Success with Oven Roasted Potatoes
Look, even when following a recipe perfectly, sometimes things just go a little sideways in the kitchen. That’s okay! Cooking is learning, and I’ve learned a few tricks over the years when batches of these delectable spuds didn’t come out as perfectly golden as I wanted. These tips focus entirely on nailing that unbelievably crisp exterior and achieving magnificent Crispy Roast Potatoes.
The success of this recipe hinges on managing moisture and maximizing surface contact. If you’ve had trouble with soggy potatoes before, it’s usually because one of these two factors was ignored. I rely on these quick fixes every time I test a new batch, and you can read more about other high-heat frying methods, like my crunchy air fryer recipes, here: air fryer french fries crispy recipe.
Troubleshooting Common Issues
If your beautiful potatoes came out limp instead of crunchy, don’t throw the pan away! Let’s figure out what happened.
- The Soggy Potato Culprit: Crowding the Pan: This is the number one killer of crispness. If those potato chunks are touching each other, they are steaming, not roasting. They need that direct heat contact on all sides. If you see overlap, you need another pan next time. It’s worth the extra dishwashing, trust me!
- The Internal Failure: Not Boiled Long Enough: If the interior is somehow still hard or dry, you didn’t let the boiling step give you enough time to start cooking the center starch. Remember, 7 minutes exactly after the water comes to a hard boil. That pre-cooking process is vital because the high oven heat will then flash off the exterior moisture to crisp the outside without drying out the inside.
- The Steamy Surface: Not Dried Properly: Did you skip the 5-minute rest in the colander? Those potatoes hold a lot of water, even after draining. If you toss them in oil while they are still damp, that moisture immediately turns to steam when it hits the pan, preventing browning. Make sure you shake that colander well to create a slightly dry, starchy, fuzzy coating before they ever see the oil.
When you use those Yukon Golds or Russets and ensure they have enough room on the baking sheet, you are setting yourself up for crispy glory every single time. It’s all about control!
Variations on Your Oven Roasted Potatoes
While I firmly believe this classic garlic and herb combination is unbeatable for standard oven roasted potatoes, I absolutely encourage you to play around once you’ve mastered the base technique. That’s how the best family recipes evolve, right? Once you’ve got that perfect crispy-fluffy ratio locked down, changing up the spices is the easiest way to keep things feeling fresh on a busy weeknight. It truly keeps this an “Easy Oven Potato Side Dish” because the required steps don’t change one bit!
I love how versatile these potatoes are. My husband, for example, sometimes insists we add a little warmth. For him, I’ll swap out some of the dried rosemary for a teaspoon of smoked paprika and a half teaspoon of cayenne pepper. Wow, does that wake things up! The paprika also gives the exterior an extra beautiful hue that looks fantastic on the dinner plate.
Other times, I’ll ditch the dried herbs entirely and lean hard into fresh ingredients near the end of the roasting time. If you have beautiful, fresh thyme or rosemary sprigs, toss them in with the oil and potatoes for the first 20 minutes. Then, during the last 15 minutes—maybe right before you flip them—toss in a few tablespoons of freshly minced garlic and a sprinkle of lemon zest. The fresh garlic won’t burn, and the lemon brightens everything up when paired with that savory oil. It pairs just as beautifully with something light, like the lemon, ginger, and turmeric chicken soup, as it does with a heavy steak. Flavor combinations are endless once you’ve mastered the heat!
Serving Suggestions for Your Perfect Potato Side Dish for Dinner
Now that you’ve mastered the technique and have this incredible, crispy side dish ready to go, the fun part begins: figuring out what glorious main course deserves to share the plate with them! These savory, herb-flecked potatoes are sturdy enough to stand up next to virtually anything, which is why they earn the title of the Perfect Potato Side Dish for Dinner in my book.
Honestly, they are just as good alongside a simple weeknight meal as they are anchoring a huge holiday spread. You don’t need complex recipes to feed your family well; you just need reliable staples like these.
For a quick weeknight fix, pair these with virtually any protein that’s easy to cook. Roasted chicken breasts or thighs are amazing because you can often roast them right alongside the potatoes—just pop them in halfway through the potato roasting time! They also go wonderfully with sheet-pan sausage and peppers. If you’re looking for a great salad to round out that weeknight meal, you have to check out my notes on the best Caesar salad recipe with chicken; it’s a classic combination for a reason.
When it comes to special occasions or Sunday dinners, these roasted gems are sturdy enough to handle heavier mains. Think about a perfectly seared steak or a holiday ham. They soak up all the wonderful pan juices without losing their structural integrity, meaning they stay crisp even when smothered in gravy or sauce. They truly shine when served right next to slow-cooked pot roast or tender short ribs. These potatoes are the reliable foundation your main dish deserves!
Storage and Reheating Instructions for Leftover Oven Roasted Potatoes
First off, if you’re lucky enough to have any leftovers of these perfectly crisp potatoes, pat yourself on the back! Getting this level of crispiness is a win, and you want to treat those leftovers right so they taste almost as good the next day. Don’t even think about hiding them in the fridge in a sealed plastic bag—that is how you guarantee steam accumulation and sogginess!
To store them properly, you need to cool them down quickly first. Lay them out on a plate or tray for about 20 minutes until they reach room temperature. Then, transfer them to an airtight container, but here’s the trick: line the bottom with a clean paper towel. That towel will absorb any residual moisture overnight. Stored this way, they should be fantastic for 3 to 4 days in the refrigerator.
Now, for the best part: bringing them back to life! You absolutely must avoid the microwave unless you enjoy lukewarm, mushy potatoes. The microwave heats the water molecules, which means you re-steam them. We spent all that time roughing up the edges to avoid steam, so we can’t go backward!
The key to regaining that glorious crunch is using high, dry heat again. Preheat your oven—or toaster oven, if you only have a few left—to a sizzling 400°F. Spread the cold, leftover potatoes out again on a clean, dry baking sheet. Don’t overcrowd them! Pop them in for just about 8 to 10 minutes. You’ll hear them crackle slightly as they heat up, and the exteriors will crisp right back up. They are perfect for pairing with an easy comfort meal, like my easy chicken cobbler casserole recipe!
If you’re planning on having leftovers, I usually make sure to make a little extra seasoning mix so I can toss the cooled potatoes with a fresh tiny drizzle of oil and perhaps a pinch of fresh salt before the second roast. It just helps wake up the flavor profile again!
Frequently Asked Questions About Oven Roasted Potatoes
I know you might still have a few little lingering worries, especially if you’ve had some soggy potato disasters in the past! That’s totally normal. My goal here at Cookery Command is to remove all the guesswork so you can feel totally confident. Here are some of the most common things people ask me about making sure their oven roasted potatoes turn out perfectly browned and crusted every time.
Can I use sweet potatoes instead of Yukon Gold for this oven roasted potatoes recipe?
That’s a common question! You absolutely can substitute sweet potatoes, but you need to adjust your timing slightly. Sweet potatoes are naturally softer and have more sugar than white potatoes. Because of that extra sugar, they brown much faster and can sometimes burn before the inside is perfectly cooked.
If you use sweet potatoes, I recommend dropping your oven temperature down to about 400°F (instead of 425°F) after you boil them. Also, keep a very close eye on them during that last roasting phase. They might only need 15 to 20 minutes after the initial roast, not the full 20 to 25. You still want them tender, but rushing the process prevents burning the edges.
What is the best oil to use for Crispy Roast Potatoes?
This is where the temperature of your oil comes into play, which is vital for achieving those amazing Crispy Roast Potatoes. You need an oil with a high smoke point, meaning it can handle the 425°F in your oven without burning off or smoking excessively before your potatoes are done. Olive oil works wonderfully for flavor, and regular olive oil is usually fine for this temperature.
However, if you want to push the crisp factor even further, try using avocado oil or refined canola oil. These oils can take a higher heat than standard olive oil, meaning they almost flash-fry the rough edges of your potatoes immediately, creating that superior, rigid exterior crunch we are looking for. Just make sure you toss them while the oil is fairly cool—we heat them up *in* the oven, not on the stovetop!
If you’re ever looking for other recipes that pair wonderfully with rich flavors, you should see how these potatoes shine next to a hearty bowl of kielbasa potato soup. It’s comfort food perfection!
Take Command of Your Next Side Dish
See? It wasn’t complicated at all! Mastering these tried-and-true techniques means you’ll never have to worry about those sad, soggy potato sides again. This recipe isn’t just for holidays; I hope you feel confident enough to pull this reliable method out for a busy Tuesday night when you want something truly impressive without stressing out.
When you give this recipe a try, please come back and let me know how they turned out! Drop a rating down below or tell me about your favorite seasoning variation in the comments. I love hearing how you are taking command of your own kitchen and creating new memories around simple, perfect food. If you have any specific questions or need further guidance, don’t hesitate to reach out to me directly via my contact page. Happy roasting!
PrintThe Best Crispy Oven Roasted Potatoes Recipe

Follow this simple method to make oven roasted potatoes that are perfectly crispy on the outside and tender inside. This reliable recipe uses garlic and herbs for maximum flavor.
- Prep Time: 15 min
- Cook Time: 45 min
- Total Time: 60 min
- Yield: 6 servings 1x
- Category: Side Dish
- Method: Roasting
- Cuisine: American
- Diet: Vegetarian
Ingredients
- 3 lbs Yukon Gold or Russet potatoes, scrubbed and cut into 1.5-inch pieces
- 1/4 cup olive oil
- 1 tablespoon coarse kosher salt
- 1 teaspoon black pepper
- 1 teaspoon garlic powder
- 1 teaspoon dried rosemary
- 1/2 teaspoon dried thyme
Instructions
- Preheat your oven to 425 degrees Fahrenheit. Place the cut potatoes in a large pot and cover them with cold water. Add 1 tablespoon of salt to the water.
- Bring the water to a boil over high heat. Boil the potatoes for exactly 7 minutes. This step is key for a fluffy interior.
- Drain the potatoes completely in a colander. Let them sit for 5 minutes to allow excess moisture to evaporate. Shake the colander gently to rough up the edges of the potatoes; this creates more surface area for crisping.
- In a large bowl, toss the roughed-up potatoes with the olive oil, kosher salt, black pepper, garlic powder, rosemary, and thyme until evenly coated.
- Spread the seasoned potatoes in a single layer on a large, rimmed baking sheet. Do not overcrowd the pan; use two sheets if necessary.
- Roast for 20 minutes. Remove the pan from the oven and carefully flip the potatoes using a spatula.
- Return the pan to the oven and roast for another 20 to 25 minutes, or until the potatoes are deep golden brown and very crispy.
- Serve your perfect potato side dish immediately.
Notes
- For the ultimate crispiness, use a heavy-duty baking sheet and do not skip the step of boiling and roughing up the edges.
- If you prefer a stronger garlic flavor, substitute 2 cloves of minced fresh garlic for the garlic powder and add it during the last 10 minutes of roasting.
- Yukon Gold potatoes yield a creamier interior, while Russets offer a fluffier texture.
Nutrition
- Serving Size: 1 serving
- Calories: 310
- Sugar: 1
- Sodium: 450
- Fat: 16
- Saturated Fat: 2
- Unsaturated Fat: 14
- Trans Fat: 0
- Carbohydrates: 38
- Fiber: 4
- Protein: 5
- Cholesterol: 0