
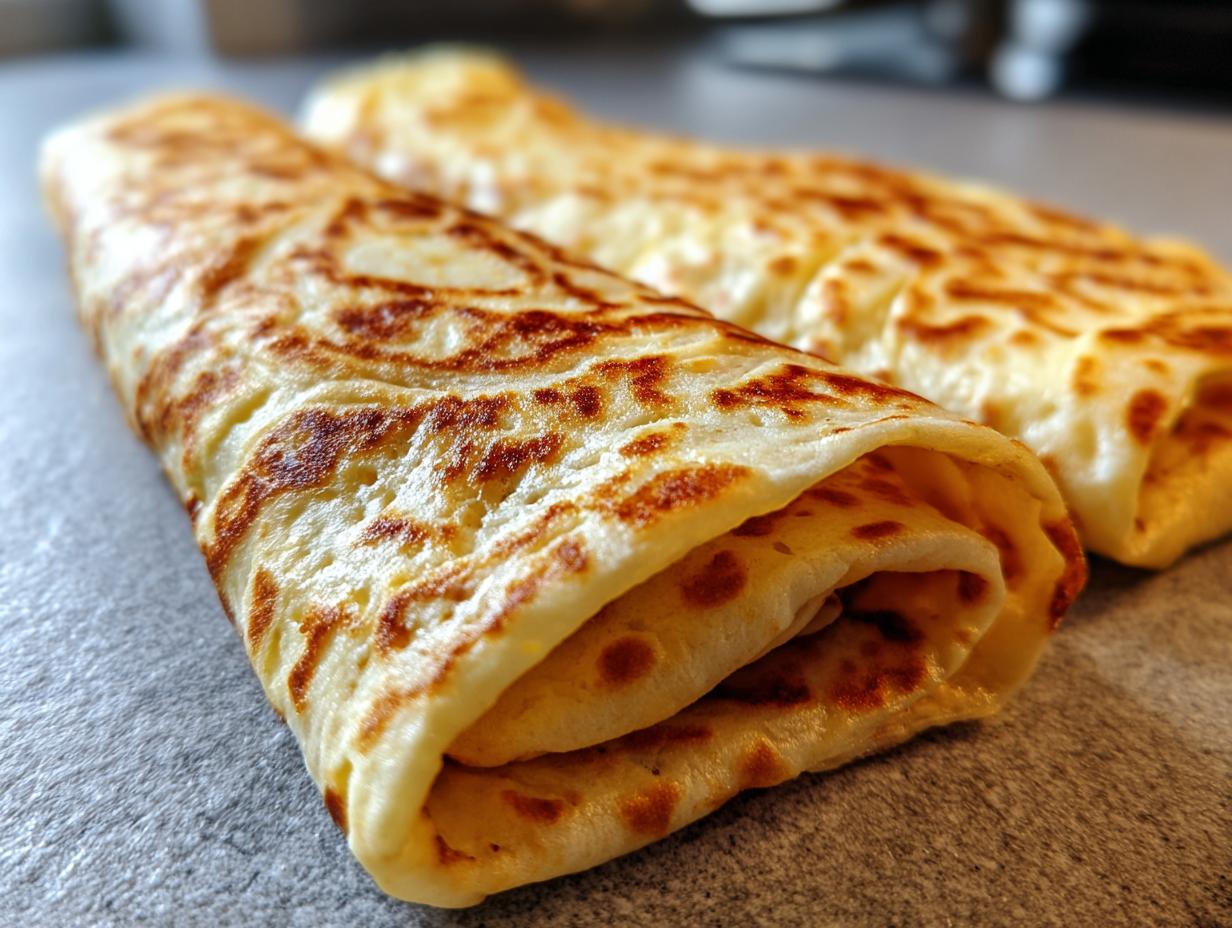
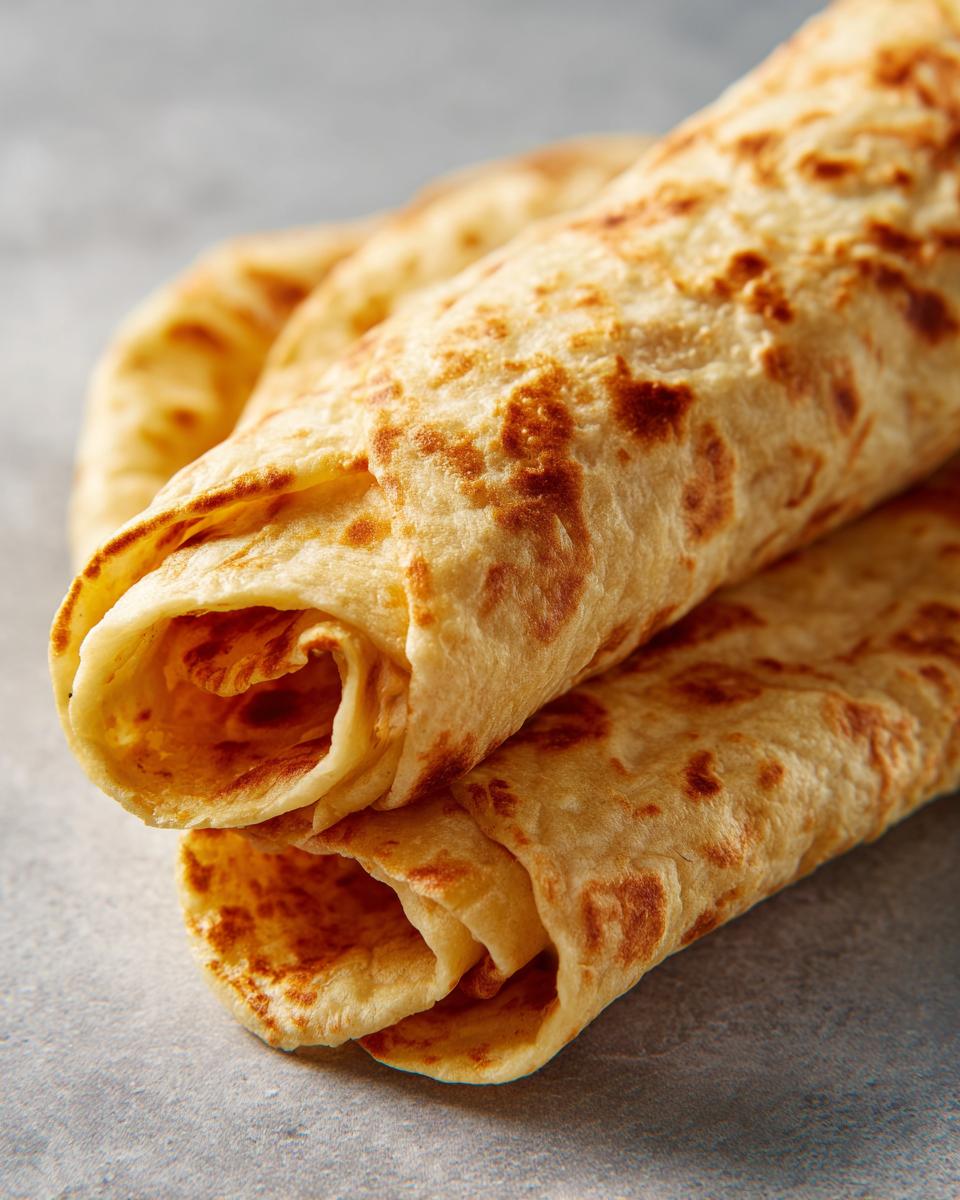
When life gets hectic, finding a meal that’s genuinely fast, packed with protein, and actually satisfies is like finding gold. Isn’t it? That’s exactly why this **cottage cheese wrap** recipe blew up online, and let me tell you, it deserves all the hype! Here at Cookery Command, we took this viral sensation and put it through the wringer. As someone with a background in nutrition, I needed to ensure this **cottage cheese wrap** wasn’t just low-carb, but that the resulting flatbread was sturdy enough for your favorite fillings—not some sad, flimsy mess. We tested this recipe so you can confidently make **healthy lunch ideas** that actually hold up! Pair it with a drizzle of homemade dressing from my guide on easy, healthy homemade salad dressings for the perfect pairing.
- Why This Viral Cottage Cheese Wrap Recipe Works (High Protein Wraps)
- Ingredients for Your Cottage Cheese Wrap
- How to Prepare the Ultimate Cottage Cheese Wrap
- Tips for Success When Making Cottage Cheese Wraps
- Serving Suggestions for Your Cottage Cheese Wrap
- Storage and Make-Ahead Tips for the Cottage Cheese Wrap
- Frequently Asked Questions About the Cottage Cheese Wrap
- Nutritional Snapshot of the Cottage Cheese Wrap
- Share Your Perfect Cottage Cheese Wrap Creations
Why This Viral Cottage Cheese Wrap Recipe Works (High Protein Wraps)
There are tons of recipes out there claiming to be the next big thing, but honestly, most of them result in scrambled edges or wraps that tear the second you try to fold them. That’s where my testing process comes in! What makes this recipe a winner is consistency; you get these amazing **High Protein Wraps** that are naturally **Gluten Free Wraps**, too. We’re talking about a whopping 34 grams of protein in just the wrap base, which is fantastic if you’re watching macros or looking for the ultimate **keto friendly wraps**.
This blend beats those boxed **Low Carb Tortillas** any day because you control every single ingredient. It’s simple, yes, but the technique ensures you get a flexible, useable flatbread every time.

The Science Behind the Perfect Cottage Cheese Flatbread
The secret arm span from the other watery versions? It’s the blender, folks! You absolutely have to get that cottage cheese perfectly smooth. If you leave little curds in there, those act as weak points when you spread the batter thin. When baked, those curds bubble differently, leading to tears.
We want a beautifully uniform mixture that spreads like silk—that’s how you achieve that **Sturdy Homemade Wrap**. When it bakes into one solid, pliable sheet, you can roll it up tight with your favorite fillings, even if you’re packing it for lunch later. For more reliably awesome low-carb flavor foundations, check out my recipe for Keto Chicken Parmesan!
Ingredients for Your Cottage Cheese Wrap
Okay, time for the practical part! This is what I love most about this **cottage cheese wrap**—it’s ridiculously simple. Remember, we are focusing on the base here; the fillings are where you get creative later. This recipe is built on just two main players, making it an genuinely **Easy 2 Ingredient Wrap**, but trust me on adding the seasonings because they stop the wrap from tasting a little, well, cheesy.
This batch makes one really large, sturdy wrap perfect for a satisfying lunch. If you’re meal prepping, just follow the recipe exactly and double everything!
- 1 cup low-fat cottage cheese (Make sure it’s well-drained if it’s holding a lot of liquid!)
- 2 large eggs
- 1 teaspoon dried oregano
- 1/2 teaspoon garlic powder
- 1/4 teaspoon salt
See? So easy! Once you have these on hand, you’re already winning the race for a **Quick Weeknight Dinner**. For more simple, flavor-forward ideas, you have to try my recipe for easy beef noodle soup—it’s classic comfort.
Ingredient Notes and Substitutions for Your Cottage Cheese Wrap
I specify low-fat cottage cheese because we’re aiming for that great nutritional profile, but if you use full-fat, don’t panic! It will just be slightly richer and maybe a tiny bit softer, so let it set up longer before peeling it off the paper. That’s key for handling any texture change.
For the seasonings, oregano and garlic are my go-to because they give it a nice neutral, savory background that works with sweet or savory fillings. However, if you are making a specific type of filling, feel free to swap that teaspoon of oregano out! Throw in a mix of Italian seasoning, or pinch in some smoked paprika for a smoky kick. You could even use onion powder instead of garlic powder. The point is, the base is forgiving, but don’t skip the salt—it really brings the flavor profile forward!
How to Prepare the Ultimate Cottage Cheese Wrap
Alright, grab your blender because this is where the magic happens! This process takes a little patience, but trust me, perfect blending equals a wrap that doesn’t fall apart when you fill it. Remember, we want a culinary masterpiece, not a cheesy puddle!
First things first, get that oven warming up to 350°F (175°C). While it heats, line your baking sheet with parchment paper. Don’t even think about skipping the parchment; it’s our failsafe here.
Blending and Seasoning: Key to a Smooth Cottage Cheese Wrap
This is the step I see people rushing, and that’s usually why their wrap turns into a mess! Take your cottage cheese and eggs and toss them right into your high-speed blender. You need to blend this until it looks totally uniform—like liquid silk! We’re talking zero lumps, period. We are aiming for a truly **Blended Cottage Cheese Recipe** here.
Once it’s smooth, add your oregano, garlic powder, and salt. Just pulse a couple of times to mix those seasonings in. This quick blend keeps the texture consistent.
Baking and Cooling the Cottage Cheese Wrap Perfectly
Now, pour that lovely, smooth batter right into the center of your lined baking sheet. Use an offset spatula—it’s the best tool here—to spread it into a thin, even circle. Aim for 8 to 10 inches, keeping those edges neat. If they are too thin, they’ll crisp up too fast!
Bake this beauty for about 25 to 30 minutes. You’re looking for the edges to look set and the middle to feel firm when you gently touch it—no wet spots! The most important, hardest part? Letting it cool! Seriously, leave it on that parchment paper for a good five minutes after it comes out, then gently peel it onto a wire rack to cool completely. This resting time is crucial to prevent tearing when you finally use it for your **Easy Meal Prep Wraps**. You can find more great guidance on planning your kitchen time with my post about easy meal prep ideas!
Tips for Success When Making Cottage Cheese Wraps
Listen, even with the perfect technique, sometimes the universe throws a curveball in the kitchen. Over the years, I’ve gathered a few crucial tips—little secrets that ensure this **cottage cheese wrap** turns out perfectly pliable every single time. Think of these as the fine-tuning steps that elevate your **Protein Packed Tortilla Alternative** from good to absolutely flawless!
The first trick, especially if you’re worried about a soft center, is to let that blended batter rest for about five minutes *before* you spread it on the parchment. Seriously, just let it sit! This short break allows the eggs and cheese to integrate just a tiny bit more firmly, which helps us achieve maximum handling strength when it comes out of the oven—it makes such a difference in keeping it sturdy.
Now, about texture. If you look at the results from the oven and think, “I wish this was a little more toasty,” I have a quick fix! You don’t have to scrap the whole thing. Once the wrap is totally cool, you can finish it in a non-stick skillet over medium heat. Just cook it for a minute or two on each side. It gets this amazing, satisfying crispness without drying out the middle too much. It’s perfect for making a crunchy taco shell or a grilled wrap sandwich!

I always recommend doubling the recipe if you plan on preparing lunches for the week. Just remember that full-fat cottage cheese can yield a slightly richer, softer wrap, so if you use that, lean into the skillet finish mentioned above for a firmer result. For an incredible filling that pairs perfectly with this high-protein base, you absolutely must try my recipe for easy chicken tinga. That smoky flavor is just unbeatable with this wrap!
Serving Suggestions for Your Cottage Cheese Wrap
Now that you have mastered the base—and believe me, mastering this flatbread means you’ve unlocked tons of **Healthy Lunch Ideas**—the best part is deciding what to fill it with! Because this **cottage cheese wrap** is so low in carbs but super high in protein, it’s perfect for holding onto creamy, veggie-heavy, or lean meat fillings without feeling heavy.
Think of this wrap as your blank canvas for a **Quick Weeknight Dinner**. Since the wrap itself is savory thanks to that hint of oregano and garlic, you can go in a ton of different directions. It’s amazing how such a simple blend of cheese and egg works so well as a **Protein Packed Tortilla Alternative**!
For lunch, I love making mine ahead of time and filling it with something fresh, like shredded rotisserie chicken mixed with a little Greek yogurt, crunchy celery, and fresh dill. It tastes like a gourmet chicken salad, but perfectly contained. It’s a huge step up from standard flour tortillas, and you feel so much better eating it!
If you’re looking for dinner inspiration, try using it as the shell for tacos or fajitas! Instead of ground beef, I often use shredded lean turkey sautéed with taco seasoning. Load it up with fresh salsa, avocado chunks, and maybe a squeeze of lime. It holds up beautifully when you wrap it tight.

And speaking of great pairing ideas, if you’re looking for a side dish that’s equally fresh and satisfying, give my recipe for Chicken Caesar Pasta Salad a look. It’s the perfect cool, creamy counterbalance to a warm, savory wrap!
Storage and Make-Ahead Tips for the Cottage Cheese Wrap
One of the absolute best things about this **cottage cheese wrap** is that it’s practically begging you to make it ahead of time! This recipe is truly designed for **Easy Meal Prep Wraps**. I often bake a double batch on Sunday evening, and those wraps get me through three or four lunches by Wednesday, saving me so much time during the busy work week. It’s an incredible hack for keeping things healthy when you’re feeling rushed.
But, you need to know the right technique for storage, otherwise, you risk it getting gummy or sticking together. If you let the wraps cool totally on the rack—yes, completely cool, this is non-negotiable—you can store them beautifully. For the fridge, stack them with a small piece of parchment paper between each one. This prevents sticking, which is a huge issue with protein-heavy baked goods like this one.
If you’re planning further ahead and want to freeze these **protein packed tortilla alternative** wonders, that works great too! Wrap each cooled wrap individually in plastic wrap first, then slide them all into a large freezer-safe bag. They should keep perfectly fine in the freezer for up to a month. When you’re ready to use one, just pull it out and give it plenty of time to thaw in the fridge overnight.
Reheating is crucial if you want to maintain that perfect texture we worked so hard to achieve during the bake. I almost never recommend microwaving these wraps directly, because while it’s fast, it can make them a bit chewy or brittle.
Instead, pop the thawed or refrigerated wrap onto a dry, non-stick skillet over medium-low heat for just about 45 seconds per side. This brings back a little bit of that lovely softness without turning it soggy. It’s quick enough for a pre-lunch heat-up, or you can sneak it into the toaster oven on low! Honestly, mastering this makes eating healthy so much easier. Speaking of easy treats, once you have your lunch sorted, you should totally check out my recipe for easy fluffy homemade marshmallows for an after-dinner sweet fix!
Frequently Asked Questions About the Cottage Cheese Wrap
I know when you first see a **Viral Cottage Cheese Recipe**, you’re going to have questions! That’s totally normal, especially when you’re trying to replace something like a standard tortilla. We want to make sure you succeed here at Command Central. Here are the top things I always hear about this **cottage cheese wrap**.
Can I substitute Greek yogurt for the cottage cheese?
Oh, that’s a common one! While Greek yogurt is delicious and high protein, it dramatically changes the structure of this **Low Calorie Wraps** base. Cottage cheese is thicker and has a different protein structure that helps it blend into that almost-crepe batter consistency. Greek yogurt is usually too loose! If you try to substitute, your wrap will likely spread too thin and become brittle or tear immediately when you fold it. Stick to the cottage cheese for best results!
My wrap tore when I tried to fill it! What went wrong?
This is frustrating, I know, but it almost always boils down to one of two things: either you didn’t blend it smooth enough (remember, we need liquid silk!), or you tried to peel it off the parchment paper before it was *completely* cool. If that sheet is even slightly warm, it lacks structural integrity. Let it rest on the cooling rack until room temperature—even if that means waiting an extra ten minutes. A cold wrap is a strong wrap, believe me.
Can I make these wraps vegan or dairy-free?
Because the structure of this particular wrap relies entirely on the protein coagulation of eggs and cottage cheese, no, you cannot make this specific recipe vegan or dairy-free successfully. It just won’t set up correctly without those key animal proteins. If you need a plant-based option, you’ll need to look into flour-based scratch recipes or recipes using chickpea flour, as this particular method won’t convert well. But if you’re looking for a low-carb, high-protein solution, this recipe is fantastic!
Can I use different seasonings in my cottage cheese wrap?
Absolutely! The oregano and garlic powder are just my preference for a savory base that complements almost any filling. Feel free to experiment with your seasonings when you’re making your next batch of **Low Calorie Wraps**. Next time, try adding a half teaspoon of smoked paprika and a pinch of cumin for a Southwestern flair, or maybe some dried chives for a milder onion note. Just remember that if you add too much seasoning, it can sometimes throw off the balance needed for that perfect bake.
If you experiment with flavor additions, you might want to try my recipe for easy toffee pretzels for a completely different kind of sweet treat!
Nutritional Snapshot of the Cottage Cheese Wrap
Alright, commandants, let’s talk macros! Knowing what you’re putting into your body is super important, especially when you’re aiming for those **high protein wraps** or trying to keep things low carb. I want to be really clear here: these numbers are for the wrap base only—the baked shell made from the cottage cheese and eggs, before you add any filling, sauces, or veggies.
We worked hard to get these ingredients just right to maximize the protein while keeping the carbs down, and the results are fantastic for anyone focused on fitness or just eating cleaner. This recipe is a game-changer for controlling your macros, making those planned meals so much easier to stick to, and it’s a great foundation for my **protein cheesecake** recipe if you need another hit of protein later on!
Here is the snapshot for one large, unfilled wrap, based on the standard low-fat cottage cheese version:
- Calories: 220
- Protein: 34g (Yes, 34 grams! That’s why this thing keeps you full for hours!)
- Carbohydrates: 8g
- Fat: 6g (Mostly healthy fats from the egg yolks)
- Sugar: 5g
See how those numbers look? You get a massive protein punch for only 220 calories, and the carbohydrate count is seriously low. This is why this recipe works so well for satisfying those high-protein goals. It’s genuinely one of the best homemade solutions for a satisfying, healthy meal base. For another high-protein meal idea that doesn’t involve wraps, you should definitely check out my recipe for the ultimate high-protein baked cheesecake—it proves that healthy eating can still feel indulgent!
Share Your Perfect Cottage Cheese Wrap Creations
Now that you’ve mastered the blending consistency and nailed that perfect bake, it’s time to enjoy the rewards! Making a successful **cottage cheese wrap** is a real win in the kitchen, and honestly, once you see how pliable and sturdy it is, you’ll feel like you can conquer anything. That confidence is what Cookery Command is all about!
I truly want to see what you fill these amazing wraps with! Are you keeping it simple and low-carb, or did you decide to try a heavier, saucier filling? Don’t be shy! Head over to our social channels and tag us in your creations. Seeing your kitchen successes is my favorite part of doing this job. If you’re looking for more inspiration for quick, healthy bites, make sure you check out my guide on easy appetizers and snacks!
If you made this **cottage cheese wrap** and it gave you that fresh boost you needed, please leave a star rating right here on the page. It helps other home cooks know that this recipe is tried, true, and successful! It also helps me know what kind of simple, high-protein recipes you want to see next!
If you are looking for another variation on this popular idea, I highly recommend checking out the delicious method shared by a peer over at Comfort Food Lite for another take on these two-ingredient wonders. Happy wrapping, my friends—you’ve earned it!
PrintViral High Protein Cottage Cheese Wrap

Make the popular, high-protein, low-carb cottage cheese wrap. This recipe uses just two main ingredients to create a soft, sturdy flatbread perfect for quick lunches or light dinners.
- Prep Time: 5 min
- Cook Time: 30 min
- Total Time: 35 min
- Yield: 1 large wrap 1x
- Category: Lunch
- Method: Baking
- Cuisine: American
- Diet: Low Fat
Ingredients
- 1 cup low-fat cottage cheese
- 2 large eggs
- 1 teaspoon dried oregano
- 1/2 teaspoon garlic powder
- 1/4 teaspoon salt
Instructions
- Preheat your oven to 350°F (175°C). Line a baking sheet with parchment paper.
- Place the cottage cheese and eggs into a high-speed blender. Blend until the mixture is completely smooth, with no visible curds remaining. This step is key for a smooth wrap texture.
- Add the oregano, garlic powder, and salt to the blender. Pulse briefly to combine the seasonings.
- Pour the batter onto the center of the prepared parchment paper. Use an offset spatula to spread the mixture into a thin, even circle, about 8 to 10 inches in diameter. Keep the edges as even as possible.
- Bake for 25 to 30 minutes, or until the edges are set and the center is firm to the touch. The wrap should look dry, not wet.
- Carefully remove the baking sheet from the oven. Let the wrap cool on the parchment paper for 5 minutes.
- Gently peel the cottage cheese wrap off the parchment paper. Place it on a wire rack to cool completely before filling. This prevents sticking and tearing.
- Fill the cooled wrap with your desired ingredients and roll it up.
Notes
- For a sturdier wrap that is easier to handle, let the blended mixture rest for 5 minutes before spreading it on the parchment paper.
- If you want a crispier texture, you can cook the wrap in a non-stick skillet over medium heat after baking, cooking for 1-2 minutes per side.
- Use full-fat cottage cheese if you prefer a richer flavor, though low-fat is often used for lower calorie counts.
- This recipe makes one large wrap. Double the ingredients to make two wraps.
Nutrition
- Serving Size: 1 wrap (unfilled)
- Calories: 220
- Sugar: 5
- Sodium: 450
- Fat: 6
- Saturated Fat: 3
- Unsaturated Fat: 3
- Trans Fat: 0
- Carbohydrates: 8
- Fiber: 0
- Protein: 34
- Cholesterol: 250