
When you need something that feels like a warm hug but tastes like a fiesta, you reach for ultimate comfort food, right? That’s exactly what this sopapilla cheesecake delivers! It’s not just a dessert; it’s a brilliant marriage between flaky pastry and that smooth, slightly sweet cream cheese filling we all crave. Here at Cookery Command, we honor those classic recipes that just feel right, and Emily Harrison always insists that blending that beloved Tex-Mex inspiration with solid technique is the secret sauce. This particular recipe takes something simple—crescent rolls—and elevates it into something truly spectacular. Trust me, this easy layered dessert is about to become your go-to when company shows up!
- Why This Easy Sopapilla Cheesecake Recipe Is a Family Favorite
- Ingredients for the Best Sopapilla Cheesecake Bars
- How to Prepare Sopapilla Cheesecake Bars Step-by-Step
- Expert Tips for the Best Sopapilla Cheesecake
- Serving Suggestions for Your Creamy Cinnamon Sugar Dessert
- Storage and Reheating Instructions for Sopapilla Cheesecake
- Frequently Asked Questions About This Dessert
- Nutritional Data Estimate
- Share Your Culinary Success
Why This Easy Sopapilla Cheesecake Recipe Is a Family Favorite
Honestly, I keep this recipe pinned right next to my classic sweet recipe index because it’s a guaranteed winner. When you talk about the **best sopapilla cheesecake**, you’re talking about speed and incredible impact. It’s one of those rare desserts that looks like you spent hours on it, but it truly comes together in a snap. It manages to hit every note: sweet, creamy, and warmly spiced. It’s quickly become our staple for holiday gatherings!
Quick Preparation Using Crescent Roll Dough
You know how sometimes you just need a *dessert* and you need it *now*? That’s where the store-bought dough swoops in to save the day. Using refrigerated crescent roll sheets means we skip all the fuss of making a traditional pastry from scratch. This is what makes this an incredibly easy sopapilla cheesecake recipe. We are talking about rolling out dough, whipping up a filling, and getting it into the oven in less than 15 minutes of active time!
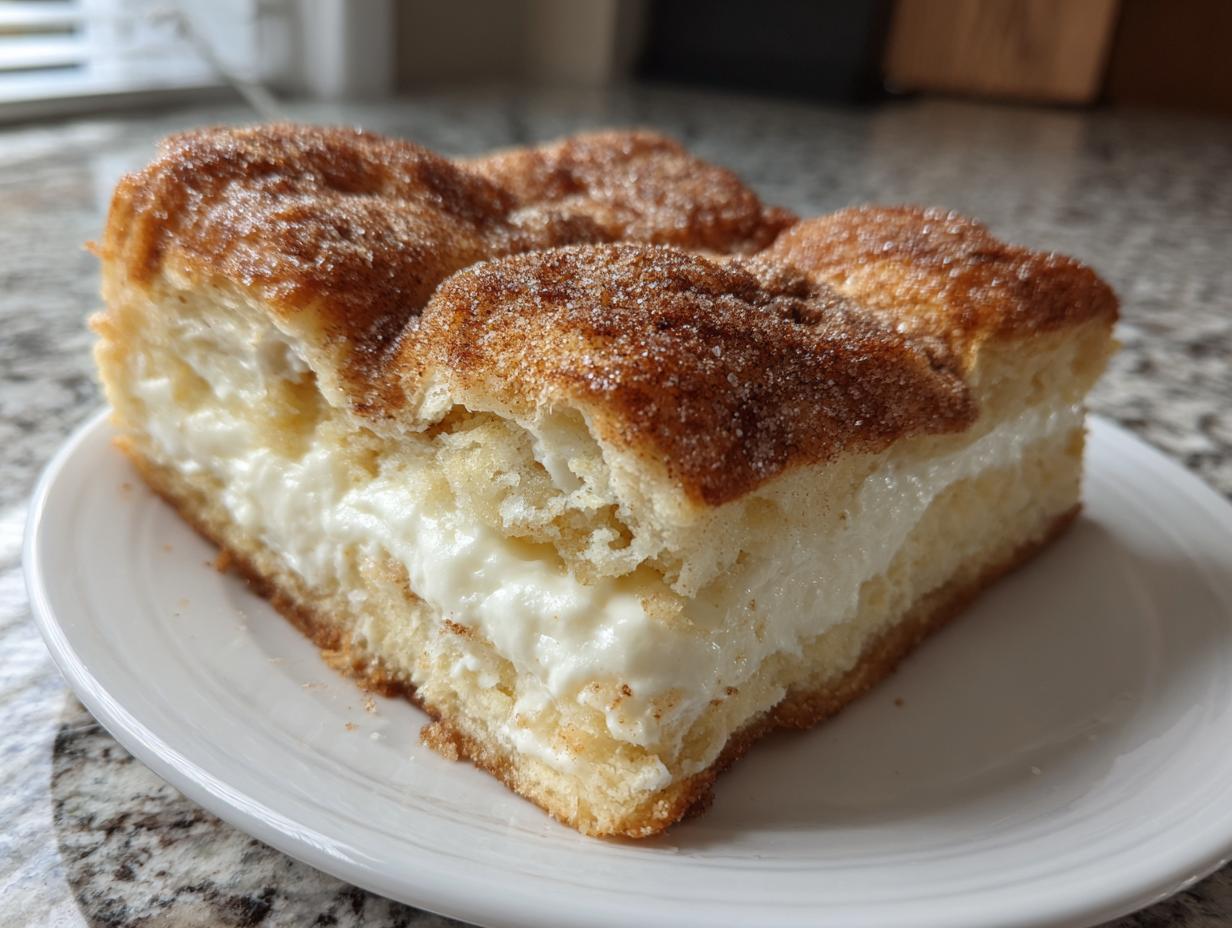
Achieving the Perfect Flaky Pastry Cheesecake Texture
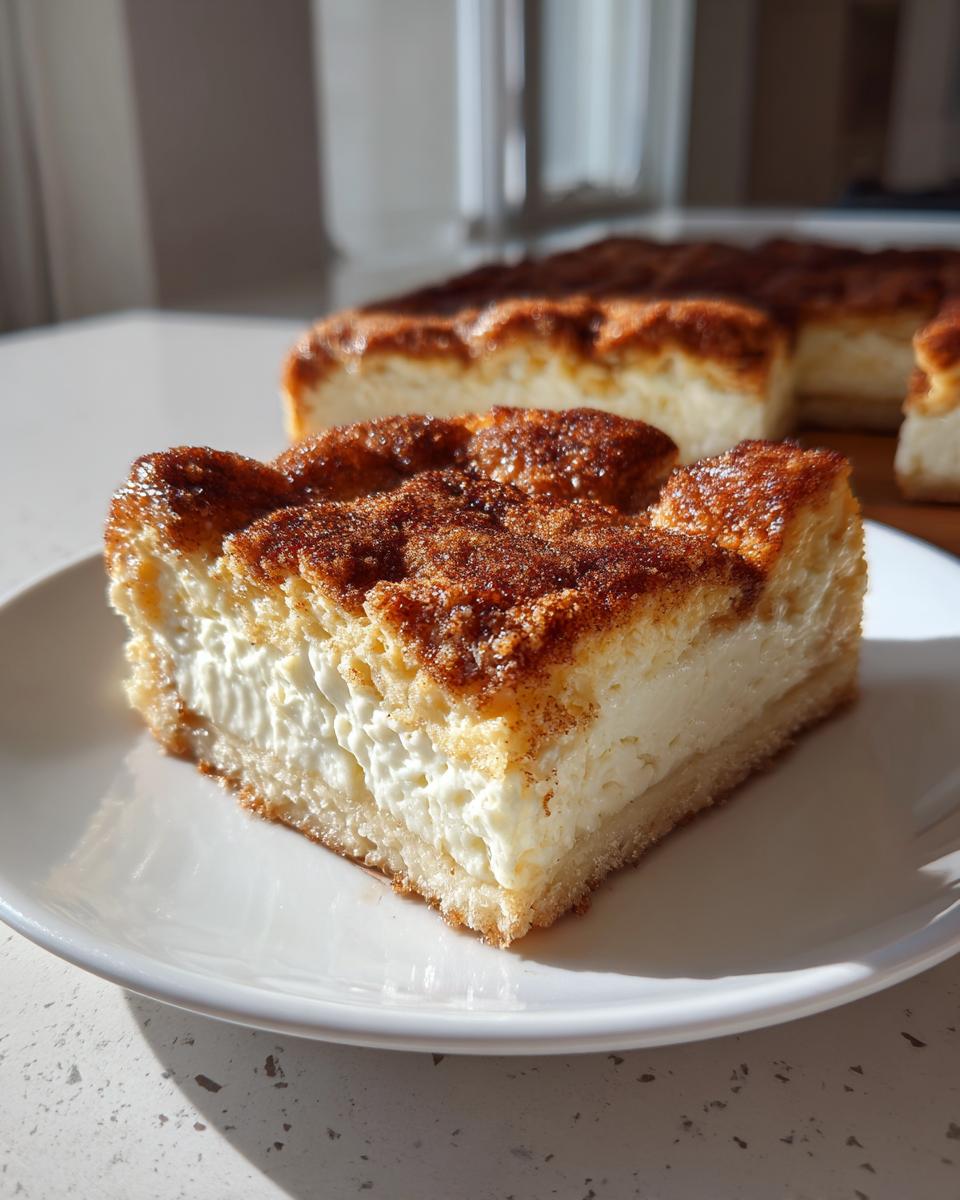
The real magic, though, is that texture contrast. If you love a good flaky pastry cheesecake, you’re going to adore this. You get that wonderful, butter-layered crispness surrounding everything. The dough provides the perfect anchor for that rich, smooth cream cheese center. That contrast between the **flaky pastry cheesecake** layer and the velvety goo inside is honestly what separates this from a standard cheesecake bake. It’s pure comfort!
Ingredients for the Best Sopapilla Cheesecake Bars
Don’t let the simplicity fool you—the ingredients list is short, but every single item needs to be the right temperature or measurement to nail that perfect bake. I’ve tried swapping things around before, and trust me, it just isn’t the same! When you’re aiming for that famous melt-in-your-mouth dessert quality, precision matters. Getting the cream cheese perfectly soft is non-negotiable for a smooth center in your **sopapilla cheesecake** bars. It’s all about setting ourselves up for success right here!
Cream Cheese Filling Components
This is the heart of the Tex-Mex dessert bars, so make sure you give the cream cheese time to get truly soft on the counter. Nothing ruins a smooth filling faster than cold chunks!
- 8 ounces cream cheese (absolutely must be softened!)
- 1 cup granulated sugar
- 1 large egg
- 1 teaspoon vanilla extract
Cinnamon Sugar Topping for Sopapilla Cheesecake
This topping is what transforms our dough into that signature gooey cinnamon dessert experience. I always melt the butter in a little glass measuring cup so I can drizzle it easily over the dough later. Don’t skimp on the cinnamon here!
- 1/2 cup (that’s one full stick!) unsalted butter, melted
- 3/4 cup granulated sugar
- 2 teaspoons ground cinnamon
Oh, and don’t forget the two cans of refrigerated crescent roll dough! That’s the flaky foundation holding all this creamy goodness together.
How to Prepare Sopapilla Cheesecake Bars Step-by-Step
Okay, this is the fun part where we build our masterpiece! Because we are making these into bars, we need a 9×13 inch dish, and getting the oven ready first is always step one. Always preheat! It ensures everything starts baking evenly right away. I always lightly grease my whole dish—I don’t want any sticking when it comes time to cut these beauties. Now, when we layer this sopapilla cheesecake, the key is gentleness. We don’t want to deflate all the air in that crescent dough. Remember, this recipe is designed to be quick, so follow these steps closely, and by the time you sit down, you’ll have the most incredible easy layered dessert!
Assembling the Layers of Your Sopapilla Cheesecake
First things first: grab those two cans of dough. Unroll the first can and press it *gently* into the bottom of that prepared baking dish. I like to use my knuckles or the back of a measuring cup to press it out evenly; you want edge-to-edge coverage. Next, take your beautifully smooth cream cheese filling we mixed up earlier. Spread that filling over the bottom crust—try to get it as even as you can, because if one side is thick, it won’t bake right against the other! Then, take your second roll of dough and lay it carefully over the filling. Give the edges and the middle seam a little pinch just to seal everything up tight. That pinching keeps the filling nicely contained!
Applying the Buttery Cinnamon Sugar Topping
Now for the part that makes it smell like heaven: the topping! While the filling was being spread, I usually mix my reserved sugar and cinnamon in a little cup. Remember that melted butter? You’re going to brush that melted butter *liberally* over the top layer of dough. That butter is essential because it acts like glue for our delicious cinnamon-sugar mix. Sprinkle that sugary blend right over the butter. That combination of fat and sugar is what gives your bars that gorgeous, crunchy, caramelized finish when they bake. Pop it into the 350°F oven for about 30 to 35 minutes, but keep an eye on it until it’s nicely golden brown. And the hardest part? You must let it cool completely before slicing!
Expert Tips for the Best Sopapilla Cheesecake
Even with an easy recipe like this, a couple of little tricks from the test kitchen can take you from good to absolutely legendary status! When I was testing variations of this **sopapilla cheesecake**, I realized that controlling the temperature and the cooling time are just as important as mixing the ingredients right. We want that beautiful texture: slightly crisp layers yielding to a luscious, creamy middle. If you’re aiming to impress, these insights will help you nail that perfect consistency every single time you pull a batch from the oven. It reminds me a bit of the careful temperature control needed for a flawless moist cake, even though this is a bar!
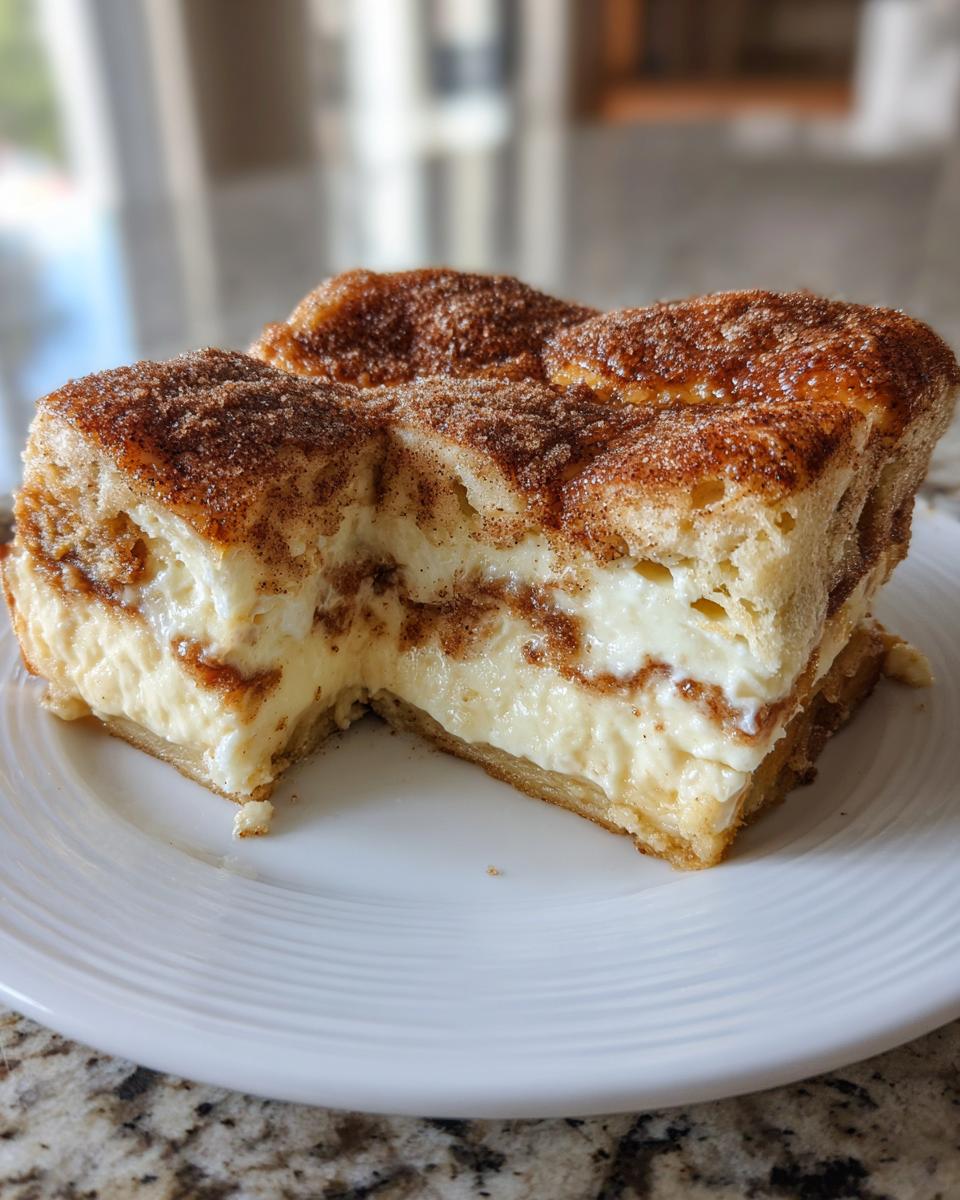
Controlling Texture: Gooey vs. Set Filling in Sopapilla Cheesecake
This is where you get to decide what kind of dessert experience you want! If you love that slightly gooey center—you know, the kind that makes the bars almost impossible to hold until they are completely cool—you should aim for the shorter end of the baking time, maybe stopping around 30 minutes. A slightly underbaked center gives you that gorgeous, melty texture when warm. On the flip side, if you need sturdy, clean squares for a potluck, bake it the full 35 minutes or maybe even 5 more. Another thing I always coach people on is the cream cheese: make sure it’s truly room temperature, almost slightly warmer. If it’s cold, you’ll fight lumps, and lumps mean uneven baking and a less-than-perfectly smooth texture in your final **sopapilla cheesecake**.
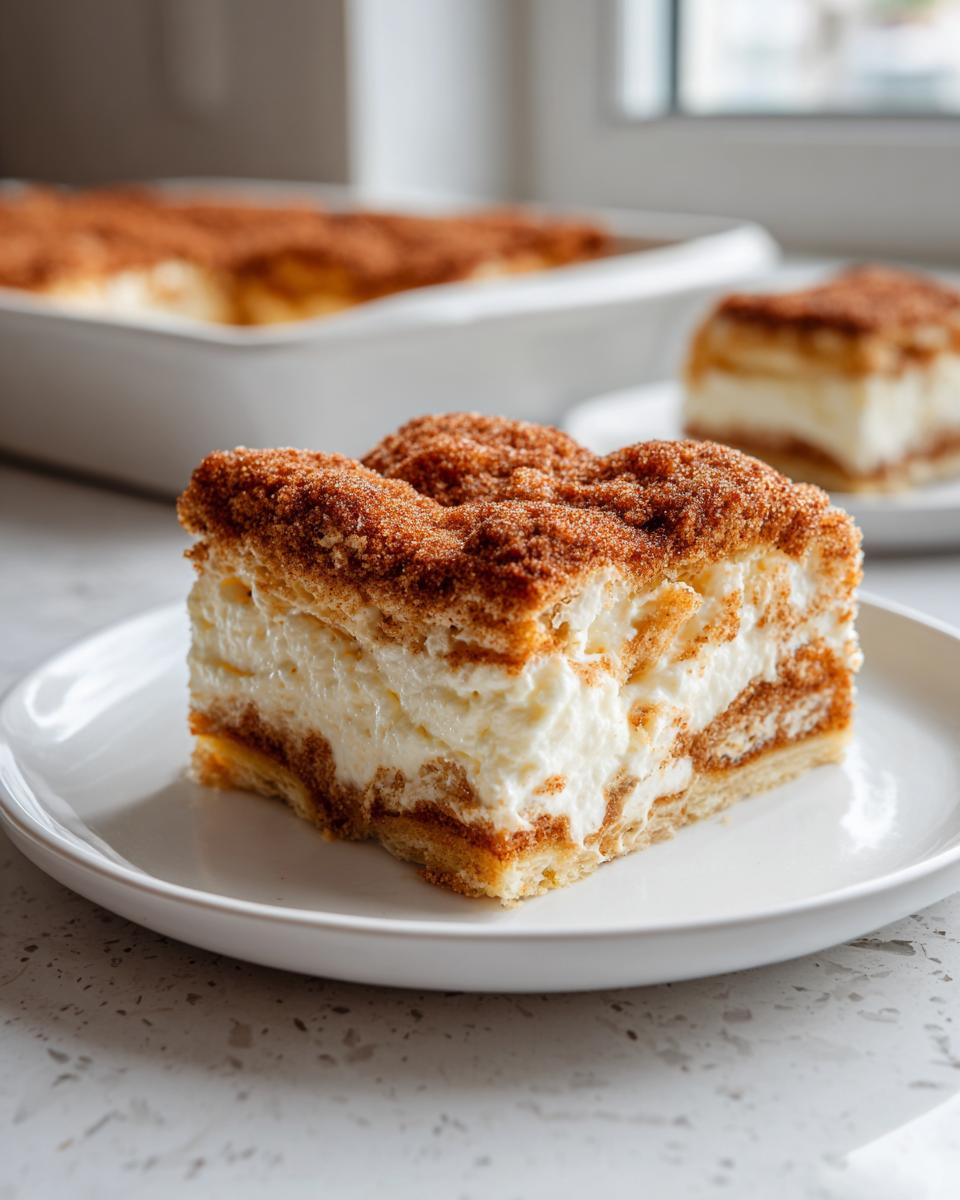
Achieving Clean Slices for Your Tex Mex Dessert Bars
Listen to me now: if you try to cut this dessert even slightly warm, you’re going to end up with a mountain of smeared cream cheese and dough scraps. Don’t do it to yourself! The most critical step for getting those beautiful, sharp squares of **Tex Mex dessert bars** is patience during the cooling process. You have to let this cool completely on the rack—I mean, fully set up—which usually takes at least two hours on the counter, if not more. If you rush this cooling stage, the warm structure collapses when the knife hits it. Many folks even chill theirs for an hour after they’ve reached room temp to get the absolute cleanest cut possible. You can find even more great baking wisdom over at The Soccer Mom Blog! Trust me, waiting is worth it for those perfect bars!
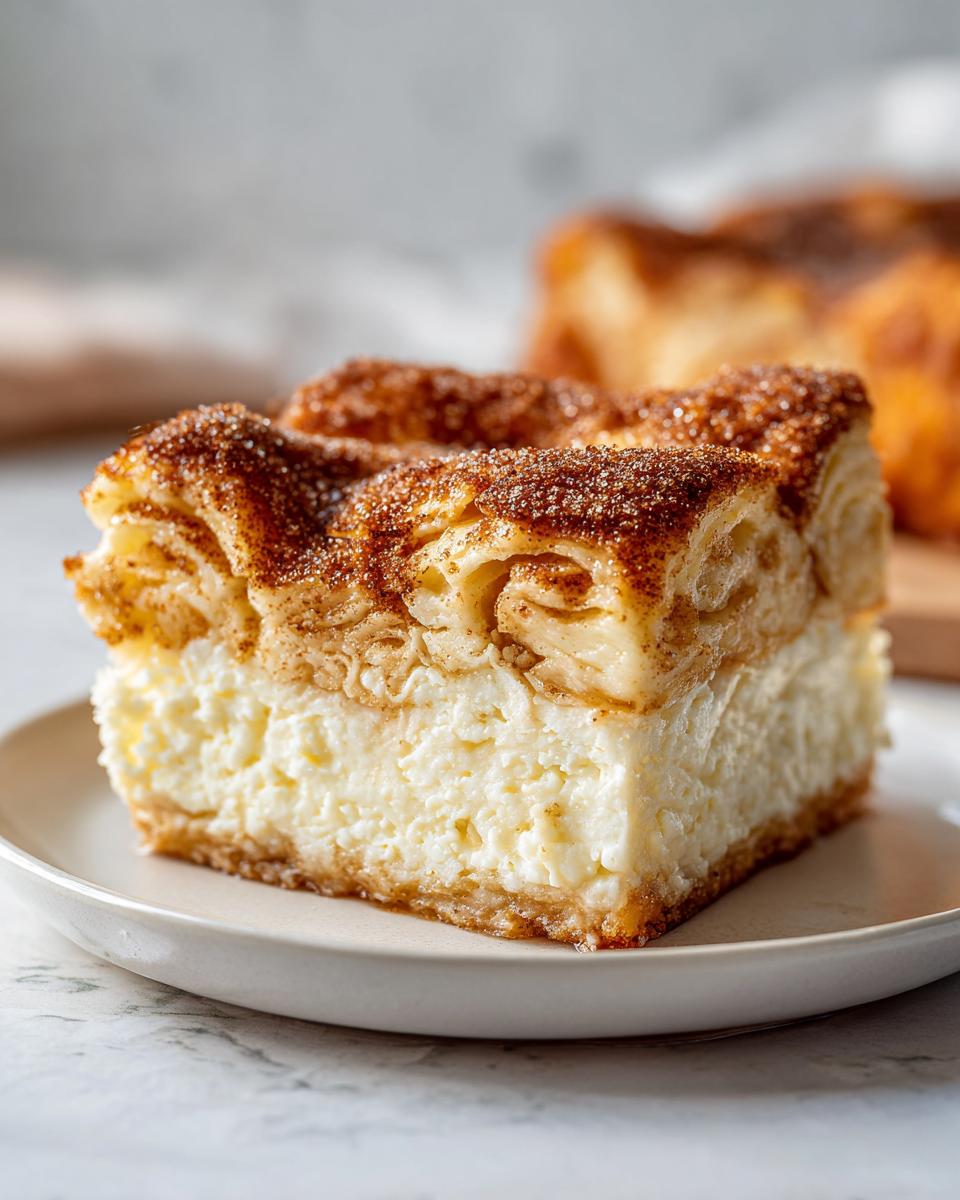
Serving Suggestions for Your Creamy Cinnamon Sugar Dessert
Once these bars are perfectly cool—and I know it’s torture waiting—you need to decide on the perfect accompaniment! This **creamy cinnamon sugar dessert** is rich on its own, which is why it goes so well with something simple or bright. My absolute favorite way to serve these is with a generous drizzle of warm honey. Think about it: the flaky, buttery crust meets that smooth, cool cream cheese, and then BAM! That sweet kiss of floral honey just brings all those cinnamon notes forward. It tastes incredibly authentic, almost like a deconstructed sopapilla!
If you’re serving these bars after a big, heavy meal, you might want something light to cut through the richness. I often whip up a batch of fresh, lightly sweetened whipped cream. I try to infuse the cream myself with a little bit of fresh vanilla bean or even a tiny dash of orange zest, which really pairs beautifully with that creamy filling base. It adds a lovely cloud-like texture contrast to the dense bar!
Alternatively, if you’re serving these bars as an afternoon treat, they are absolutely divine alongside a strong cup of coffee or a Mexican hot chocolate. That bitterness from the coffee or the spice from the chocolate balances out the sweetness from the sugar topping perfectly. If you’re feeling extra ambitious, you can even whip up some homemade cinnamon butter—we have a super simple recipe for that right here: easy cinnamon butter recipe—and put a little pat of it right on top just before serving. It melts right into those warm cinnamon sugar patches, and it’s just heavenly!
Storage and Reheating Instructions for Sopapilla Cheesecake
The only thing better than having a fresh batch of this **sopapilla cheesecake** is knowing you saved some for later! These dessert bars are famous for disappearing quickly, especially if they are part of a dessert spread for a party or potluck dessert recipes. But when you do have leftovers, knowing how to store them properly ensures they keep that signature creamy texture and flaky structure.
Because of that gorgeous cream cheese filling, you absolutely must keep any leftover **sopapilla cheesecake** bars in the refrigerator. I usually let them cool completely on the counter first—remember that crucial cooling step from earlier?—and then I transfer the whole pan (covered tightly with plastic wrap or foil) into the fridge. They stay delicious and perfectly set for about four to five days this way. If you absolutely must freeze them, wrap individual bars tightly in plastic wrap first, then foil, and they should keep okay for about a month, but honestly, the texture of the pastry can suffer a little!
Now, reheating is tricky business. You want to warm up that cinnamon sugar butter and soften that filling just a touch without turning the crescent dough layer into a sad, soggy mess. I never microwave big squares because they get hot spots and get steamy fast. Instead, I take a single bar out of the fridge about 30 minutes before I want to eat it. Serving them cool or room temperature is best, and it keeps that nice firmness! If you absolutely need it warm, I’d zap it for just 10 to 15 seconds on low power, then serve it immediately with that honey drizzle on top! For more inspiration on storing baked goods, I always check trusted sources like Pillsbury when I’m testing out shelf life: check their site for great tips.
Frequently Asked Questions About This Dessert
Even though this recipe is wonderfully straightforward, I always get a few questions when folks try making it for the first time! It’s a bit of a hybrid dessert, so sometimes people wonder about how to adjust it for different timelines or serving needs. We want this **easy layered dessert** to work perfectly for your busy life, whether you’re whipping it up for a casual Tuesday night or prepping for a big holiday gathering. Here are the things I hear most often about making the best batch!
Can I make this sopapilla cheesecake ahead of time?
That’s a great question, especially if you’re planning a big meal where you want everything ready to go! Honestly, the absolute best way to serve this is fresh from the oven after that necessary cooling period. The crescent dough is at its peak flakiness right on day one. If you assemble the bars *before* baking, I find the bottom layer can get a little soggy sitting in the fridge overnight, which we definitely don’t want!
However, you absolutely can bake the entire dish, cool it down completely, cover it, and store it in the fridge for up to three days. When you’re ready to serve it, take it out about an hour beforehand to come slightly closer to room temperature. If you’re only eating one or two bars, taking it straight from the fridge is fine, but know that the texture will be much firmer!
What can I use instead of crescent roll dough for these cheesecake bars?
The crescent dough is what gives us that signature flaky, buttery texture that pairs so perfectly with the cream cheese. If you can’t find crescent roll dough, or if you just like to switch things up, puff pastry is a fantastic substitute! Puff pastry will give you a dramatically flakier, lighter result, maybe even a little more delicate. Just make sure you try to keep the overall thickness similar to what you get with the crescent sheets so the baking time stays roughly the same.
You could also use refrigerated biscuit dough, but be warned: biscuits are thicker and will result in a much denser, breadier base. It’s still delicious, but it moves it further away from that true flaky pastry feel. If you use biscuits, make sure to press them thin so you don’t end up with a huge layer of bready dough on the bottom!
How do I turn this into a true churro cheesecake bars experience?
Oh, I love this goal! If you want to lean hard into that deep cinnamon-sugar flavor profile that makes these taste just like easy layered desserts crossed with a fried treat, you have a couple of options! The simplest step is what I mentioned before: wait until the bars are completely cool. Then, right before slicing and serving, brush the top very lightly with a tiny bit more melted butter and sprinkle a fresh, generous layer of cinnamon sugar over it. This gives you that freshly coated crunch right before you bite in.
For a truly next-level rich experience, you can make a simple glaze. Mix powdered sugar with just a splash of milk or heavy cream until it’s thick but pourable. A tiny dash of vanilla or almond extract makes it sing! Drizzle that glaze on *after* you’ve sliced them. It’s a little extra step, but it makes them look incredibly professional!
Nutritional Data Estimate
Now, let’s talk fuel! Look, this is a rich, utterly decadent treat—it’s made with cream cheese, butter, and sugar, so we know it’s not exactly a salad, right? But for those of you who need to account for ingredients, I always run the components through a standard calculator just to get a baseline estimate. Remember, these numbers are based on the specific ingredients listed in the recipe and assume you get 12 good-sized servings from that 9×13 pan. Every kitchen is a little different, so treat this as a close approximation for your magnificent batch of **sopapilla cheesecake**!
We want to be transparent about what we’re enjoying here. This dessert is certainly satisfying, delivering a wonderful mix of carbs for energy and good fats from the butter and cream cheese. It truly is the perfect end to any meal, especially when served with that drizzle of honey we talked about earlier—which would, of course, add a bit more sugar!
- Serving Size: 1 bar
- Calories: Approximately 320
- Total Fat: About 18g (This includes roughly 10g of saturated fat.)
- Carbohydrates: Around 35g
- Sugar: Expect about 25g of sugar per bar.
- Protein: Roughly 4g
- Cholesterol: Estimated at 45mg
- Sodium: Approximately 210mg
See? It gives you a good snapshot! It’s a delightful, **melt in your mouth dessert** packed with flavor, which is why we enjoy it in moderation—usually just one bar is plenty!
Share Your Culinary Success
Now that you’ve experienced the magic of this **sopapilla cheesecake**—that warm, gooey, cinnamon-sugar perfection—I really want to hear all about it! Creating these reliable recipes is my passion, but they truly come alive when they land on your family table. Did you serve it with honey? Did you try prepping it the day before? Did your husband request it for the third time this month?
Don’t keep those amazing results a secret! When you rate this recipe down below, you’re not just helping other cooks who are looking for the **best sopapilla cheesecake** out there, you’re also giving me crucial feedback. Your experience tells me where to double down on clarity or where a technique might need a little extra explaining for future bakers.
We are building a community here at Cookery Command, a place where we take command of the kitchen with confidence. So please, take a minute to drop a comment and let me know how your batch of these **crescent roll cheesecake dessert** bars turned out. If you have any questions at all, or just want to share a picture of the beautiful golden-brown top, head over to my contact page, and let’s chat about baking!
PrintEasy Sopapilla Cheesecake Bars with Cinnamon Sugar

Make this easy Sopapilla Cheesecake recipe using crescent roll dough for flaky layers, a creamy filling, and a buttery cinnamon sugar topping. This dessert tastes like a blend of churros and cheesecake.
- Prep Time: 15 min
- Cook Time: 35 min
- Total Time: 50 min
- Yield: 12 servings 1x
- Category: Dessert
- Method: Baking
- Cuisine: Tex-Mex
- Diet: Vegetarian
Ingredients
- 2 cans (8 ounces each) refrigerated crescent roll dough
- 1 package (8 ounces) cream cheese, softened
- 1 cup granulated sugar
- 1 large egg
- 1 teaspoon vanilla extract
- 1/2 cup (1 stick) unsalted butter, melted
- 3/4 cup granulated sugar
- 2 teaspoons ground cinnamon
Instructions
- Preheat your oven to 350 degrees Fahrenheit. Lightly grease a 9×13 inch baking dish.
- Unroll one can of crescent roll dough and press it evenly into the bottom of the prepared baking dish.
- In a medium bowl, beat the softened cream cheese, 1 cup of sugar, egg, and vanilla extract until the mixture is smooth and creamy.
- Spread the cream cheese mixture evenly over the bottom layer of crescent roll dough.
- Unroll the second can of crescent roll dough and place it over the cream cheese layer. Pinch the seams together lightly.
- In a small bowl, mix the remaining 3/4 cup of sugar and 2 teaspoons of cinnamon together.
- Brush the melted butter over the top layer of dough. Sprinkle the cinnamon-sugar mixture evenly over the buttered top.
- Bake for 30 to 35 minutes, or until the top is golden brown and the filling is set.
- Let the dessert cool completely on a wire rack before slicing into bars. Serve plain or drizzle with honey.
Notes
- For a richer flavor, substitute honey for some of the sugar in the filling mixture.
- If you prefer a gooey texture, slightly underbake the bars by about 5 minutes.
- Slice the bars after they have cooled for the cleanest cuts.
Nutrition
- Serving Size: 1 bar
- Calories: 320
- Sugar: 25
- Sodium: 210
- Fat: 18
- Saturated Fat: 10
- Unsaturated Fat: 8
- Trans Fat: 0.5
- Carbohydrates: 35
- Fiber: 1
- Protein: 4
- Cholesterol: 45