
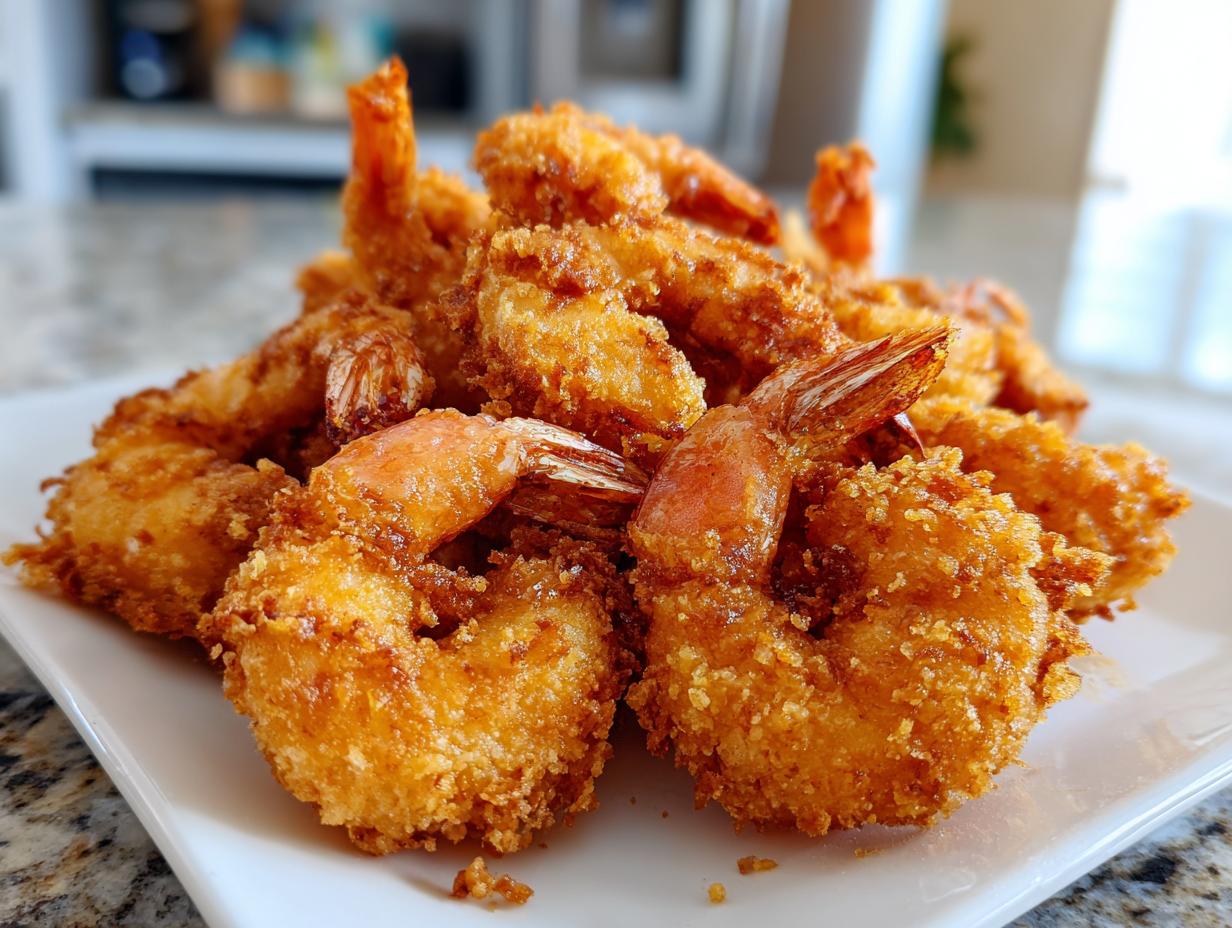
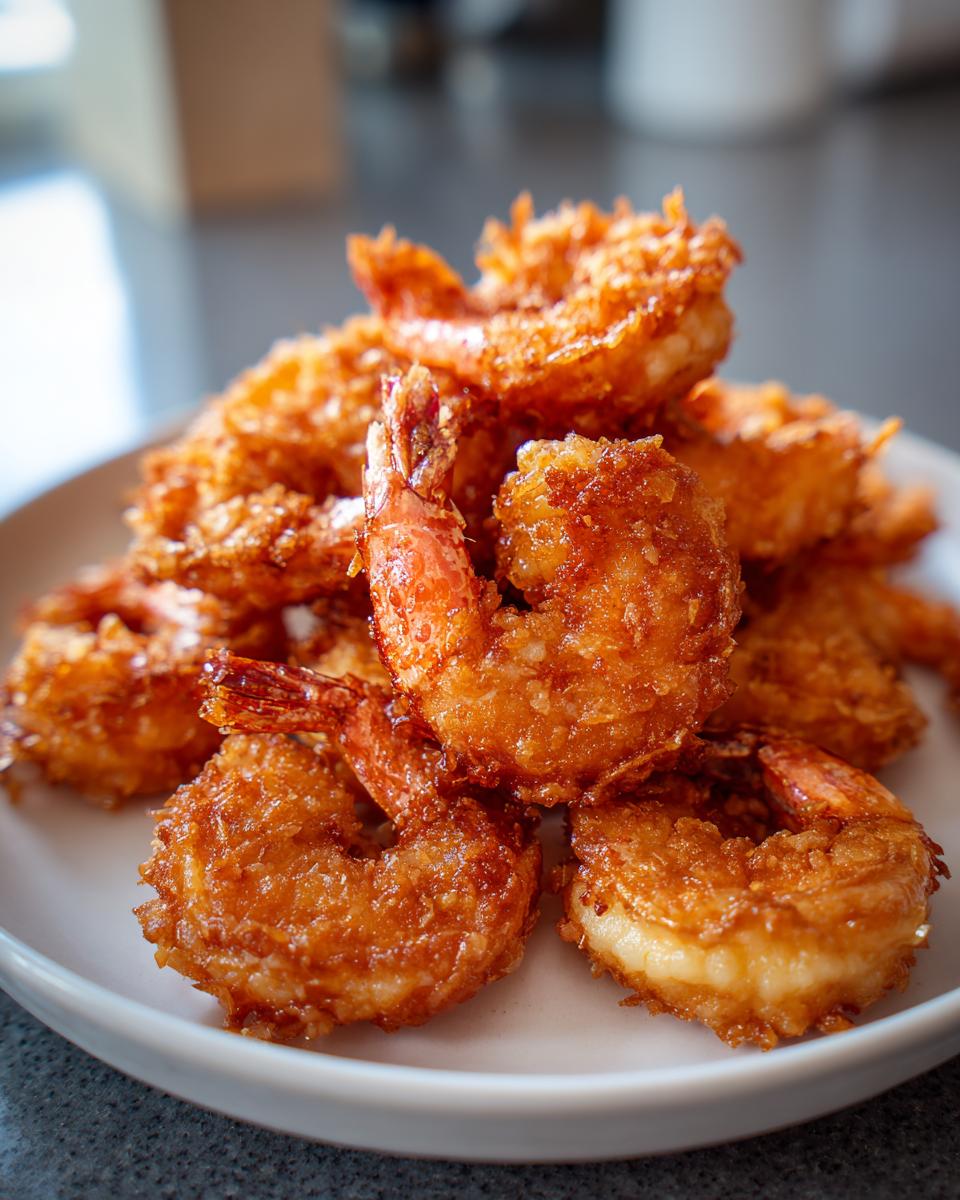
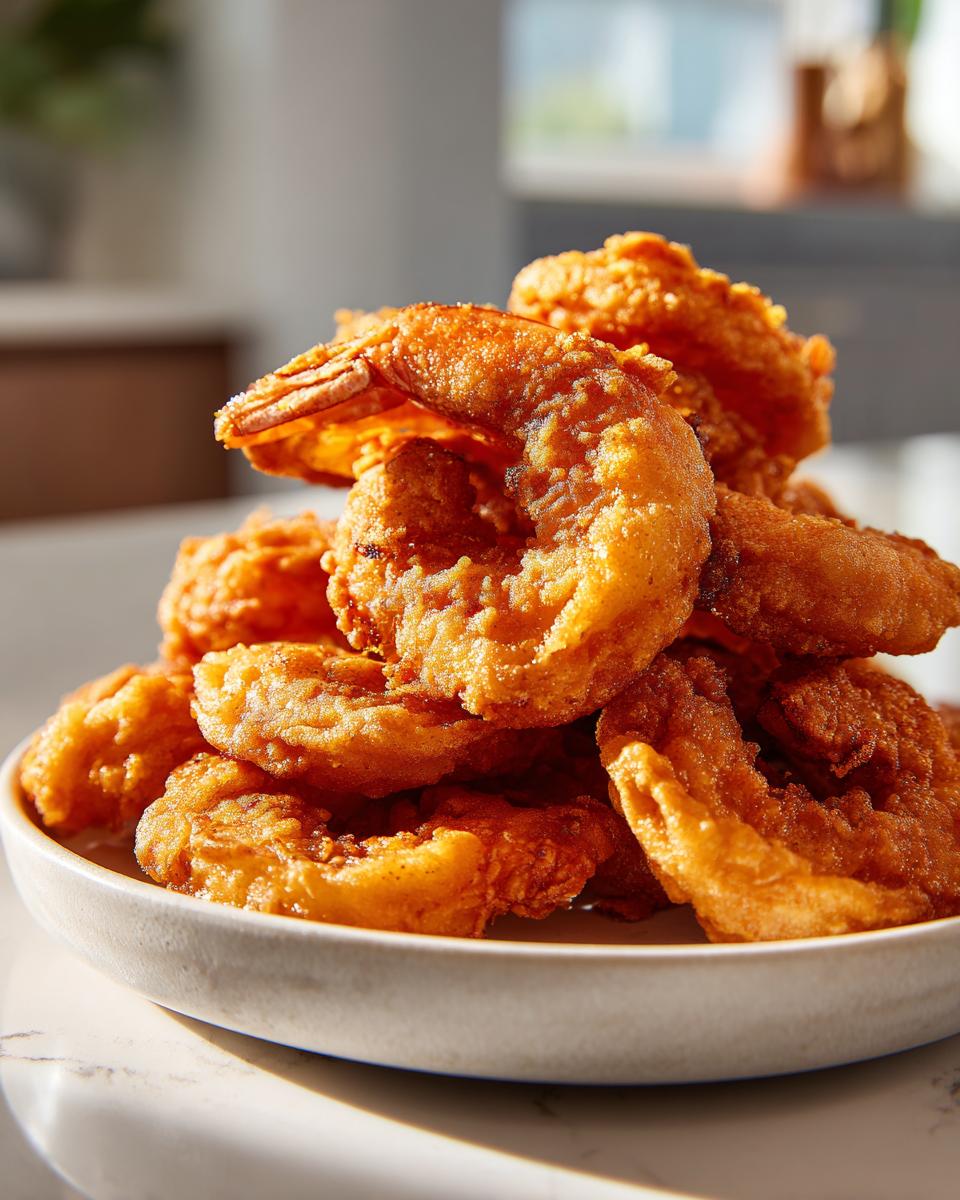
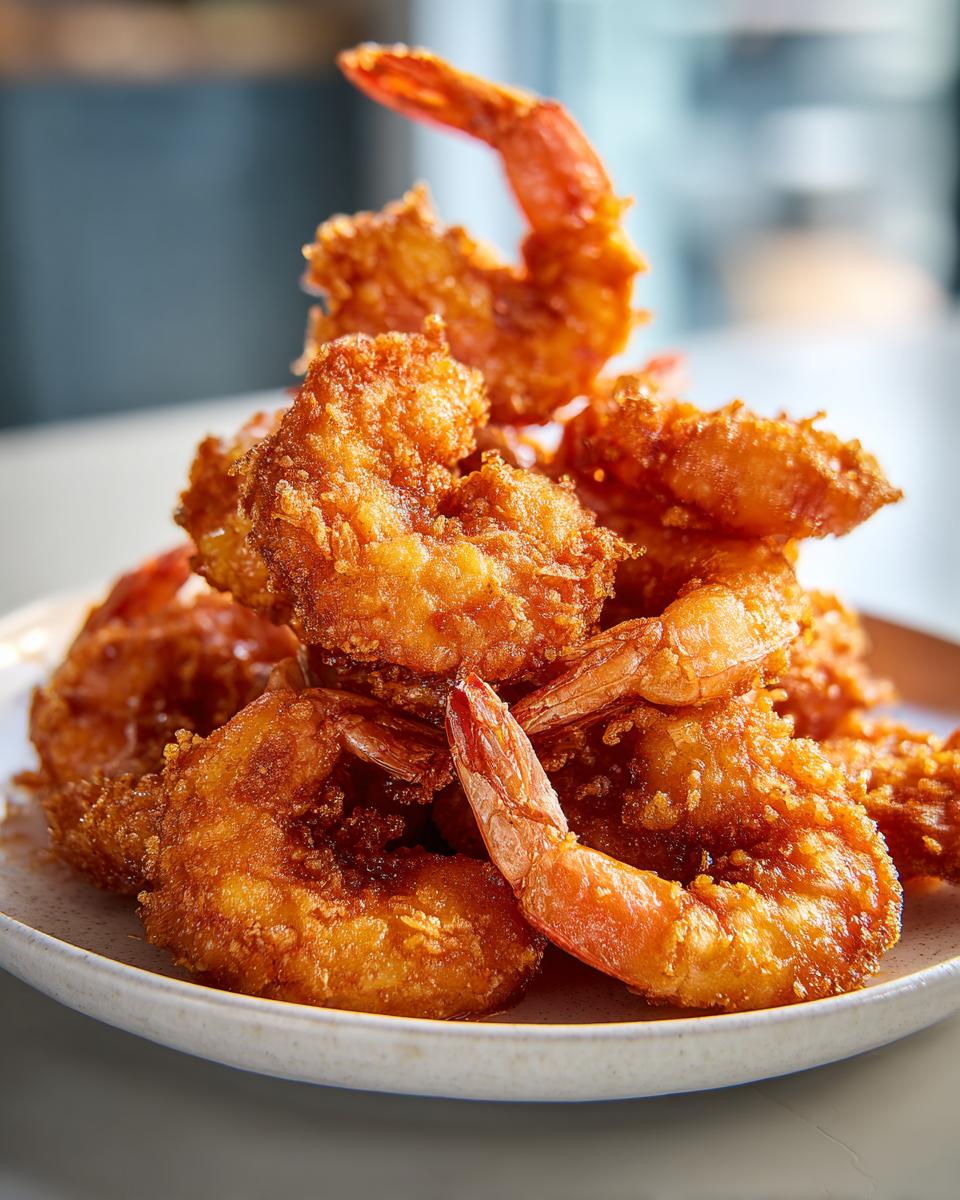
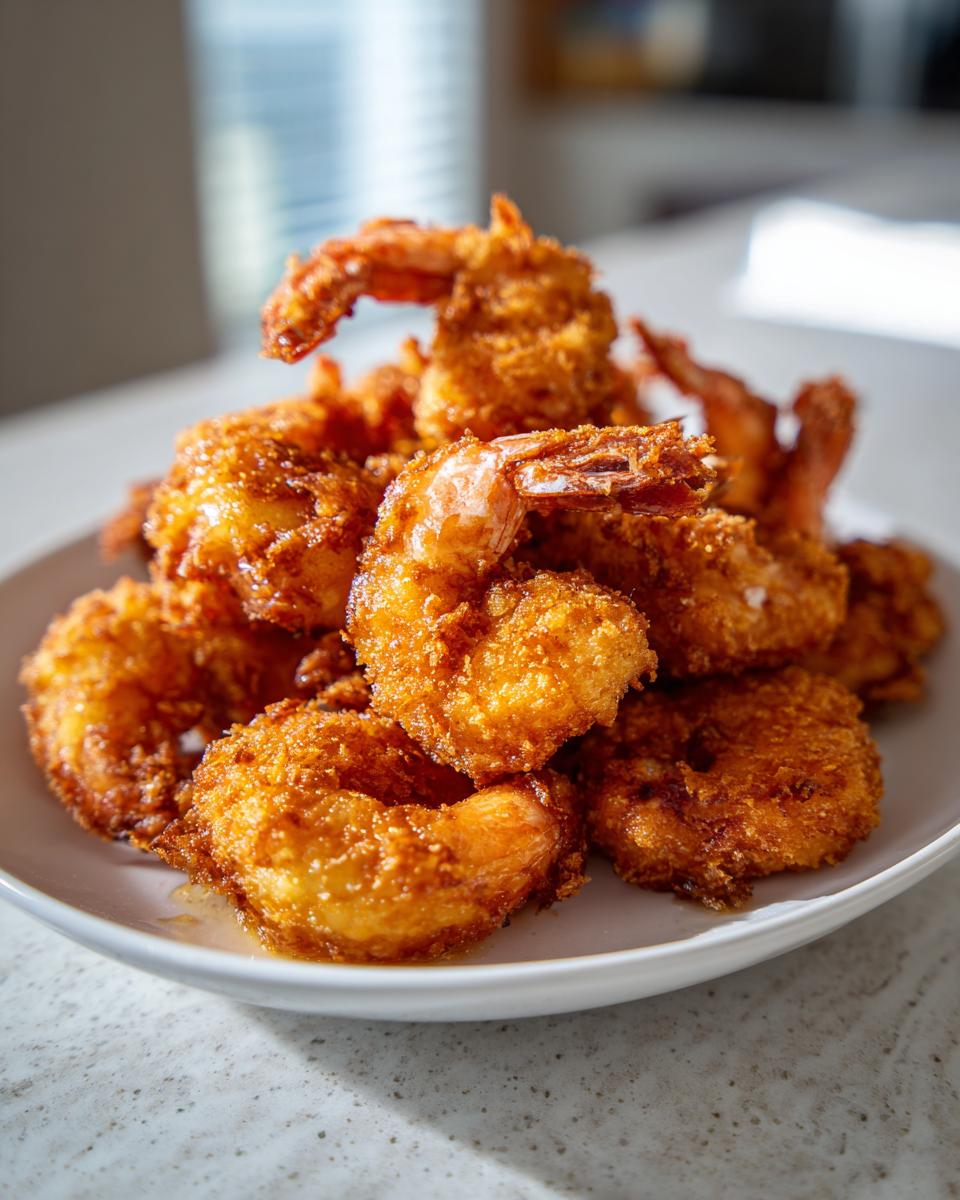
Listen, achieving that perfect, shatteringly crisp exterior on your fried shrimp while keeping the inside tender and juicy feels like an absolute magic trick, doesn’t it? Well, trust me, it’s not magic—it’s just technique! Here at Cookery Command, I’ve put this Southern fried shrimp method through rigorous testing in my kitchen (that’s the Emily Harrison guarantee!) to seal in that flavor and crunch. This recipe cuts straight to the chase, requiring just a simple buttermilk soak and a dual coating process that locks everything in place. Forget soggy seafood; this leads to the best fried shrimp recipe you’ll ever bring to your own dinner table.
When you serve this up, you absolutely have to have a good dipping sauce on hand. I swear by my easy homemade tartar sauce alongside these beauties for the ultimate seafood experience.
- Why This Is the Best Fried Shrimp Recipe You Will Make
- Ingredients for Crispy Southern Fried Shrimp
- Essential Equipment for Perfect Fried Shrimp
- Step-by-Step Guide: How to Make Fried Shrimp
- Expert Tips for the Crispiest Fried Shrimp Every Time
- Serving Suggestions for Your Fried Shrimp
- Storage and Reheating Fried Shrimp
- Common Questions About Making Fried Shrimp
- Nutritional Snapshot of This Fried Shrimp
Why This Is the Best Fried Shrimp Recipe You Will Make
I know everyone promises the “best” recipe, but this one delivers on texture and flavor without being complicated. If you are looking for truly crispy fried shrimp that never tastes greasy, you’ve landed in the right spot. We nail that perfect seasoning blend every time, ensuring you get perfectly cooked shrimp inside that golden shell.
- The buttermilk soak guarantees tender results.
- Fast cooking time means the shrimp stay juicy inside.
- Seasoning is bold but balanced—no bland seafood here!
Oh, and if you ever need a non-seafood win—maybe for a guest who doesn’t eat fish—you have to try my easy black bean soup recipe when the weather cools down!
Achieving Maximum Crispiness with the Dual Coating Method
This is where the crunch factor comes from! That quick, second dip back into the dry flour after the buttermilk bath creates little craggy bits on the surface. These flakes are what get super crispy when they hit the hot oil, giving you that audible crunch when you bite into your crispy fried shrimp. It’s simple, but it definitely earns its title!
Ingredients for Crispy Southern Fried Shrimp
Okay, let’s get organized! Having everything prepped ahead of time is half the battle when frying, trust me. For this incredible fried shrimp, you need 2 pounds of extra large shrimp, and make sure they are peeled and deveined, but leave those tails on for easy dipping later! You’ll need 2 cups of buttermilk—and yes, that hot sauce is optional but highly recommended for a little background heat.
For the coating, we use 2 cups of flour blended with 1/2 cup of cornstarch—that cornstarch is non-negotiable for the ultimate crunch! Don’t skimp on the spices: salt, pepper, garlic powder, smoked paprika, and just a dash of cayenne. And please, use a high smoke point oil like vegetable or peanut oil for frying. If you happen to need an amazing side, my creamy homemade tartar sauce is the perfect partner!
Essential Equipment for Perfect Fried Shrimp
You can’t make the best fried shrimp without the right gear! This isn’t the most complicated shrimp fry, but temperature control is everything. You absolutely must have a deep, heavy-bottomed pot—I reach for my Dutch oven first. Most importantly, grab a reliable thermometer! If you’re trying how to fry shrimp without knowing the oil temperature is exactly 350°F, you’re asking for soggy results. Lastly, make sure you have a wire rack set up over a baking sheet for draining; that’s key for keeping the bottom crispy!
Step-by-Step Guide: How to Make Fried Shrimp
This is where the magic happens! Getting the process down cold guarantees that easy shrimp fry turns out restaurant quality right in your kitchen. We’re breaking down every step, from the mandatory soak to the final golden coating. Temperature is your best friend here, so get that thermometer ready!
First, let’s prep that amazing soak for the shrimp. Then, we mix up that killer dry blend we talked about. Once everything is set, we move to the hot oil. Follow these specific steps, and you’ll see why people rave about this fried shrimp technique.
If you’re looking for a main dish pairing after you master this, my quick creamy shrimp alfredo is always a huge hit!
The Buttermilk Soak: Tenderizing Your Fried Shrimp
Step one, and this is crucial: you have to soak those beauties! Cover your cleaned shrimp entirely with buttermilk (and that drop of hot sauce, if you’re feeling it) and pop them in the fridge for at least 30 minutes, but up to four hours is even better. I’ve learned that this soak does two amazing things: it tenderizes the shrimp so they aren’t rubbery, and it creates a surface that the seasoned flour absolutely clings to. It’s the secret handshake for making sure your coating stays put!
Frying Technique for Golden Brown Shrimp
Once soaked, shake off the excess buttermilk—don’t rinse!—and give each shrimp a good, firm press into the flour mix. Now, heat your oil to exactly 350°F. This temperature control is vital for that golden brown shrimp color we want. Only drop in about 6 to 8 shrimp at a time. If you crowd the pot, the oil temperature drops instantly, and your shrimp get soggy instead of crisp! Fry them for just 2 to 3 minutes per side, flipping gently. I always check one after the first batch to make sure it’s perfectly cooked shrimp inside before I keep going.
Expert Tips for the Crispiest Fried Shrimp Every Time
Diving into these extra details takes your batch of fried shrimp from good to truly phenomenal. We talked about the buttermilk soak, but to really achieve that unbeatable crunch often associated with classic Southern fried shrimp, you might want to try the double dredge I included in the notes. That means shrimp in buttermilk, into the flour, back into the buttermilk for a quick dip, and then one final, firm press into the dry mix! That extra layer creates those wonderful little crags that crisp up perfectly.
Another pro tip I insist on, which comes straight from the test kitchen: when draining them, never, ever pile them directly onto paper towels! That traps steam underneath, and all that beautiful crispiness turns soft real fast. Always use a wire rack set over a baking sheet. The air circulates underneath, keeping the bottom coating dry and crunchy. This is how we ensure every piece stays golden and perfect until it hits the table. If you love nailing those Southern staples, you simply must try my recipe for flaky Southern buttermilk biscuits, too!
Serving Suggestions for Your Fried Shrimp
Now that you have mastered the art of the perfect fried shrimp, it’s time to figure out how to serve these golden beauties! They are absolutely fantastic as the star of a relaxed, classic seafood dinner idea served alongside some crisp vinegar slaw or some seriously good seasoned fries. But let’s be honest, sometimes you just want a handful while watching a game. They shine as amazing appetizer shrimp recipes!
Whatever you choose, you cannot skip the sauce! You already know I swear by my easy homemade tartar sauce, but cocktail sauce or even a quick spicy aioli works wonders. The important thing is getting them hot and crispy straight from the rack!
Storage and Reheating Fried Shrimp
Oh, leftovers! If you are lucky enough to have any of this fried shrimp left over (which I doubt, honestly), storing them carefully is essential to keeping that crunch alive. Don’t just toss them in a container; they need air circulation!
The best way to store them is to let them cool completely, then place them in a single layer in an airtight container lined with a paper towel, making sure they aren’t tightly packed. When it comes time to reheat, the microwave is your enemy—it steams everything! Instead, pop them in a 400°F oven for about 5 to 7 minutes, or better yet, give them a quick blast in the air fryer. I use my air fryer on 375°F for about 3 minutes when reheating frozen shrimp, and it works wonders on leftovers too, bringing back that lovely crispiness!
Common Questions About Making Fried Shrimp
I get so many questions after folks try this recipe—and honestly, that’s how I know you all are diving deep into making the absolute best fried shrimp possible! Here are a few things that seem to pop up most often when people tackle how to fry shrimp for the first time.
First up, can you skip the buttermilk soak? Look, I strongly advise against it! The buttermilk is crucial for both tenderness and getting that seasoned flour coating to stick perfectly. Skipping it means your coating will likely fall off while frying, leaving you with sad, naked shrimp.
For oil, I mentioned peanut or vegetable oil because they have high smoke points, which is essential for deep frying. If you use olive oil, it’ll start smoking and break down way too fast. We need high heat that stays stable to get that beautiful golden brown shrimp finish!
Can I make this fried shrimp recipe in an air fryer?
This is a big one! While you absolutely *can* use an air fryer for fried shrimp, I have to be honest: it won’t give you the same texture as deep frying. Deep frying is what creates that thick, craggy, and consistently crispy fried shrimp shell we worked so hard for with the dual dredge. If you must use the air fryer, spray the coated shrimp very liberally with oil spray and cook them in a single layer at about 380°F, flipping halfway. Just know you’re trading some of that signature crunch for a healthier option. I’ve shared some tips for air fryer frozen shrimp if you want to check that out later!
Nutritional Snapshot of This Fried Shrimp
I always like to share a quick look at what’s in the bowl, though remember nutrition facts for fried shrimp can vary wildly depending on how much oil gets absorbed!
Based on my recipe breakdown (using the ingredients listed), this estimate is for a 6-shrimp serving size before adding any heavy sauces. You’re looking at about 380 calories, with 28 grams of protein making this a satisfying seafood dinner idea!
- Calories: 380
- Fat: 20g
- Carbohydrates: 25g
- Protein: 28g
This is just an estimation, of course—eating those dipping sauces adds romance, but also calories! Consider this your baseline for enjoying this amazing snack!
PrintCrispy Southern Fried Shrimp: The Best Easy Recipe

Make the best fried shrimp with this easy Southern-style recipe. You achieve maximum crispiness using a buttermilk soak and dual coating method for perfectly cooked, golden brown shrimp every time.
- Prep Time: 15 min
- Cook Time: 15 min
- Total Time: 45 min
- Yield: 4 servings 1x
- Category: Dinner
- Method: Deep Frying
- Cuisine: American
- Diet: Vegetarian
Ingredients
- 2 pounds extra large shrimp, peeled and deveined, tail on
- 2 cups buttermilk
- 1 tablespoon hot sauce (optional)
- 2 cups all-purpose flour
- 1/2 cup cornstarch
- 2 teaspoons salt
- 1 teaspoon black pepper
- 1 teaspoon garlic powder
- 1 teaspoon smoked paprika
- 1/2 teaspoon cayenne pepper
- Vegetable or peanut oil, for frying
Instructions
- Place the shrimp in a bowl and cover them completely with buttermilk and hot sauce, if using. Let the shrimp soak in the refrigerator for at least 30 minutes, or up to 4 hours. This step tenderizes the shrimp and helps the coating stick.
- In a shallow dish, whisk together the flour, cornstarch, salt, black pepper, garlic powder, smoked paprika, and cayenne pepper. This is your dry coating mixture.
- Remove the shrimp from the buttermilk, letting excess drip off, but do not rinse.
- Dredge each shrimp thoroughly in the dry coating mixture, pressing the flour onto the shrimp to create a thick layer. Shake off any excess flour.
- Heat 2 to 3 inches of oil in a deep, heavy-bottomed pot or Dutch oven to 350 degrees Fahrenheit (175 degrees Celsius). Use a thermometer to monitor the temperature; maintaining this heat is key for crispiness.
- Carefully place 6 to 8 shrimp into the hot oil, ensuring you do not overcrowd the pot. Overcrowding lowers the oil temperature and results in soggy shrimp.
- Fry the shrimp for 2 to 3 minutes per side, turning once, until they are golden brown and cooked through. The internal temperature should reach 145 degrees Fahrenheit (63 degrees Celsius).
- Remove the fried shrimp with a slotted spoon and place them on a wire rack set over a baking sheet to drain excess oil. Do not place them directly on paper towels, as this traps steam and reduces crispiness.
- Repeat the frying process with the remaining shrimp, allowing the oil temperature to return to 350 degrees Fahrenheit between batches.
- Serve your crispy fried shrimp immediately with lemon wedges or your favorite dipping sauce.
Notes
- For extra crispy shrimp, you can use a double dredge: dip the shrimp in the buttermilk, then flour, then back into the buttermilk, and finally back into the flour mixture before frying.
- Use a neutral oil with a high smoke point, like peanut or vegetable oil, for the best results when deep frying.
- If you prefer a lighter coating, you can skip the cornstarch in the dry mix, but the cornstarch contributes significantly to the final crisp factor.
Nutrition
- Serving Size: 6 shrimp
- Calories: 380
- Sugar: 2
- Sodium: 750
- Fat: 20
- Saturated Fat: 4
- Unsaturated Fat: 16
- Trans Fat: 0
- Carbohydrates: 25
- Fiber: 1
- Protein: 28
- Cholesterol: 210