
Oh, when the air gets crisp and you just need that hug from a dessert, nothing beats a bubbling, sweet fruit bake, right? Forget complicated layered cakes; we are talking about pure, unadulterated comfort. That’s exactly why I’m sharing what I truly believe is the Best Easy Apple Cobbler you’ll ever make, complete with that glorious, golden buttery biscuit topping. This is the centerpiece of my best Fall baking ideas, straight from the heart of American home cooking tradition that our founder learned in her Midwestern kitchen. This apple cobbler recipe just works—it’s forgiving, fast, and tastes like true home. We love keeping things simple but perfect here, and this bake proves it!
- Why This Easy Apple Cobbler Recipe Reigns Supreme
- Gathering Ingredients for Your Homemade Apple Cobbler
- Step-by-Step Instructions for the Best Apple Cobbler
- Tips for a Flawless Homemade Apple Cobbler
- Serving Suggestions for Your Sweet Apple Bake
- Storage and Reheating Instructions for Apple Cobbler
- Frequently Asked Questions About This Quick Apple Dessert
- Nutritional Estimates for Your Apple Cobbler Serving
- Share Your Cozy Autumn Desserts Experience
Why This Easy Apple Cobbler Recipe Reigns Supreme
I know there are a million apple desserts out there, but trust me when I say this one earns its title. It nails the trifecta: super easy prep, intensely flavorful filling, and a topping that just melts in your mouth. If you’re looking for a dependable Easy Apple Cobbler Recipe that delivers on every single promise, you’ve found it. It’s the definition of a true classic Comfort Food Dessert because it leans into tradition without requiring any fuss.
Tender Cinnamon Spiced Apples
The secret to the filling isn’t just the spice—though we sure load it up with cinnamon and nutmeg! It’s about balancing the apples. I always use a mix of Granny Smith for that necessary tartness and Honeycrisp because they hold their shape beautifully when baked. A tiny splash of lemon juice brightens everything up and stops the sugars from getting too heavy. The goal here is perfectly tender Cinnamon Spiced Apples that are saucy, not mushy, when you finally dig in.
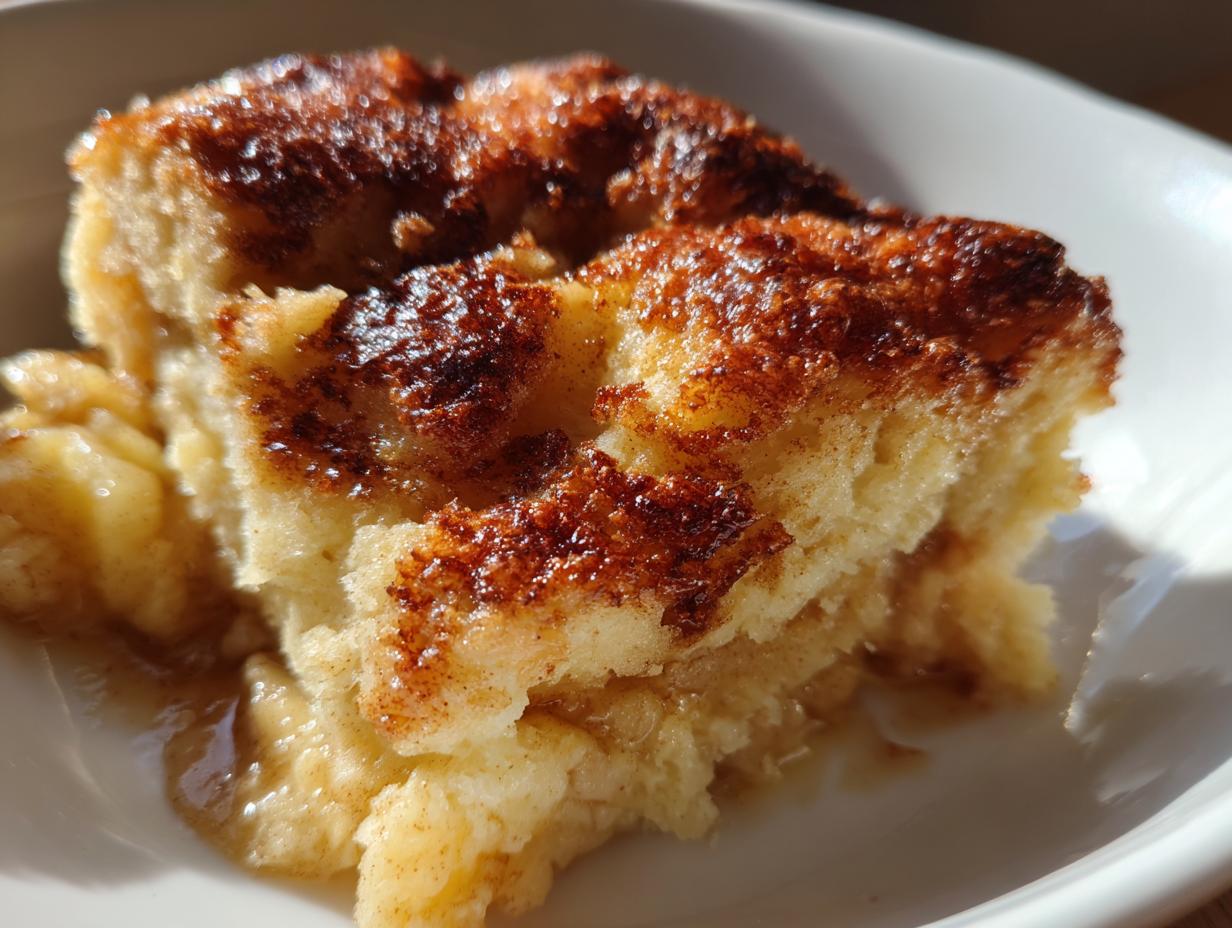
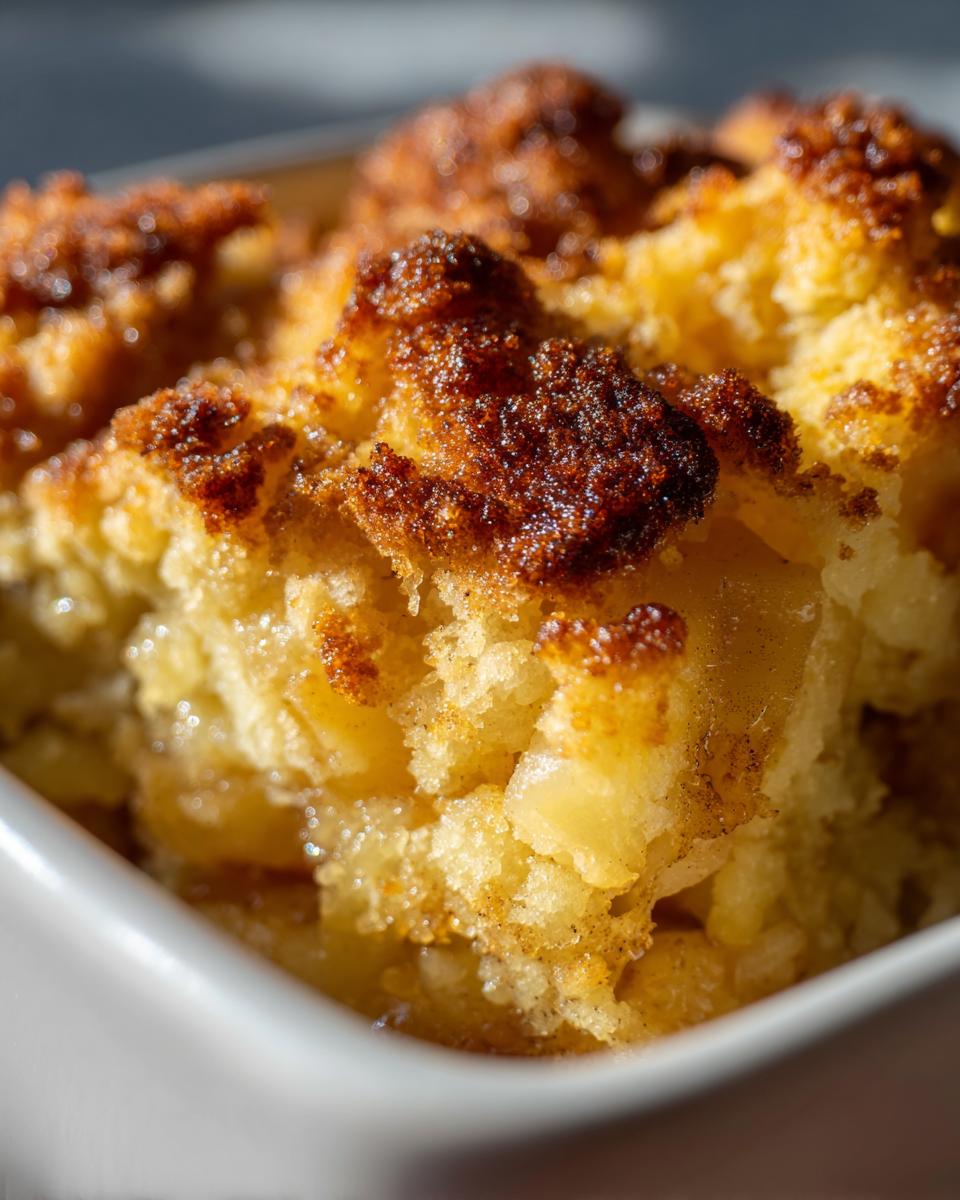
The Golden Buttery Biscuit Topping Recipe
This topping isn’t runny like a crisp, and it isn’t sticky like a streusel. It bakes up right into this lovely, golden-brown blanket that’s halfway between a fluffy biscuit and a cakey crust. It’s all thanks to using cold butter and buttermilk in the mixture. This Buttery Topping Recipe comes together in five minutes flat, but it bakes into a golden textural dream over those warm apples. It truly makes this recipe feel special.
Gathering Ingredients for Your Homemade Apple Cobbler
Okay, pulling together your ingredients for this beloved Homemade Apple Cobbler is really the quickest part of the whole process, but we have to be precise! We need two distinct ingredient piles: one for the juicy bottom layer and one for that amazing biscuit top. Don’t try to substitute the apples, trust me! For the filling, make sure you have your peeled and sliced Granny Smiths ready, along with all our essential spices like cinnamon and nutmeg.
For the topping, using very cold butter is non-negotiable—it’s what gives us that crumbly, tender texture. Here’s what you’ll need to pull together your perfect batch:
- For the Filling: 6 medium apples (Granny Smith or Honeycrisp are my go-tos), 1/2 cup granulated sugar, 1/4 cup brown sugar, 1 tablespoon flour, 1 teaspoon cinnamon, 1/4 teaspoon nutmeg, 1 tablespoon lemon juice, and 1/4 cup cold unsalted butter, cut into tiny pieces.
- For the Buttery Topping: 1 1/2 cups all-purpose flour, 1/4 cup granulated sugar, 1 teaspoon baking powder, 1/2 teaspoon salt, 1/2 cup (that’s one full stick) cold unsalted butter, cut into small cubes. Oh, and don’t forget the 1/2 cup of buttermilk!
Step-by-Step Instructions for the Best Apple Cobbler
This is where the magic actually happens! Don’t rush this part, but honestly, it moves so quickly because we aren’t rolling out pie dough or anything fancy. Preheat your oven right away to 375 degrees and give that 8×8 baking dish a little grease rubdown so nothing sticks later on. You want everything prepped before you mix the topping, because those topping ingredients need to stay cold!
Preparing the Cinnamon Apple Filling
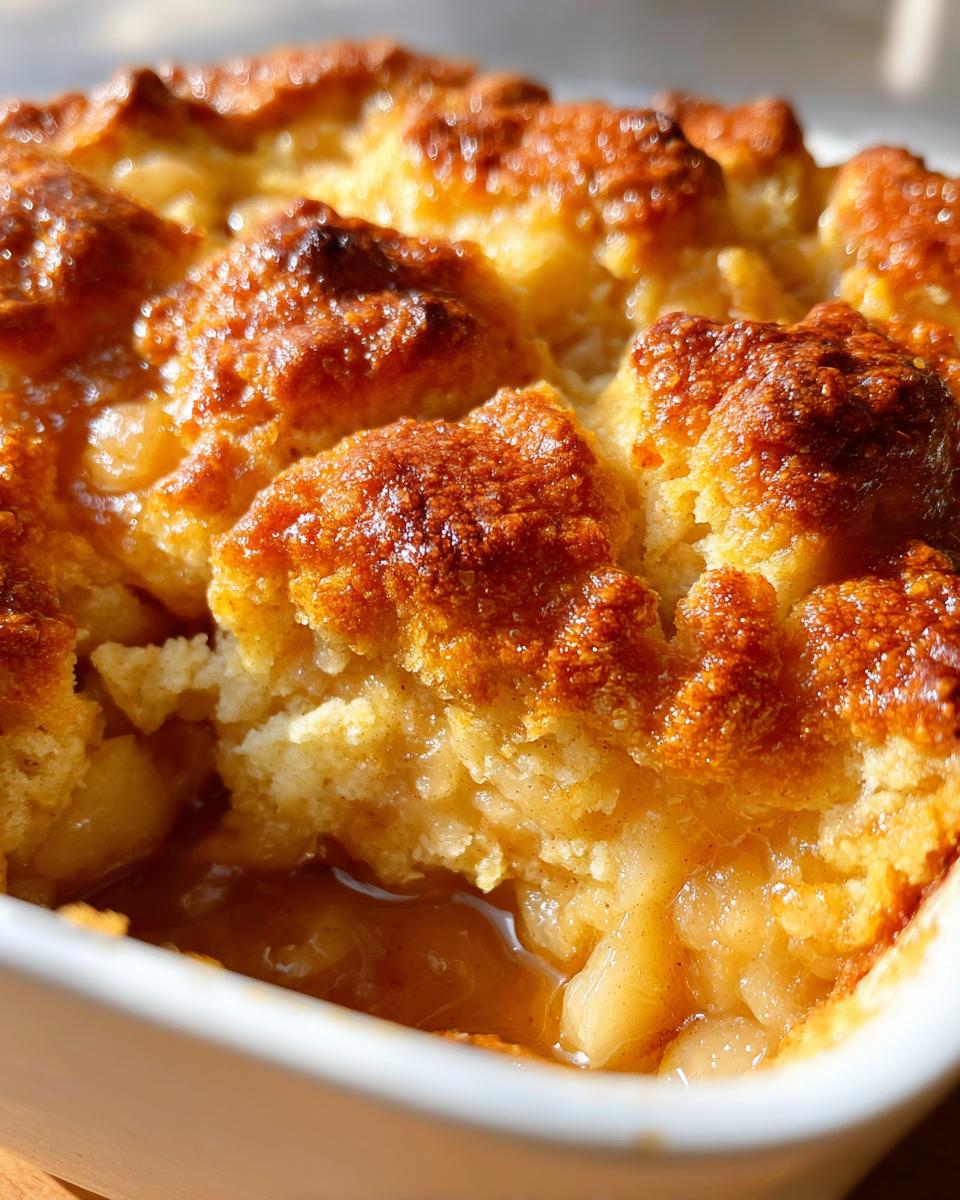
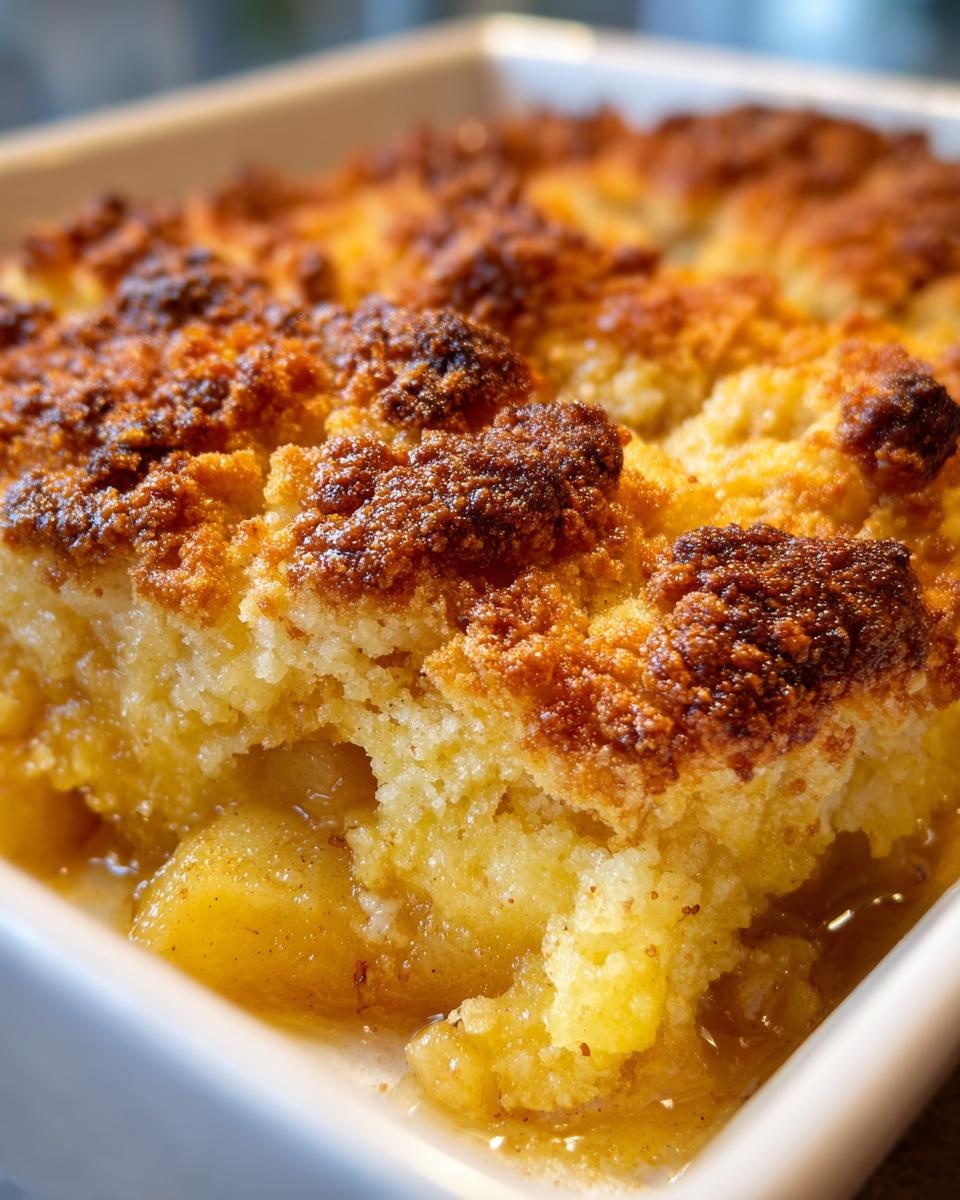
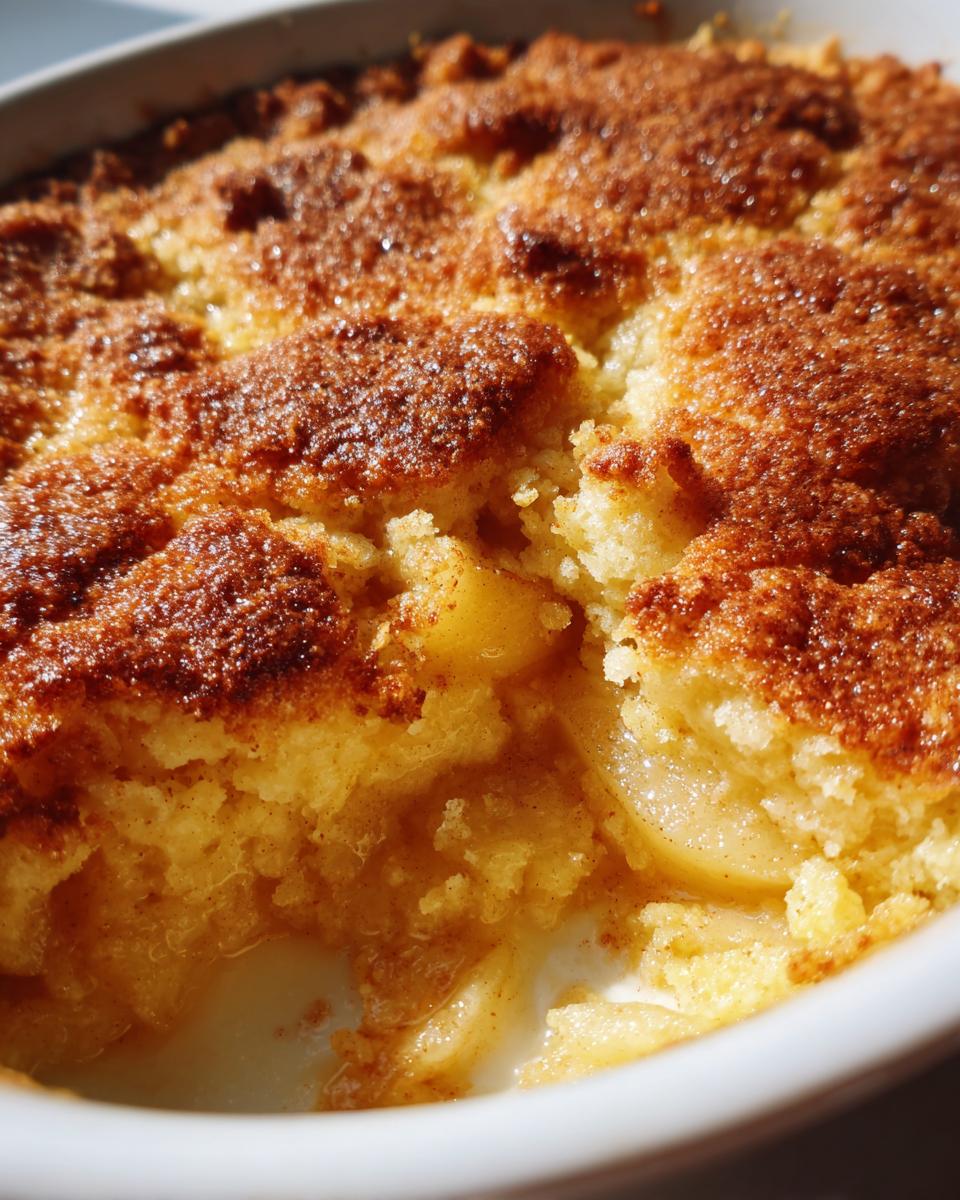
Grab your biggest mixing bowl—we need room to toss everything around without crushing those beautiful apple slices. Toss those peeled, cored apples with both sugars, the tiny bit of flour we use as a thickener, all the heavenly cinnamon and nutmeg, and that bright lemon juice. Be gentle when you toss; we want them coated, not bruised. Once they look perfectly glossy, pour that whole mix right into your prepared dish. Now, here’s a small trick: take that 1/4 cup of cold butter pieces and dot them all around the top of the apples. They’ll melt down while baking, creating little pockets of buttery flavor right under the crust!
Making and Applying the Buttery Topping for Your Apple Cobbler
Time for the biscuit topping! In a separate bowl, whisk together the dry stuff: flour, sugar, baking powder, and salt. Now, the crucial part for that amazing texture: cut in the 1/2 cup of cold butter cubes. You want the pieces to look like little peas, not sand. If your kitchen is warm, stick the bowl in the freezer for five minutes first—that cold butter is essential! Once you have those coarse crumbs, pour in the buttermilk. Only stir until it *just* comes together. Seriously, stop mixing the second the streaks disappear. We are making an apple cobbler here, not bread! Drop big spoonfuls of that dough evenly over the apples. Don’t worry about covering every bit; those gaps let the steam out and let the apples bubble up, which is what we want.
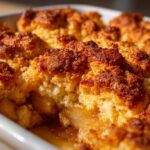
Baking Time and Resting the Warm Cobbler Dessert
If you remembered that optional coarse sugar, sprinkle it on now for extra twinkle and crunch! Pop the whole dish into that 375-degree oven for about 40 to 50 minutes. You’ll know it’s done when the topping is beautifully golden brown—like a perfect biscuit crust topping—and you can see the fruit filling bubbling hard around the edges. Before you even *think* about grabbing a spoon, though, you absolutely must let this Warm Cobbler Dessert rest for 15 minutes. This lets the juices settle down so you get a clean scoop instead of a watery mess. Then, go grab that vanilla ice cream!
I actually found a great inspiration piece that talks about how the topping should mimic a snickerdoodle—that’s exactly the vibe we’re going for!
Tips for a Flawless Homemade Apple Cobbler
Even though this recipe is wonderfully straightforward, I always have a few little secrets I rely on to make sure every single batch turns out perfect. You know, the kind of tips you only learn after baking twenty batches trying to get it *just right*. This isn’t just throwing fruit in a pan; it’s about making informed tweaks that suit your apples and your family’s sweet tooth.
Ingredient Adjustments for Your Apple Cobbler
First thing: sugar. If you happen to be using super sweet apples like Gala or Fuji, don’t hesitate to cut back on the total sugar in the filling by maybe two tablespoons. The fruit’s natural sweetness has changed over the years, so tasting the mix first is always smart. Also, if you want a slightly richer texture in that beautiful topping, you can totally swap out half of the regular all-purpose flour for whole wheat flour. It gives the crust a nice, subtle nutty flavor without changing the wonderful biscuit texture. It’s my little way of making this classic dessert just a touch healthier without anyone noticing!
Serving Suggestions for Your Sweet Apple Bake
Look, once this apple cobbler comes out of the oven, you’re going to want to attack it immediately, but give it just a few minutes to breathe! The biggest rule for serving any warm fruit bake is to serve it warm, never piping hot. That’s when the magic happens. The steam should still be rising, making the cinnamon smell absolutely intoxicating.
And you know what makes everything better? Something cold to contrast that warmth. This dish demands ice cream—I’m talking a giant scoop of high-quality vanilla bean melting slowly onto the golden topping. If you’re feeling fancy, a drizzle of caramel sauce over the top of the ice cream changes the whole game. It’s the perfect combination for the ultimate Desserts with Ice Cream experience. I saw someone suggest whipped cream flavored with a little bourbon another time, but honestly, plain vanilla is king here!
Storage and Reheating Instructions for Apple Cobbler
So, if you happen to have any leftovers—which I seriously doubt, but hey, we can hope!—you want to store your apple cobbler correctly. Just cover that dish tightly with plastic wrap or foil once it’s cooled down completely to room temperature. It keeps beautifully on the counter or in the fridge for about three days. It’s still tasty the next day, I promise!
When you want to reheat it, skip the microwave if you can! We need that topping crispy again. Pop the slice, or the whole dish, into a 350-degree oven for about 10 to 15 minutes. That gentle heat warms the apples without turning the buttery topping into mush. Serve it right away while it’s steaming!
Frequently Asked Questions About This Quick Apple Dessert
I always end up with a million questions whenever I try a new recipe, so I figured I’d tackle a few things I get asked about this glorious bake all the time. It’s so important to feel confident making any Comfort Food Dessert, so let’s clear up any doubts about making your very own version!
Can I substitute the apples in this apple cobbler recipe?
Yes, absolutely! While the recipe is designed around those firm, slightly tart apples, you can definitely use other sturdy fruits. Firm pears work beautifully, or if you have some early autumn peaches, you can swap them in. Just remember one thing: if you use softer fruit, you might need to knock 5 to 10 minutes off the baking time so they don’t turn to complete mush. Keep checking on it around the 40-minute mark!
What is the best way to achieve a crisp topping on my apple cobbler?
This is all about temperature control, honey! The main reason the topping gets that gorgeous, golden crunch we love is because we use ice-cold butter and buttermilk. When those tiny, cold butter pieces hit the hot oven, they create steam pockets that puff up instantly, resulting in that lovely texture—think fluffy biscuit meets slight crunch. Also, make sure your oven is fully preheated to 375 degrees before it goes in. Don’t let it sit on the counter waiting for the oven to warm up!
Nutritional Estimates for Your Apple Cobbler Serving
Now, I know when we’re talking about an old fashioned apple cobbler made with real butter and sugar, we aren’t exactly dialing in for a salad, right? But, it’s important to know what you’re serving up! Here are the general estimates for one generous slice of this wonderful dessert. These numbers are based on standard ingredient amounts, so keep in mind that if you sneak an extra tablespoon of butter into the filling (I totally wouldn’t blame you!), things might shift a little.
This table gives you a good idea of what’s in each generous helping:
- Serving Size: 1 serving
- Calories: 410
- Sugar: 35g
- Sodium: 280mg
- Fat: 19g
- Saturated Fat: 11g
- Unsaturated Fat: 8g
- Trans Fat: 0.5g
- Carbohydrates: 60g
- Fiber: 4g
- Protein: 5g
- Cholesterol: 45mg
It’s a solid dose of warmth and comfort, perfect for serving alongside a high-quality vanilla ice cream. Enjoy it, because this is the kind of bake you make for joy, not just for the macros!
Share Your Cozy Autumn Desserts Experience
Now that you have the secrets to the Best Easy Apple Cobbler, the only thing left to do is get baking! I genuinely can’t wait for you to experience that moment—the smell hitting your kitchen, the bubbling filling contrasting with that golden, crisp topping. It just screams comfort, doesn’t it?
Once you pull this beauty out of the oven—and please, wait those crucial 15 minutes before digging in—I really want to hear all about it! Did you use Granny Smiths or maybe try the whole wheat flour trick in the topping? Hop down to the comments below and tell me what worked best for you.
It would make my entire year if you rated this recipe for others looking for great Cozy Autumn Desserts. If you snapped a picture of your finished bake, especially if you served it up for a family gathering or holiday, tag us! We love seeing our recipes come to life in your homes. If you have any lingering questions or just want to send a note, you can always reach out through our contact page. Happy baking, friends!
PrintThe Best Easy Apple Cobbler: Tender Cinnamon Apples with a Golden Buttery Biscuit Topping
Make this easy apple cobbler featuring tender, cinnamon-spiced apples covered with a golden, buttery biscuit topping. This recipe delivers classic comfort food flavor simply.
- Prep Time: 20 min
- Cook Time: 50 min
- Total Time: 70 min
- Yield: 6 servings 1x
- Category: Dessert
- Method: Baking
- Cuisine: American
- Diet: Vegetarian
Ingredients
- 6 medium apples (like Granny Smith or Honeycrisp), peeled, cored, and sliced
- 1/2 cup granulated sugar
- 1/4 cup packed light brown sugar
- 1 tablespoon all-purpose flour
- 1 teaspoon ground cinnamon
- 1/4 teaspoon ground nutmeg
- 1 tablespoon lemon juice
- 1/4 cup cold unsalted butter, cut into small pieces (for the filling)
- 1 1/2 cups all-purpose flour (for the topping)
- 1/4 cup granulated sugar (for the topping)
- 1 teaspoon baking powder
- 1/2 teaspoon salt
- 1/2 cup (1 stick) cold unsalted butter, cut into small cubes (for the topping)
- 1/2 cup buttermilk (or whole milk)
- 1 tablespoon coarse sugar, for sprinkling (optional)
Instructions
- Preheat your oven to 375 degrees Fahrenheit. Lightly grease an 8×8 inch baking dish or a similar 2-quart casserole dish.
- In a large bowl, combine the sliced apples, granulated sugar, brown sugar, 1 tablespoon flour, cinnamon, nutmeg, and lemon juice. Toss gently until the apples are evenly coated.
- Pour the apple mixture into the prepared baking dish. Dot the top of the apples evenly with the 1/4 cup of cold butter pieces.
- Prepare the topping: In a separate medium bowl, whisk together the 1 1/2 cups flour, 1/4 cup sugar, baking powder, and salt.
- Cut in the 1/2 cup cold butter cubes using a pastry blender or your fingertips until the mixture resembles coarse crumbs with some pea-sized pieces remaining.
- Pour in the buttermilk and stir just until the dough comes together. Do not overmix.
- Drop spoonfuls of the biscuit topping evenly over the apple filling, leaving small gaps between the mounds.
- Sprinkle the top with coarse sugar, if using.
- Bake for 40 to 50 minutes, or until the topping is golden brown and the apple filling is bubbly and tender when pierced with a fork.
- Let the cobbler cool for at least 15 minutes before serving warm with vanilla ice cream.
Notes
- For a richer flavor, substitute half of the all-purpose flour in the topping with whole wheat flour.
- If your apples are very sweet, reduce the total sugar in the filling by 2 tablespoons.
- This cobbler tastes best when served warm, straight from the oven.
Nutrition
- Serving Size: 1 serving
- Calories: 410
- Sugar: 35g
- Sodium: 280mg
- Fat: 19g
- Saturated Fat: 11g
- Unsaturated Fat: 8g
- Trans Fat: 0.5g
- Carbohydrates: 60g
- Fiber: 4g
- Protein: 5g
- Cholesterol: 45mg