

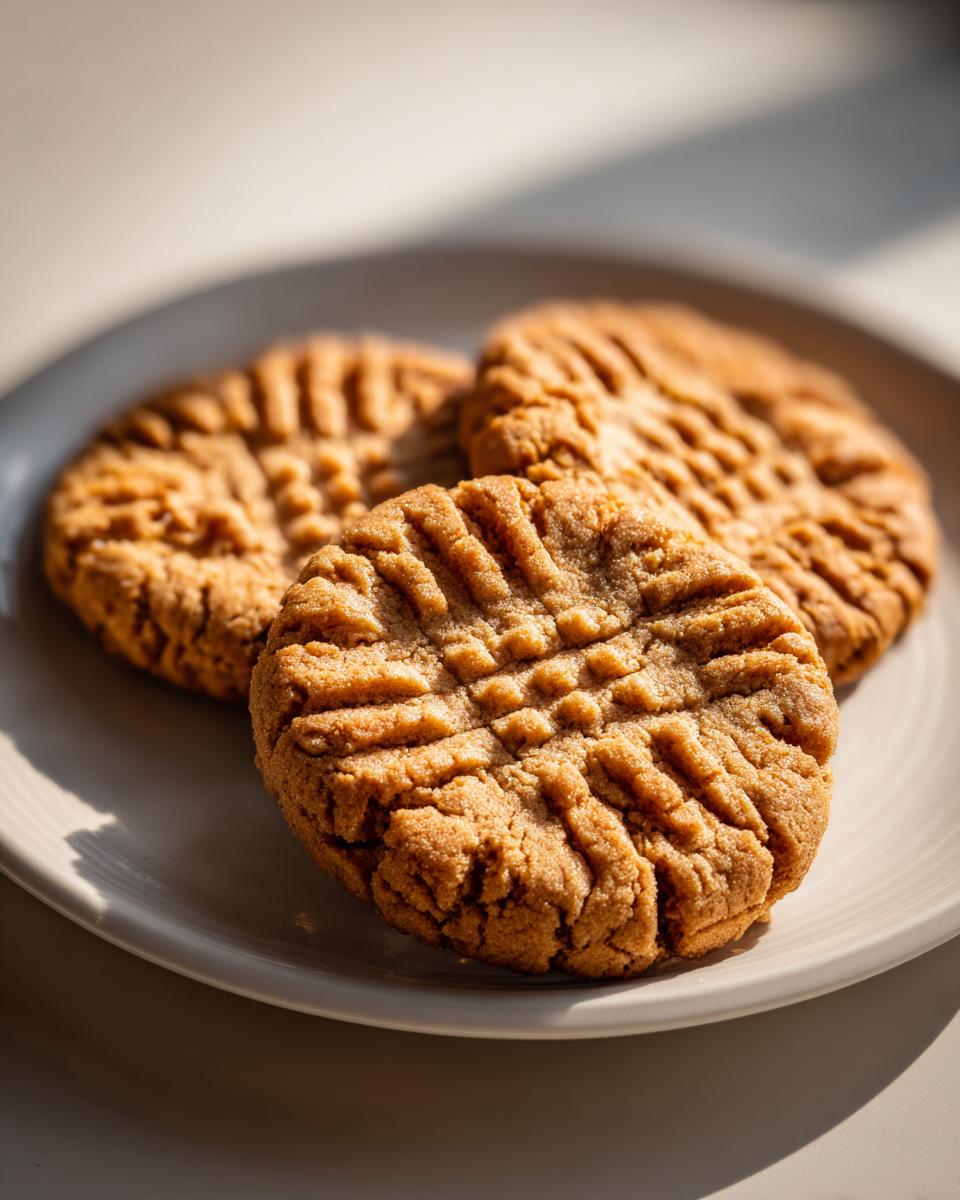
There is just something about a classic baked good that hits different, isn’t there? If you’re hunting for the absolute, hands-down, best peanut butter cookies you will ever make, stop right here. This isn’t just another recipe; this is the one that finally nails that incredible, perfect balance. I’m talking super tempting crispy edges that snap just right, giving way to a rich, tender center. That classic fork crosshatch? That’s tradition right there, and it’s non-negotiable for these beauties! Here at Cookery Command, we take reliability seriously, bringing you time-honored American home cooking that just works, every single time. We build recipes on a foundation of tradition and technique, and these cookies prove it.
- Why This is the Best Way to Make Peanut Butter Cookies
- Gathering Ingredients for Classic Peanut Butter Cookies
- Step-by-Step Instructions for Homemade Peanut Butter Cookies
- Tips for Perfect Classic Cookie Recipes Success
- Variations on Traditional Cookies
- Storing and Keeping Your Peanut Butter Cookies Fresh
- Frequently Asked Questions About Peanut Butter Cookies
- Estimated Nutritional Data for Peanut Butter Cookies
- Share Your Homemade Peanut Butter Cookies Creations
Why This is the Best Way to Make Peanut Butter Cookies
Trust me, I’ve been through batches that came out crumbly or maybe just too cakey. The magic in these classic peanut butter cookies really comes down to a few stubborn rules I learned early on. We use both white and brown sugar here! The granulated sugar helps those edges brown up beautifully and get that lovely crispness you crave. Meanwhile, the brown sugar brings molasses notes and keeps the center soft and chewy. That’s how we nail the crispy-tender goal every time!
This method respects the dough; we don’t beat it into submission. It’s all about building a solid structure that bakes up just right without drying out.
Achieving the Perfect Crispy Tender Cookies Texture
The secret sauce? It’s the ratio of that softened butter combined with the two sugars working together. Butter melts evenly, giving us predictable spread and that sought-after delicate crispness around the perimeter. We absolutely must not overmix once the flour goes in. Seriously, as soon as you see those dry streaks disappear, stop the mixer! Overmixing develops too much gluten, and you end up with a tough cookie instead of that perfect, tender bite right in the middle.
Gathering Ingredients for Classic Peanut Butter Cookies
You can’t just throw anything into the bowl and expect cookie perfection, right? Since these are such straightforward, classic peanut butter cookies, every single item plays a massive role in the final texture. If you want true success in your peanut butter baking adventures, you need to treat your ingredients with respect. I’ve listed exactly what you need below. Stick to the list, and these cookies will bake up beautifully!
Ingredient Specifications and Preparation
- 1 cup (2 sticks) unsalted butter, softened—this means you should be able to press a finger into it gently, but it shouldn’t be greasy or melty!
- 1 cup granulated sugar
- 1 cup packed light brown sugar—make sure you pack it tightly into the measuring cup!
- 1 cup creamy peanut butter—I cannot stress this enough: use the smooth, stabilized kind, like Jif or Skippy. The natural, oily kind separates and messes with the structure!
- 2 large eggs, room temperature is best for smooth mixing
- 1 teaspoon vanilla extract
- 2 1/2 cups all-purpose flour, remember to spoon this into the cup and level it off—don’t scoop!
- 1 teaspoon baking soda
- 1/2 teaspoon baking powder
- 1/2 teaspoon salt
Getting the peanut butter right is half the battle with traditional cookies. If you use the natural, separated stuff, you’ll end up with a greasy mess that won’t hold its shape. We want that dense, sturdy dough that presses perfectly under the fork, and that only happens with a good, creamy peanut butter.
Step-by-Step Instructions for Homemade Peanut Butter Cookies
Okay, we’ve got our perfect ingredients ready, so now it’s time for the fun part! You want to make sure you’ve got those baking sheets lined with parchment paper first. This is just good practice so you don’t have to scrape baked-on bottoms later. Preheat that oven to 375 degrees F right now so it’s ready when the dough is. Get ready to mix because these go fast once you start!
Mixing the Wet and Dry Components for Peanut Butter Cookies
Grab your big mixing bowl! We start by creaming that softened butter with both the white and brown sugars until it gets nice and fluffy—it should look lighter in color. Then, the peanut butter slides in. Don’t rush the eggs; add them one at a time, waiting until the first one is fully incorporated before dropping in the second one. A splash of vanilla finishes the wet side.
In a separate bowl, take a minute to whisk your flour, baking soda, baking powder, and salt together. This just makes sure everything levels out before it meets the wet stuff. When you add the dry ingredients to the wet, keep that mixer on low! Only mix until you stop seeing streaks of flour. Seriously, stop! Overmixing is the fastest way to ruin the tender center we are aiming for.
Shaping and Creating the Signature Crosshatch Pattern
Now for the shaping! I use a rounded tablespoon for scooping, which keeps my cookies fairly consistent. Drop them onto your prepared sheets about two inches apart because they will spread out a little bit. This is where we honor tradition: grab that fork! You want to press down firmly to flatten the ball slightly—that’s the first direction. Then, without lifting the fork completely, just rotate it 90 degrees and press again.
That double press gives you those beautiful little squares on top. That pattern isn’t just for looks, though—it helps the thicker center cook evenly compared to the edges! If you see them start to look crumbly while pressing, your dough might be a touch too dry, but don’t worry, they’ll still taste amazing.
Baking Times and Cooling Peanut Butter Cookies
Into the 375-degree oven they go for about 9 to 11 minutes. Here’s the critical visual cue: you want those edges to look beautifully golden brown and set. Don’t freak out if the very center still looks a tiny bit soft or puffy; they finish baking outside the oven! They need 5 whole minutes sitting right there on the hot baking sheet to firm up before you touch them. If you try to move them too soon, they *will* crack or break apart on you.
After that 5-minute rest, gently move them over to a wire rack to cool completely. This cooling process is what locks in that perfect blend of crispy edge and chewy middle for the best homemade peanut butter cookies!
Tips for Perfect Classic Cookie Recipes Success
We’ve got a classic cookie recipe here that is incredibly reliable, but even the classics can benefit from a little insider knowledge, right? I’ve gathered up the little things I do every single time to ensure these homemade peanut butter cookies are absolutely flawless. Using these pointers guarantees you get that wonderful texture we talked about—crispy on the outside, soft on the inside!
Ingredient Temperature and Peanut Butter Choice for Peanut Butter Cookies
Listen, the temperature of your butter haunts your cookie texture, I’m telling you! It needs to be softened—that means it yields just slightly when you press it—but absolutely NOT melted. Melted butter spreads too fast and makes crispy-tender cookies turn into thin, greasy wafers. Keep that in mind when you’re setting out your ingredients!
And we’re back to the peanut butter! If you happen to be using that super natural, oily kind where you have to stir the cream back into the oil, please skip it for this recipe. That added oil makes the dough soft and runny, and you won’t get the defined crosshatch or the proper structure. Stick to the creamy, stabilizer kind for the best results. Now, if you live somewhere super hot, or if your kitchen gets toasty while you’re mixing, don’t hesitate! Scoop the dough balls onto the tray, stick them in the fridge for 10 or 15 minutes before you press the fork in. A brief chill helps them keep their shape beautifully when they hit the heat!
Variations on Traditional Cookies
While this recipe stands tall as one of the greatest traditional cookies because of its simplicity and perfect texture, I know we all get the urge to shake things up a little bit once in a while! The beauty of having such a straightforward, reliable base recipe for our peanut butter cookies is that you can experiment without too much fear of total disaster.
I always encourage people to try small shifts first, especially since we want to keep that glorious crispy-tender structure intact. You don’t want to lose the essence of what makes a classic peanut butter cookie great!
Adding Fun Mix-Ins
The easiest way to change things up is by stirring in something extra right at the very end when the flour mixture is *just* combined. My go-to addition is semi-sweet chocolate chips. Fold in about one cup of chips for an incredible sweet and salty combination. The chocolate melts slightly while baking, giving you those beautiful little pockets of melted goodness.
You could also try adding chopped nuts if you want more crunch, but make sure they are dry-roasted and chopped small so they don’t interfere with the dough consistency too much. Anything overly moist will just throw off our careful balance!
Experimenting with Different Nut Butters
Sometimes I get curious and wonder what would happen if I used almond butter or cashew butter instead of peanut butter. You *can* try this, but I have to give you a big warning label right here first! The structure and fat content of different nut butters vary wildly.
If you swap it out, your cookie might spread more, bake differently, or end up much oilier because the stabilizers aren’t the same. If you try it, make sure the replacement butter is nice and stiff, not oily at the bottom of the jar. It truly is a fun experiment for smaller batches, but for your first time making these, stick to classic creamy peanut butter to guarantee that perfect result we worked so hard for!
Storing and Keeping Your Peanut Butter Cookies Fresh
Whew! You made it through a whole batch of these incredible homemade peanut butter cookies, and now you might have to resist eating them all tonight! Good news: they keep really well, which is perfect because they are fantastic for lunchboxes or having on hand for a quick craving later in the week. You want to make sure you lock in that texture we worked so hard to achieve—the crispy edges and the tender heart.
The number one rule, always, is airtight storage. Moisture is the enemy of crispness! I always let my cookies cool completely—and I mean *completely*—to room temperature first. If you trap any heat inside the container, that condensation will make your adorable cookies soft and sticky, and we definitely don’t want that.
Once fully cool, tuck them into a container with a tight-sealing lid. They are honestly still amazing for about 4 or 5 days sitting right on your counter. Since they are so rich in fat, they stay surprisingly fresh. Just make sure you keep them separated from any softer, high-moisture cookies like oatmeal raisin, because they might trade textures with each other!
Bringing Back the Crunch After a Few Days
Now, after day three or four, you might notice those lovely edges have softened up just a hair. Don’t despair! You don’t have to make a new batch. This is my favorite little trick for bringing back that initial, happy snap. Just pop two or three of the peanut butter cookies onto a microwave-safe plate.
Microwave them for just 8 to 10 seconds—no more than 15! This short blast of heat warms everything up, evaporates some of that mild excess humidity, and actually helps redefine that edge crispness. You’ll want to eat them immediately after this, though, because they will soften again as they cool down completely. It’s a perfect little emergency crispness revival system for when you just *need* that perfect bite!
Freezing Peanut Butter Cookies for Later
If you realize you baked way too many, don’t worry about them going stale! These classic peanut butter cookies freeze like a dream. We’re talking about keeping them perfect for up to three months. I stack them in a single layer inside a heavy-duty, freezer-safe bag, separating the layers with a small square of wax paper so they don’t stick together. Make sure you press out as much air as you can before zipping that bag shut.
When you’re ready for a nostalgic treat, just pull out how many you want, let them thaw on the counter for about an hour, and enjoy! They hold up beautifully, and you’ll have a ready-made, traditional cookie on hand whenever the craving strikes!
Frequently Asked Questions About Peanut Butter Cookies
Oh, I get so many questions about these classic peanut butter cookies! It’s totally normal; we all want to make sure our favorite traditional cookies turn out perfect. I tried to cover everything in the recipe steps, but here are a few extra bits of wisdom I’ve picked up over the years of peanut butter baking!
Can I skip the crosshatch pattern on my classic peanut butter cookies?
Technically, yes, you absolutely can skip the fork press if you’re in an absolute rush! But I really, really urge you not to. That crosshatch pattern isn’t just decorative; it’s functional, especially for this recipe. Since the dough is quite rich, it tends to dome up high in the oven. Pressing it down ensures that the whole cookie flattens out a bit, which is what guarantees you get those lovely crisp edges while the center cooks through evenly. If you skip it, you risk having doughy middles!
What is the best way to measure flour for these peanut butter baking treats?
This is a huge one for achieving the right consistency! Do not, under any circumstances, stick your measuring cup right into the bag of flour and scoop it out. Seriously, stop! When you scoop like that, you pack the flour in, and you can easily end up adding 25% too much flour. That changes everything and makes your cookies dry and crumbly.
Instead, take a spoon and gently fluff up the flour in its container. Then, spoon the flour lightly into your dry measuring cup until it overflows a little bit. Finally, take the back of a straight knife and sweep off the excess flour across the top. That spoon-and-level method is crucial for getting the dough consistency right so we can make the best homemade peanut butter cookies!
Why did my cookies spread too much in the oven?
Usually, spreading too much means one of two things happened, and both relate back to temperature! Either your butter was too warm—melted instead of merely softened—or the dough wasn’t chilled enough before baking if your kitchen was hot. Warm butter melts instantly in the oven, causing the fats to separate and leads to flat cookies. Try chilling the scooped dough balls for that extra 15 minutes next time, and you should see a huge improvement in how well they hold their shape!
Estimated Nutritional Data for Peanut Butter Cookies
Okay, let’s talk about the numbers, because sometimes we want to see the facts, right? Even though these are deeply satisfying, old-fashioned, and absolutely wonderful classic peanut butter cookies, it’s smart to know what’s going into your favorite treat. I’ve put together the estimated nutritional breakdown based on the ingredients listed in this recipe. Keep in mind this information is just a guide—it’s what I worked out, but your exact brand of peanut butter, or how you measure your sugar, can make small differences!
We always aim for transparency around here, and that includes what you’re eating! This data is based on one cookie, assuming the recipe yields exactly 3 dozen, which is a standard serving size for these traditional cookies.
- Serving Size: 1 cookie
- Calories: 180
- Fat: 10g
- Saturated Fat: 4g
- Trans Fat: 0g
- Carbohydrates: 21g
- Sugar: 14g
- Protein: 4g
- Sodium: 110mg
- Cholesterol: 25mg
So, looking at that, we see they are quite rich in flavor thanks to that fat content, which is what gives us that amazing crispy-tender texture we’ve been chasing! But they still deliver a nice punch of protein too. Don’t let the sugar count scare you; for a homemade peanut butter cookie, this is pretty standard for that sweet spot between soft and crisp. Enjoy them happily, knowing you made them yourself with the best ingredients!
Share Your Homemade Peanut Butter Cookies Creations
Well, now you’ve got the very best, most reliable secret to making classic peanut butter cookies that have those irresistible crispy edges and that perfect, soft middle. You absolutely have to try them! I’m standing by here, waiting to hear all about them. Did they come out perfectly golden? Did your family devour them in ten minutes flat?
I really hope you loved this recipe as much as we do, and when you make them, please pop down to the comments section below and leave me a rating! Five stars if they met your crispy-tender expectations! Nothing makes me happier than knowing I’ve shared a recipe that brings reliable joy to someone else’s kitchen.
Don’t forget that this is one of those quintessential American baking classics you’ll want coming back to again and again. Go ahead and save this post to your favorite baking board so you never lose track of the instructions for these genuinely homemade peanut butter cookies. Happy baking, and I can’t wait to see your beautiful, fork-pressed creations!
PrintClassic Peanut Butter Cookies with Crispy Edges
Make the best peanut butter cookies with this reliable recipe that yields a perfect balance of crispy edges and tender centers. These are traditional homemade peanut butter cookies.
- Prep Time: 15 min
- Cook Time: 11 min
- Total Time: 26 min
- Yield: 3 dozen cookies 1x
- Category: Dessert
- Method: Baking
- Cuisine: American
- Diet: Vegetarian
Ingredients
- 1 cup (2 sticks) unsalted butter, softened
- 1 cup granulated sugar
- 1 cup packed light brown sugar
- 1 cup creamy peanut butter
- 2 large eggs
- 1 teaspoon vanilla extract
- 2 1/2 cups all-purpose flour
- 1 teaspoon baking soda
- 1/2 teaspoon baking powder
- 1/2 teaspoon salt
Instructions
- Preheat your oven to 375 degrees F. Line baking sheets with parchment paper.
- In a large bowl, beat the softened butter, granulated sugar, and brown sugar together until creamy.
- Beat in the peanut butter until combined. Add the eggs one at a time, mixing well after each addition. Stir in the vanilla extract.
- In a separate medium bowl, whisk together the flour, baking soda, baking powder, and salt.
- Gradually add the dry ingredients to the wet ingredients, mixing on low speed until just combined. Do not overmix.
- Scoop rounded tablespoons of dough and roll them into balls. Place them 2 inches apart on the prepared baking sheets.
- Use a fork to press down on each dough ball to create a crisscross pattern.
- Bake for 9 to 11 minutes, or until the edges are golden brown. The centers will look slightly soft.
- Let the cookies cool on the baking sheet for 5 minutes before transferring them to a wire rack to cool completely.
Notes
- For the classic crosshatch, press the fork down once, then rotate the fork 90 degrees and press again.
- Use a creamy peanut butter for the best texture, not a natural, oily variety.
- If you prefer softer cookies, reduce the baking time by one minute.
Nutrition
- Serving Size: 1 cookie
- Calories: 180
- Sugar: 14g
- Sodium: 110mg
- Fat: 10g
- Saturated Fat: 4g
- Unsaturated Fat: 6g
- Trans Fat: 0g
- Carbohydrates: 21g
- Fiber: 1g
- Protein: 4g
- Cholesterol: 25mg