
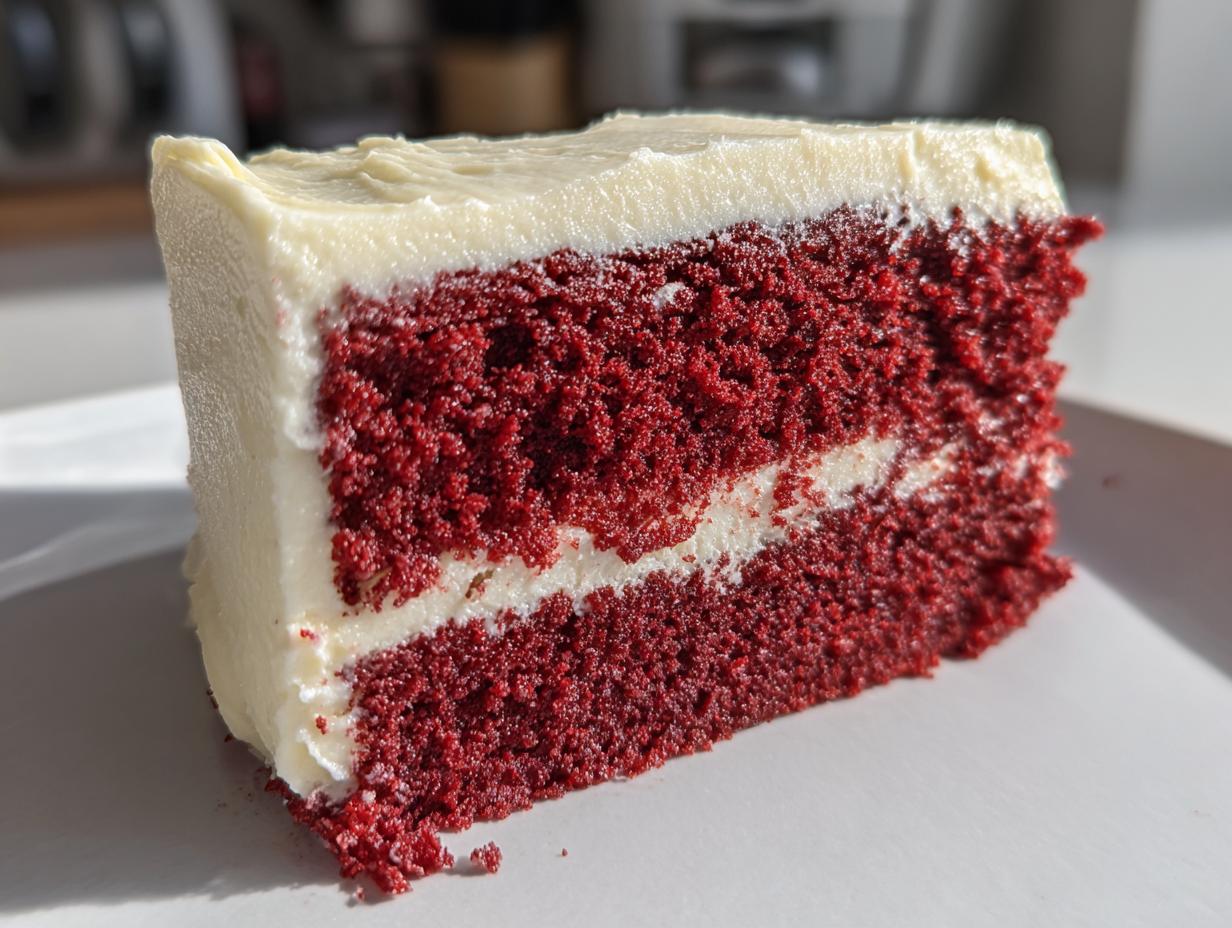
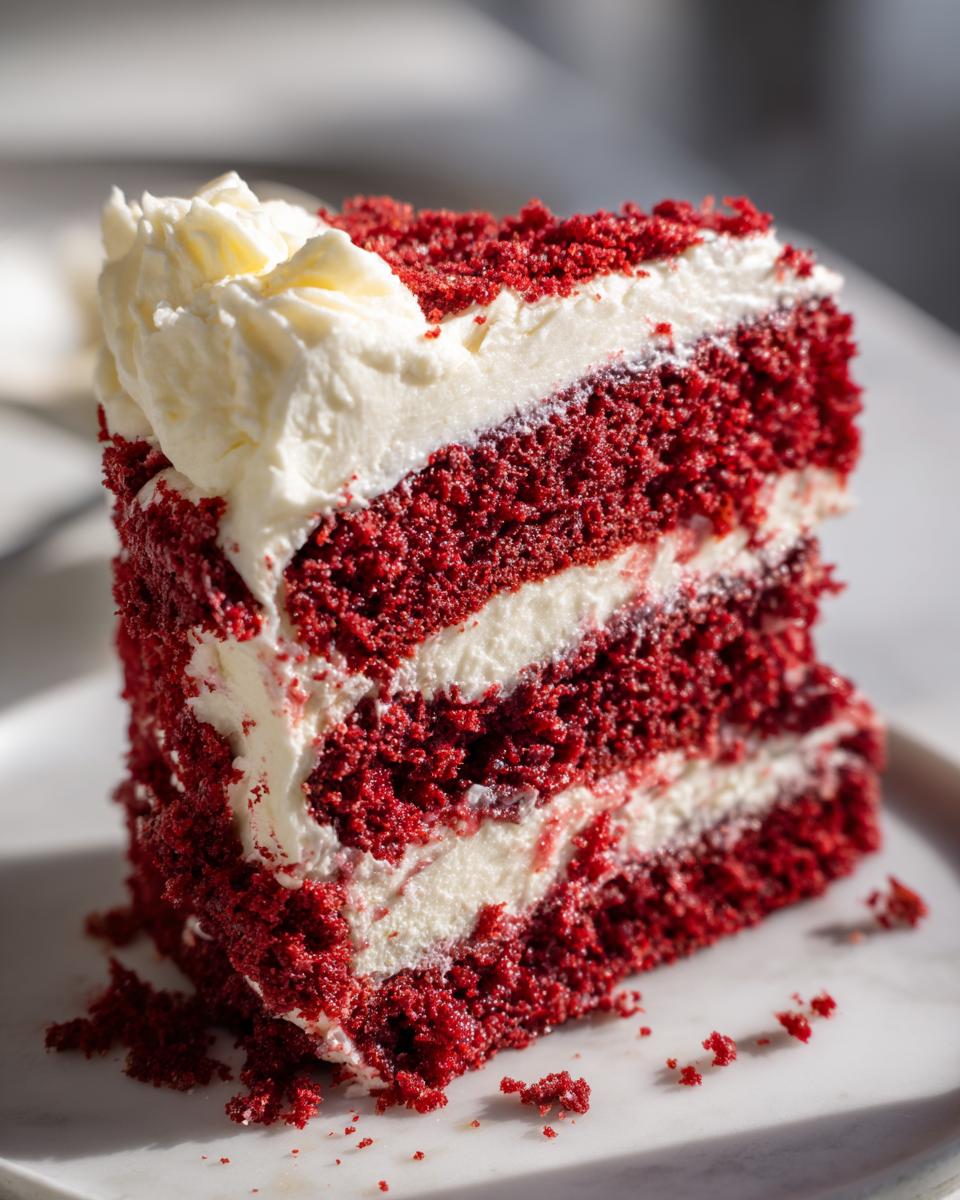
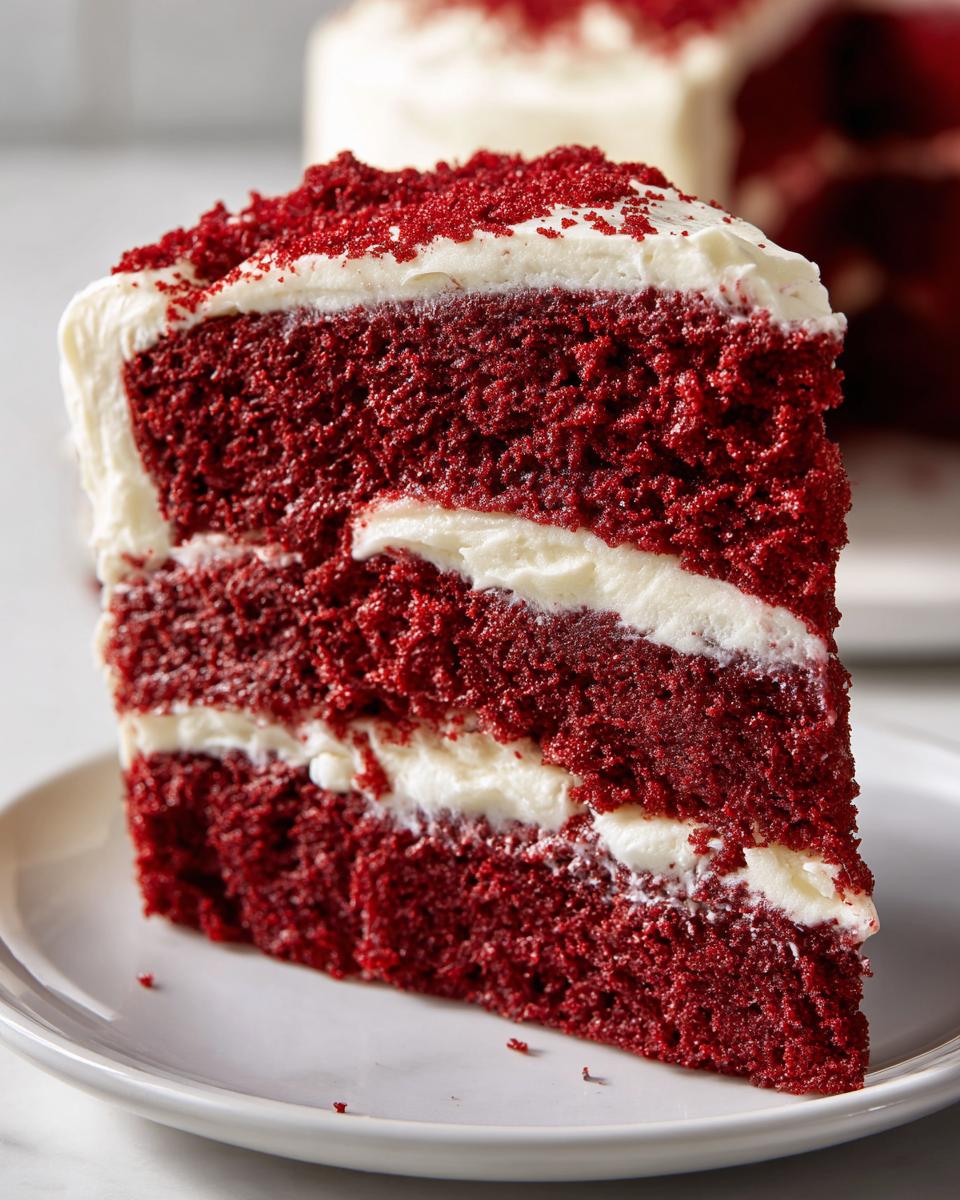
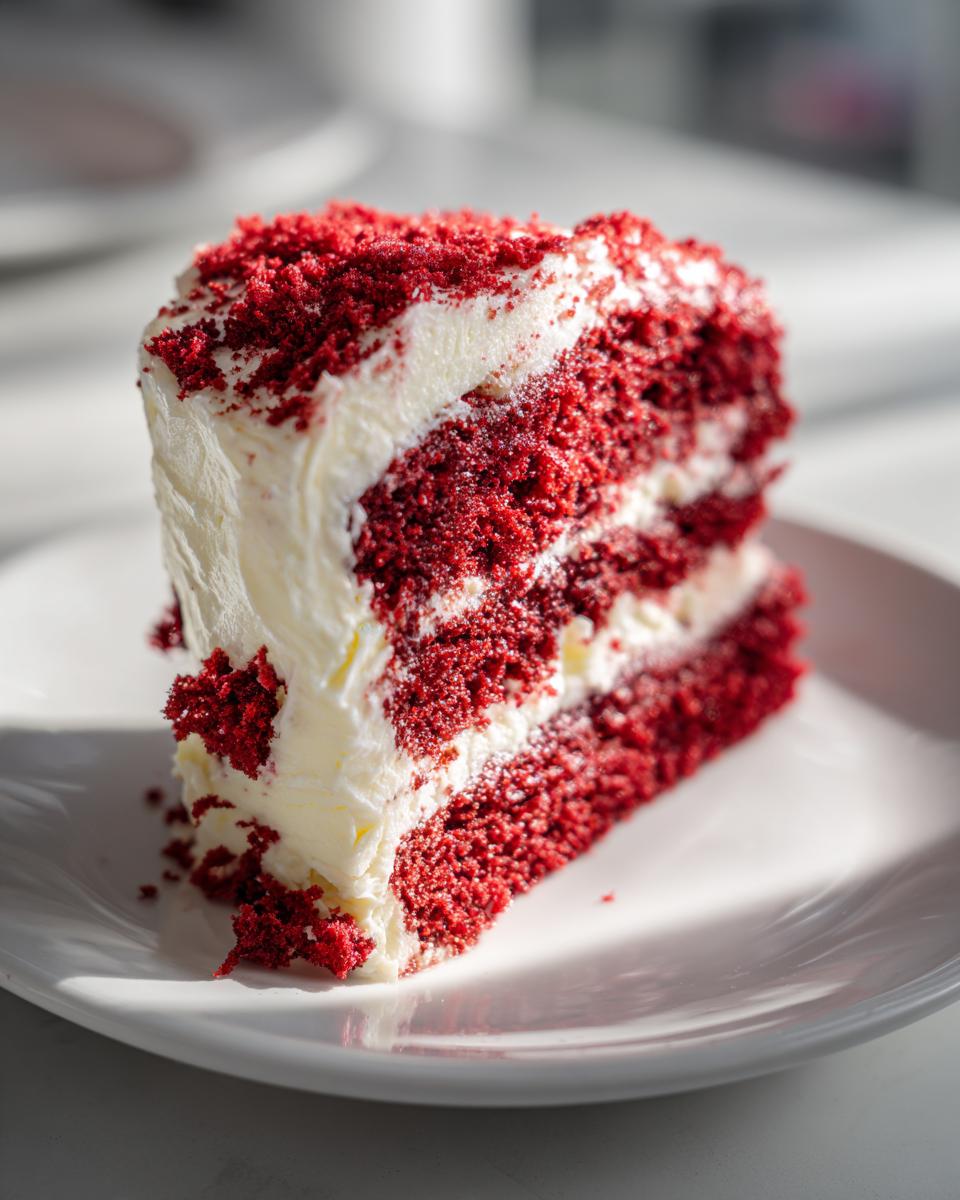
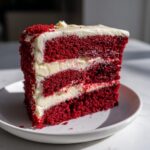
Are you tired of that sinking feeling when you cut into a red velvet cake only to find it dry, crumbly, or a shade of pink that just looks… wrong? Me too! That’s why I’m handing over the keys to what I truly believe is The Best, Ultra-Moist Southern Red Velvet Cake with Classic Cream Cheese Frosting. This isn’t just a cake; it’s a piece of heritage from the South, and trust me, it’s foolproof. We are focusing on that signature velvety texture and deep crimson color you see in the best bakeries.
Getting the *right* red velvet cake from scratch takes knowing a few little secrets that my family always passed down. This reliable recipe nails the balance of barely-there cocoa flavor against the tang of buttermilk, resulting in a cake so soft it practically melts. Stop settling for mediocre! Get ready to bake a showstopper for your next celebration.

- Why This Is The Best Moist Red Velvet Cake Recipe (Southern Tradition Meets Technique)
- Ingredients for Your Ultra-Moist Southern Red Velvet Cake
- Step-by-Step Instructions for the Classic Red Velvet Cake
- Red Velvet Tips and Tricks for a Foolproof Red Cake for Celebrations
- Making Your Red Velvet Cake Ahead of Time
- Serving Suggestions for Your Decadent Crimson Cake
- Frequently Asked Questions About the Classic Red Velvet Cake
- Nutritional Estimates for Your Red Velvet Cake Slice
- Share Your Thoughts on This Red Velvet Cake Recipe
Why This Is The Best Moist Red Velvet Cake Recipe (Southern Tradition Meets Technique)
You want a Moist Red Velvet Cake Recipe that isn’t fussy, right? That’s what we deliver here because we honor the true Southern Red Velvet Cake tradition while using smart technique. The magic, frankly, happens with the buttermilk and vinegar reacting with the baking soda. That little fizz provides most of the lift and keeps this cake incredibly tender—it’s not just about looking beautiful; it’s about structure! When you read more about our philosophy over on the About Page, you’ll see why we focus so hard on reliable results.
I remember back when I was first learning, my grandmother insisted that skipping the buttermilk was a crime punishable by dry cake. She’d say, “Emily, that tanginess is what cuts through the richness and makes the chocolate notes sing!” She was so right. When you couple that acid reaction with careful creaming of the butter and sugar, you get that signature, melt-in-your-mouth crumb.
We also respect that there’s only a tiny smash of unsweetened cocoa powder in here. It’s meant to enhance the vinegar tang and create subtle flavor, not compete with it like a standard chocolate cake.
Achieving That Deep Crimson Color in Your Red Velvet Cake
Now, let’s talk color. Nobody wants a pale, brownish cake when they ask for red velvet! To get that truly stunning, Decadent Crimson Cake look, you absolutely must use a high-quality, vibrant red food coloring. Forget the watery drops from the grocery store aisles; those just dilute your batter and taste fake.
We use a concentrated gel. When you mix that deep color into the batter, make sure it’s incorporated evenly during the mixing stage. A good, thorough mix at the beginning ensures you don’t have streaks later. But just like with the flour, stop mixing once it’s uniform! We want color, not toughness!
Ingredients for Your Ultra-Moist Southern Red Velvet Cake
Okay, gathering your supplies is where the fun really starts! For this Classic Red Velvet Cake, we break the list down into two essential parts: what goes into making that gorgeous cake base and what we use for the topping. Remember, quality really shines through here, so try to use real butter!
When you get things measured out, make sure that buttermilk is actually at room temperature—it helps everything blend so much smoother and leads to that perfect emulsion we’re aiming for.
For the Velvety Layer Cake
You will need 2 and a half cups of all-purpose flour, 1 teaspoon each of baking soda and salt, and just 1 tablespoon of unsweetened cocoa powder for that slight chocolate whisper. For the wet side, grab 1 cup of unsalted butter, softened, alongside 1 and a half cups of granulated sugar for creaming. We need 2 large eggs and a teaspoon of vanilla extract. Then, the crucial texture builders: 1 cup of room temperature buttermilk, 1 teaspoon of white vinegar, and yes, you need about a quarter cup of vibrant red food coloring to get that true Old Fashioned Cake Recipe look!
For the Classic Cream Cheese Frosting Recipe
This part is non-negotiable for a true Southern cake! You need 1 cup of softened cream cheese and half a cup of softened unsalted butter. Add in 1 teaspoon of vanilla extract and 4 cups of powdered sugar that you’ve already gone ahead and sifted—don’t skip the sifting if you want it smooth. A quarter teaspoon of salt will balance out the sweetness of this Cream Cheese Frosting Recipe.
Step-by-Step Instructions for the Classic Red Velvet Cake
Putting together this Classic Red Velvet Cake is straightforward, I promise! You don’t need to be a baking wizard to get this Easy Red Velvet Cake Recipe right. The key is just following the order and trusting the process. Don’t worry if you don’t have a fancy stand mixer; a good hand mixer or even elbow grease works fine for most of this, especially the creaming!
First things first: get your kitchen ready. Preheat that oven to 350°F (175°C). Then grab your two 9-inch round cake pans. I grease mine really well and then dust them with a little flour—that extra insurance never hurt anyone when you’re dealing with cakes this delicate!
Next, we need to organize our dry and wet bits. Whisk together the flour mixture (flour, baking soda, salt, cocoa) in one bowl. In another, mix up your buttermilk, vinegar, and all that vibrant red food coloring until it’s one lovely shade of crimson.
Preparing the Soft and Fluffy Cake Batter
This is the step where we build that beautiful structure. In your biggest bowl, cream together that 1 cup of softened butter and the granulated sugar. You have to beat this until it’s genuinely light and fluffy—we’re incorporating air, which is vital for that Soft and Fluffy Cake texture! Once it looks pale, add the eggs one by one, mixing after each one, then stir in your vanilla.
Now, pay close attention! We alternate adding the dry flour mix and the colored buttermilk mixture into our creamed butter base. Always start and end with the dry ingredients. This keeps the batter from splitting. But here’s the big rule: mix only until the streaks of flour disappear. Seriously, stop right there! Overmixing develops gluten, and that’s how you go from velvety to rubbery in a split second. We want soft, not stubbornly chewy!
Baking and Cooling the Red Velvet Cake Layers
Divide that gorgeous batter evenly between your prepared pans. Pop them into the preheated oven for about 30 to 35 minutes. You’ll test them with a wooden pick—if it slides in and comes out clean, you’re golden. If it has wet batter, give it five extra minutes.
Once they look done, don’t rush them out! Let those gorgeous layers cool right there in the pans for about 10 minutes. This lets them firm up slightly so they don’t fall apart when you flip them. After that short rest, invert them carefully onto a wire rack to cool completely. And I mean *completely*—frosting warm layers is just asking for a delicious disaster!
Making the Superior Homemade Cream Cheese Frosting
While those layers are chilling out, let’s make the topping. This Cream Cheese Frosting Recipe needs the fats—the 1 cup cream cheese and half-cup butter—to be super smooth first. Beat those together until there are absolutely no lumps. Then, add the vanilla.
Slowly, little by little, beat in the sifted powdered sugar. Don’t just dump it all in, or you’ll have a sugar cloud in your kitchen! Once it looks mostly combined, crank the mixer up high and beat it for a full 2 minutes. That final high-speed whipping incorporates air and makes this frosting just so light and heavenly. Don’t forget that tiny pinch of salt to balance the whole thing!
When the cakes are totally cool—and I mean cold to the touch—you can frost and stack them. Then you have made your own towering Homemade Red Velvet Cake that tastes just like it came from the best Southern bakery! You can find more tips for making sure your layers stay perfect, like those over here over at Taste to Rate.
Red Velvet Tips and Tricks for a Foolproof Red Cake for Celebrations
Listen, even with the best recipe, sometimes things go sideways. But these aren’t just random tricks; these are the tried-and-true pieces of wisdom that turn a good cake into a truly Old Fashioned Cake Recipe masterpiece. If you want a reliable Red Cake for Celebrations every single time, pay attention to these little details.
First up, those ingredients need to cooperate! I cannot stress this enough: your buttermilk must be room temperature. If it’s cold, it won’t react correctly with the vinegar and baking soda when it hits the batter, and you lose that tender, tangy crumb. My notes on this say to just set it out an hour before you start. If you’re in a rush, you can quickly make my emergency buttermilk substitute, but honestly, waiting is worth it.
Speaking of color, remember what I said about using the concentrated gel dye? That’s vital if you’re aiming for that rich, deep hue! Too little color, and you’re making a pale pink cake. We are aiming for that beautiful, decadent look, so splurge on the good stuff.
Finally, when you are mixing, remember the cocoa powder is there for depth, not dominance. If you add too much, it fights the acid and you end up with more of a spice cake vibe, not a true red velvet. Keep the cocoa small, trust the vinegar, and you’ll have the Best Red Velvet Cake for any party! You can check out some similar tips for getting that perfect texture over at Recipe & Flavor for extra inspiration.
Making Your Red Velvet Cake Ahead of Time
I know how hectic party prep can get, so being able to bake ahead is a huge win for planning your Party Cake Ideas! If you need to split up the work, you can absolutely bake these layers a day early. Once they are completely cool—and I mean cool all the way through—wrap each velvety layer cake tightly in plastic wrap. Keep them on the counter at room temperature for a day, or pop them in the fridge for up to three days to stay fresh.
If the whole gorgeous cake is assembled with that Cream Cheese Frosting Recipe, you’ll want to keep it refrigerated. The cream cheese frosting doesn’t do as well sitting on the counter overnight. Just remember to pull the whole thing out about an hour before serving so it can warm up just slightly. It tastes so much better when it isn’t cold stiff!
Serving Suggestions for Your Decadent Crimson Cake
Once you have this Decadent Crimson Cake frosted, the beautiful part is that it really doesn’t need much else! It’s so rich and perfectly balanced that simplicity is best. I always serve it slightly cool, maybe alongside a hot cup of strong black coffee; the bitterness is the perfect match for that tangy cream cheese frosting.
If you want a little garnish, just take any bits of trim you cut off the layers before frosting and crumble them right over the top. It looks professional and ensures everyone gets a little bit of that moist cake in every bite! For a truly elegant presentation, check out how the folks at Nashville To Do style their Southern classics.
Frequently Asked Questions About the Classic Red Velvet Cake
Oh, the questions! I get asked about this Classic Red Velvet Cake all the time, usually because people have had a dry one before and are nervous. Don’t sweat it! We covered the main points in the steps, but here are the quick answers to the things I hear most often about achieving that perfect, soft texture.
What makes this red velvet cake so moist?
The main moisture power comes from two places, really! First, it’s the chemical reaction between the buttermilk and the vinegar. That slight acid helps keep the crumb super tender—it’s the backbone of any good Southern Red Velvet Cake. Second, and this is crucial, you have to promise me you won’t overmix after the flour goes in! Overmixing develops gluten, which tightens up the batter and makes the cake tough and dry. Mix until just combined, and you’ll have the best texture.
Can I skip the food coloring in this Southern Red Velvet Cake?
Technically, yes, you *can* skip the coloring, but then it stops being what most people recognize as red velvet! Back in the day, when people used non-Dutched cocoa powder, it reacted naturally with the acidic ingredients to give a reddish-brown hue. But honestly, that was way back when. If you want that beautiful, vibrant look that screams ‘celebration cake,’ you need that concentrated gel coloring. It’s what gives you that true, unforgettable color without watering down the flavor profile.
What is the difference between this and a standard chocolate cake?
That’s such a good question! People wonder why we keep calling it ‘red velvet’ when there’s cocoa powder. The difference is the *amount* and the *acid*! A standard chocolate cake uses lots of cocoa powder for a deep, rich chocolate flavor. Here, we use just a small amount of unsweetened cocoa powder—it’s mostly there to react with the acid (buttermilk/vinegar) to give that slight, subtle tang that defines the flavor profile. It’s not a chocolate cake; it’s a tangy, velvety cake that just happens to have a hint of cocoa!
Nutritional Estimates for Your Red Velvet Cake Slice
Okay, so we’ve made the most beautiful, decadent cake imaginable, but I know some of you are curious about the numbers behind the slice! Since this is a homemade recipe using real butter and a generous blanket of that Cream Cheese Frosting Recipe, it definitely leans into indulgence, which is okay because this is a celebration cake!
Please remember that these values are just estimates based on the standard measurements in the recipe above. Depending on exactly how thick you spread that frosting or the brand of flour you use, things can shift a little. But this gives you a good ballpark idea for enjoying your slice of Homemade Red Velvet Cake!
- Serving Size: 1 slice
- Calories: Roughly 450
- Sugar: About 55g (Yes, it’s sugary—it’s cake!)
- Fat: Around 24g (Most of this comes from that wonderful butter in the cake and frosting swirl!)
- Protein: 5g
- Carbohydrates: 60g
- Sodium: Approximately 300mg
Treating yourself to this unbelievably Moist Red Velvet Cake Recipe is worth every single bite. Enjoy it, knowing you made something truly spectacular from scratch!
Share Your Thoughts on This Red Velvet Cake Recipe
Whew! I am so proud of you for tackling this truly authentic, Classic Red Velvet Cake. It’s a labor of love, but I hope now, standing back and looking at that gorgeous, deep red, velvety creation, you feel like a total baking rockstar!
Now that you’ve mastered this recipe, I really want to hear from you! Did it turn out wonderfully soft? Did your kitchen smell like heaven while it baked? Please take a minute and rate this recipe right here on the site—go ahead, give it five stars if you loved it!
Even more importantly, drop a comment below. I love seeing how you tweak things—did you try a specialty vanilla, or maybe a slightly thicker layer of the Cream Cheese Frosting Recipe? If you had any questions during the process, please ask me! I monitor the comments, and I’m always here to help you troubleshoot or celebrate a win. Seeing your beautiful bakes truly makes my day.
If you need to get in touch with me directly about advanced baking questions, feel free to reach out through the Contact Page. Happy baking, and please come back soon!
PrintThe Best Ultra-Moist Southern Red Velvet Cake with Classic Cream Cheese Frosting
Follow this reliable, easy-to-follow recipe to create a classic Southern Red Velvet Cake. You get a deeply colored, soft, and velvety crumb paired with a superior homemade cream cheese frosting for your next celebration.
- Prep Time: 25 min
- Cook Time: 35 min
- Total Time: 60 min
- Yield: 12 servings 1x
- Category: Dessert
- Method: Baking
- Cuisine: American
- Diet: Vegetarian
Ingredients
- 2 1/2 cups all-purpose flour
- 1 teaspoon baking soda
- 1 teaspoon salt
- 1 tablespoon unsweetened cocoa powder
- 1 cup unsalted butter, softened
- 1 1/2 cups granulated sugar
- 2 large eggs
- 1 teaspoon vanilla extract
- 1 cup buttermilk, room temperature
- 1 teaspoon white vinegar
- 1/4 cup red food coloring (high-CPC phrase: vibrant red food coloring)
- 1 cup cream cheese, softened
- 1/2 cup unsalted butter, softened
- 1 teaspoon vanilla extract
- 4 cups powdered sugar, sifted
- 1/4 teaspoon salt
Instructions
- Preheat your oven to 350°F (175°C). Grease and flour two 9-inch round cake pans.
- In a medium bowl, whisk together the flour, baking soda, salt, and cocoa powder. Set this dry mixture aside.
- In a large bowl, cream together the 1 cup of butter and 1 1/2 cups of sugar until the mixture is light and fluffy. Beat in the eggs one at a time, mixing well after each addition. Stir in the vanilla extract.
- In a small bowl, mix the buttermilk, vinegar, and red food coloring until the color is uniform.
- Alternate adding the dry ingredients and the buttermilk mixture to the butter mixture, beginning and ending with the dry ingredients. Mix only until just combined; do not overmix.
- Divide the batter evenly between the prepared cake pans.
- Bake for 30 to 35 minutes, or until a wooden pick inserted into the center comes out clean.
- Let the cakes cool in the pans for 10 minutes before inverting them onto a wire rack to cool completely.
- Prepare the frosting: In a large bowl, beat the 1 cup of cream cheese and 1/2 cup of butter until smooth. Add the vanilla extract.
- Gradually beat in the sifted powdered sugar until the frosting is smooth and creamy. Add the salt. Beat on high speed for 2 minutes until light.
- Once the cakes are completely cool, frost and stack the layers.
Notes
- For the deepest crimson color, use a high-quality, concentrated gel food coloring instead of liquid drops.
- Buttermilk is essential for the cake’s tender crumb and tang; do not substitute it.
- To make buttermilk, add 1 tablespoon of white vinegar or lemon juice to 1 cup of whole milk and let it sit for 5 minutes before using.
- For a classic Southern texture, do not overmix the batter after adding the flour.
Nutrition
- Serving Size: 1 slice
- Calories: 450
- Sugar: 55g
- Sodium: 300mg
- Fat: 24g
- Saturated Fat: 14g
- Unsaturated Fat: 10g
- Trans Fat: 0.5g
- Carbohydrates: 60g
- Fiber: 1g
- Protein: 5g
- Cholesterol: 80mg